You are using an out of date browser. It may not display this or other websites correctly.
You should upgrade or use an alternative browser.
You should upgrade or use an alternative browser.
3D Fibertech Hyperlite Slick 540 Build Thread
- Thread starter Bipenut
- Start date
Bipenut
70cc twin V2
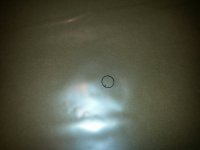
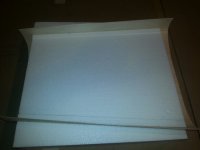
Okay I decided to go a head and vacuum bag the front hatch this weekend since I got my vacuum bagging kit. I put the nipple into the vacuum bag and I did this by tracing the I.D. of the white washer with a fine tip marker and then I put a piece of card board in between the bag and cut out the hole with my exacto knife. I installed the nipple from inside the bag and put the white washer with the face grooves down and tightened the nut. I put the nipple about 10" from both ends and now the bag is ready to go.
Attachments


Bipenut
70cc twin V2
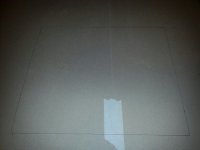
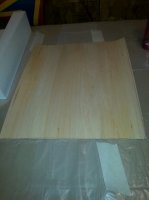
I laid out the size of the front hatch on some cardboard so I had a rough idea how big to make the sheeting. Then I edge cut my balsa sheeting and taped it together with some clean release masking tape. Then I went a head a at sprayed some water and ammonia mixed on the outside of the sheeting and let it set for about 5 minutes (this will help keep the balsa from cracking on the tight radius on the hatch) then I put the balsa over the front hatch and put them back in the shucks. I put a little bit of weight on the top of the shuck and let the balsa dry for about an hour in the shuck. I took a fine tip marker and marked around the balsa so I could trim it so I didn't have a lot sticking up when I put it in the bag.
Attachments

Bipenut
70cc twin V2
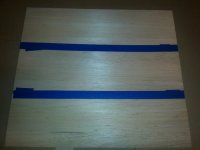
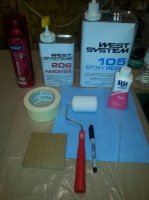
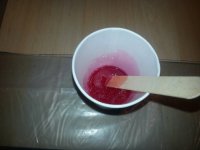
I sprayed the balsa with cheap hair spray and let it dry. I mixed up the resin and added the dye, I couldn't find any red so I bought fuschia which is a pink color. I didn't put a lot in the epoxy and it didn't didn't show up in the picture but you could see it on the balsa when I was rolling it on. The West System is very easy to use with the pumps. I ended up putting in two pumps of resin and two pumps of hardener and by the time the roller soaked some up it was just enough for the front hatch. After it had it applied to the balsa sheeting I put it in the shuck and lined up the hatch and other shuck and taped it on place with masking tape. Then I trimmed the corners of the balsa like Terry showed in his video.
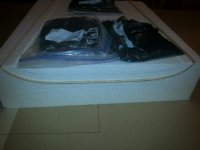
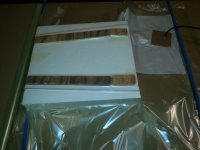
Now that everything is in the shucks I put the hatch in the bag. I have a piece of breather cloth that goes from under the foam to the nipple, and I installed a small piece of cardboard right under the nipple. I also installed some small pieces of 1/2" plywood on top of the shucks at the ends to even out the sides of the hatch. I went a head and timed how long it took to evacuate the air out of the bag and it took about 3-1/2 minutes. The size of the bag I used was 36" X 34" and the e EZ-pump is so quite that you can barely hear it run so if you are worried about the noise don't', it is very quiet. I think my cell phone on vibrate makes more noise than this pump.
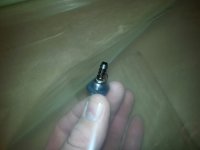
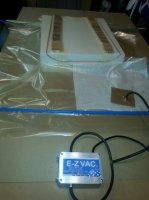
If you are on the fence about trying the vacuum bagging, just go for it. It isn't that hard to do. I have never done this before today and I didn't have and problems at all. Just watch the videos that Terry made and you won't have any troubles at all. I bought the EZ-pump kit, two 36" bags, extra nipple, and extra tubing clamps. This cost me $210.00 shipped to my house and you can see everything I bought in the picture. This is fairly inexpensive to get into vacuum bagging and you can always upgrade to a larger pump at a later time if you think you need too.
Now that everything is in the shucks I put the hatch in the bag. I have a piece of breather cloth that goes from under the foam to the nipple, and I installed a small piece of cardboard right under the nipple. I also installed some small pieces of 1/2" plywood on top of the shucks at the ends to even out the sides of the hatch. I went a head and timed how long it took to evacuate the air out of the bag and it took about 3-1/2 minutes. The size of the bag I used was 36" X 34" and the e EZ-pump is so quite that you can barely hear it run so if you are worried about the noise don't', it is very quiet. I think my cell phone on vibrate makes more noise than this pump.
If you are on the fence about trying the vacuum bagging, just go for it. It isn't that hard to do. I have never done this before today and I didn't have and problems at all. Just watch the videos that Terry made and you won't have any troubles at all. I bought the EZ-pump kit, two 36" bags, extra nipple, and extra tubing clamps. This cost me $210.00 shipped to my house and you can see everything I bought in the picture. This is fairly inexpensive to get into vacuum bagging and you can always upgrade to a larger pump at a later time if you think you need too.
Attachments


Terryscustom
640cc Uber Pimp
NICE!! You can always go a little strong on the dye if you like. It is a nice aide while sanding the sheeting to tell when you are getting a little too deep. Looking great!!
Bipenut
70cc twin V2
NICE!! You can always go a little strong on the dye if you like. It is a nice aide while sanding the sheeting to tell when you are getting a little too deep. Looking great!!
Thanks, I was kinda wondering if I should have added more dye. Thanks for doing the videos on the vacuum bagging, other wise I probably would have never bought one. After doing it, I will never go back to concrete blocks and I can't believe how easy it was.
")
Bipenut
70cc twin V2
Can you post a link to The ez vac system you bought.
Tried to Google it. Got everything from lawn mowers to pool cleaners. Nothing like this
Thanks
I seen in your last post that you found it, but here is a list of what I bought along with their part numbers. All of this cost me $210.00 shipped to my house, but I got free shipping because they were running a special for free shipping when I placed my order. I just seen on their website that they have 15% off on December 20th.
V-01 EZ-Vac Vacuum pump kit (1 EACH)
V-12B1 36" X 3 Yards bag (2 EACH)
V-12D 40" Quick Lock Seal (2 EACH)
V-13A EZ --Vac Connector (1 EACH)
V-08A Tubing Clamps (3 EACH)