You are using an out of date browser. It may not display this or other websites correctly.
You should upgrade or use an alternative browser.
You should upgrade or use an alternative browser.
Redwing RC 76" MXS-R
- Thread starter gyro
- Start date
Drew
70cc twin V2
I had my Syssa 30cc updated to a V2. Aluminum exhaust is now stainless steel and updated carb. Yesterday I ran it up with a vess 18X5 and the tac showed 8100 RPM.....whoooooa. I lost my soft copy of the manual and I want to double check the CG. What does the manual call out for a starting point for the CG?
Manual shows CG to be 100mm back from leading edge.
Last edited by a moderator:
gyro
GSN Contributor
Grapple12
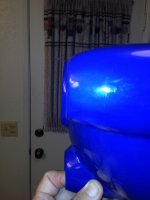
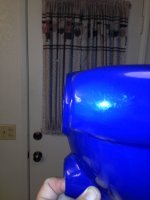
I think that's the way the cowl should be made. Here's some pic's of my cowl and the center ring is like yours. Enlarge the pic and you can see it.
Thanks Scooterpilot for posting the comparison photos.
") We got it figured out.
We got it figured out.Drew
70cc twin V2
Grapple12
I think that's the way the cowl should be made. Here's some pic's of my cowl and the center ring is like yours. Enlarge the pic and you can see it.
Hey Gapple - sorry about the cowl not lining up. They usually are pretty spot on, but maybe the ring was glued on late on friday afternoon
You could cut out the ring and re mount at a better angle. Send me an email and I'll help you out on this
Thanks, but I got it fixed last night. Simply added a washer to space the cowl out some more. Came out much better. Still slightly off, but not to noticeable.

Added washers with CA to gap the engine cowl.

Still has a good lip for the hatch to slide under

3dNater
3DRCF Regional Ambassador
Nice work on that fix. On a really positive note in my mind, I love how the cowl attaches with blind nuts. Some our favorite manufacturers simply let you screw through the fiberglass into the side of the fuse without any additional support. This results in the screw holes gradually enlarging over time with vibration. The element of risk of a misaligned cowl becomes the burden of the modeler so the manufacturer will never be blamed for it not working out. With this redwing design you get a much higher quality attachment to the fuse but the manufacturer has taken a little risk of it not working out perfectly every time. Grapple's solution shows an easy adjustment the modeler can still do and overall you end up with a higher quality attachment of the cowl in my opinion.
Drew
70cc twin V2
Finished out the aileron servos and links.


Set up throttle and throttle servo. Ran fuel line.


Installed fuel dot.


And set up 4titude gas tank.


Next I will set up the smoke system. Ive done a few in the past, but never seen a smoke tank without a fill line. Ive always treated the smoke tank the same as the gas tank, line, vent, and fill. This 4titude smoke tank came without a fill, but did come with a "T" fitting for fill. Not sure if that will work or if the pump will just let the smoke fluid flow right out and not fill the tank. Anyone used one of these 4titude smoke tanks yet ?
Set up throttle and throttle servo. Ran fuel line.
Installed fuel dot.
And set up 4titude gas tank.
Next I will set up the smoke system. Ive done a few in the past, but never seen a smoke tank without a fill line. Ive always treated the smoke tank the same as the gas tank, line, vent, and fill. This 4titude smoke tank came without a fill, but did come with a "T" fitting for fill. Not sure if that will work or if the pump will just let the smoke fluid flow right out and not fill the tank. Anyone used one of these 4titude smoke tanks yet ?
Drew
70cc twin V2
Nice work on that fix. On a really positive note in my mind, I love how the cowl attaches with blind nuts. Some our favorite manufacturers simply let you screw through the fiberglass into the side of the fuse without any additional support. This results in the screw holes gradually enlarging over time with vibration. The element of risk of a misaligned cowl becomes the burden of the modeler so the manufacturer will never be blamed for it not working out. With this redwing design you get a much higher quality attachment to the fuse but the manufacturer has taken a little risk of it not working out perfectly every time. Grapple's solution shows an easy adjustment the modeler can still do and overall you end up with a higher quality attachment of the cowl in my opinion.
I agree, its nice to have this type of cowl attachment. My only complaint is the lower cowl mount holes are not pre-drilled for the screws to go into the blind nuts. I will have to measure those and drill them perfect, but wont be hard to do, just would be nice.
Scooterpilot
50cc
Gapple12,
Thanks for providing the CG info.
Regards
PS Fix on cowl looks excellent.
Thanks for providing the CG info.
Regards
PS Fix on cowl looks excellent.
Drew
70cc twin V2
Gapple12,
Thanks for providing the CG info.
Regards
PS Fix on cowl looks excellent.
No problem....