You are using an out of date browser. It may not display this or other websites correctly.
You should upgrade or use an alternative browser.
You should upgrade or use an alternative browser.
Scale Balsa USA 1/3 Scale Super Cub Kit " NIB "
- Thread starter fencelake
- Start date

fencelake
70cc twin V2
ericb,
Wow! that's a beautiful J-3! Nice work! You have some great tips in those photos! I like the hatch on the bottom in front. I'm putting in a luggage compartment (based on full scale plane) for charging and power switches, but I will always want to get to everything without forceps. I really like how you positioned the elevator servos. It's interesting that this is a 1/3 scale airplane and it's calling for 1 servo for the elevator and 1 for the rudder, but I'm not sure how I feel about that. I didn't want to just mount them on the side, and the way you have it is really nice. The choke is a great touch too! Really nice airplane! Thanks for sharing all those photos and ideas!
stangflyer
I like 'em "BIG"!
Being sidetracked with my own projects, I kind of forgot about this thread. Love what you are doing with this build. I can't wait to see it finished and flying.
fencelake
70cc twin V2
Well, my 30 minute commute to work was a 3 HOUR commute home after being at the office for about 2 hours. It's snowing here in Ft. Worth! Once I got home I cracked a beer and worked on the cub!
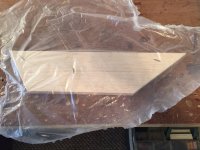
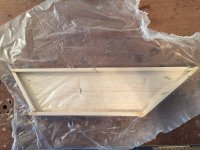
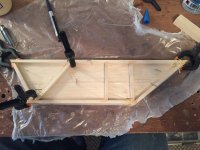
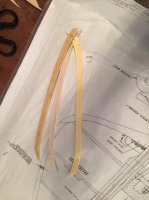
The Super Cub I'm modeling after has a glass bottom door as well as the top, so to create this I pinned down the original solid door and used 1/4" x 3/8" spruce to build it. I'll add plexi-glass later.
The Super Cub I'm modeling after has a glass bottom door as well as the top, so to create this I pinned down the original solid door and used 1/4" x 3/8" spruce to build it. I'll add plexi-glass later.
Attachments


stangflyer
I like 'em "BIG"!
Dang, this is really gonna be sweet. I like....
fencelake
70cc twin V2
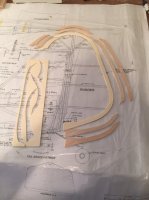
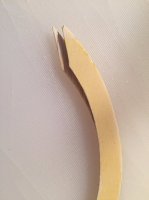
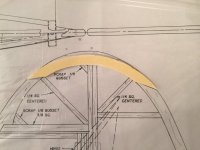
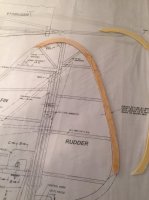
I've also started on the vertical stab, rudder, stab, and elevators. I began by popping out the laminated parts for the rudder. Everything popped out nice and clean from both the plywood and the balsa. I laid out all the parts on the plan to make sure I had everything before I began gluing them. I tip of a balsa piece for the back of the rudder was broken, but that's because it popped out and was in the box... so I'll fix it after I glue everything.
Attachments
fencelake
70cc twin V2
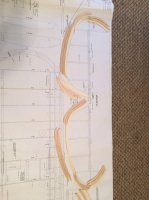
When I started laminating the parts for the rudder, the balsa pieces were shaped slightly differently than the plywood center piece. I first went ahead and glued them trying to force them to bend the same. After a few minutes I thought about it, and wondered if I was gluing the wrong parts together so I pulled everything apart and double checked them over the plan. Sure enough, the balsa pieces are shaped according to the plan, but the plywood center pieces were not.
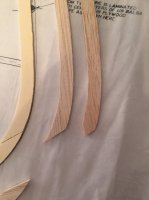
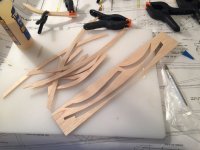
I decided to go ahead and pop out all the laminated parts for the stab and elevator and lay them out as well. All the pieces fell out really easily. I had to cut a few of the balsa pieces out just so that the tips wouldn't break off, but overall everything was of really nice quality.
I decided to go ahead and pop out all the laminated parts for the stab and elevator and lay them out as well. All the pieces fell out really easily. I had to cut a few of the balsa pieces out just so that the tips wouldn't break off, but overall everything was of really nice quality.
Attachments
-
 Rudder Top Parts Alignment.jpg42.7 KB · Views: 902
 -
 Rudder Back Pulled Apart.jpg45.9 KB · Views: 923
 -
 Rudder Top Ply Alignment.jpg68 KB · Views: 976
 -
 Rudder Balsa Parts Alignment.jpg45 KB · Views: 951
 -
 Stab Balsa Parts Pop Out.jpg79.2 KB · Views: 912
 -
 Elevator Layout.jpg53 KB · Views: 908
 -
 Stab Parts Layout.jpg50.7 KB · Views: 895