You are using an out of date browser. It may not display this or other websites correctly.
You should upgrade or use an alternative browser.
You should upgrade or use an alternative browser.
Scale Balsa USA 1/3 Scale Super Cub Kit " NIB "
- Thread starter fencelake
- Start date

HRRC Flyer
GSN Sponsor Tier 1
Looks like you're coming right along. Keep up the great work............
fencelake
70cc twin V2
Looks really great. It is satisfying when you start getting to this stage of the game.
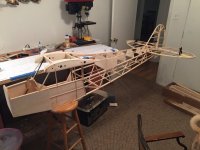
It's starting to look like a plane!
IMAC FANATIC
40% happier than most folks.
How'd I miss this one?
Subd'
Subd'
fencelake
70cc twin V2
Soooooo... It's all straight fuselages until you test fit the horizontal stabilizer... am I right?
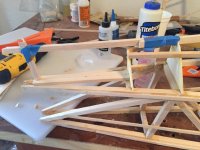
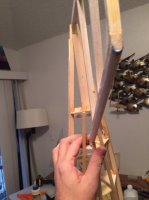
I thought everything was perfectly straight thus far with the build. Last night I started working on the blocking that needs to be installed prior to installing the horizontal stabilizer. I actually taped some balsa sticks to kind of simulate where the vertical stabilizer was going to wind up. Everything seemed okay, so I glued the blocking down thinking it was straight.
I thought everything was perfectly straight thus far with the build. Last night I started working on the blocking that needs to be installed prior to installing the horizontal stabilizer. I actually taped some balsa sticks to kind of simulate where the vertical stabilizer was going to wind up. Everything seemed okay, so I glued the blocking down thinking it was straight.
Attachments
fencelake
70cc twin V2
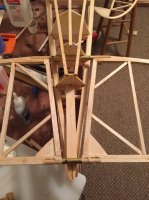
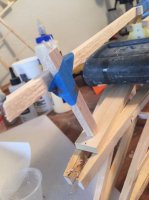
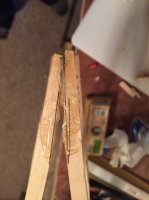
Once I had epoxied everything in place I did a test fit of my horizontal stabilizer and vertical stabilizer. The second to last former, and the tail feathers were square with the centerline of the fuselage, but the last former, as well as the tip of the tail were off to the starboard side by 1/4" to 3/8" of an inch. I probably could've left it alone, and just trimmed the plane later, but it would've irritated me forever.
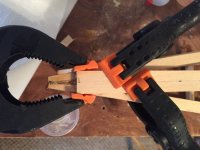
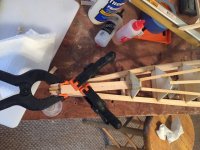
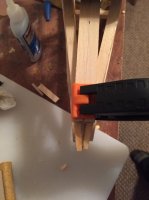
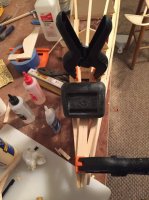
So, when I got home from work this afternoon I disassembled the tail, the blocking and the last small former and redid all of it. What ended up happening was I had to first glue the main stringers in place making one about 1/4" shorter than the other, that way when they dried it would stay bent to the centerline. I then re-glued the small former and block. NOW it's centered up and when I put the tail feathers on everything will be square.
So, when I got home from work this afternoon I disassembled the tail, the blocking and the last small former and redid all of it. What ended up happening was I had to first glue the main stringers in place making one about 1/4" shorter than the other, that way when they dried it would stay bent to the centerline. I then re-glued the small former and block. NOW it's centered up and when I put the tail feathers on everything will be square.
Attachments
-
 TAIL - hor stab comparing tail.jpg79.9 KB · Views: 931
 -
 TAIL - comparing vert stab.jpg40.4 KB · Views: 858
 -
 TAIL - tail deconstructed to realign.jpg38.1 KB · Views: 909
 -
 TAIL - regluing tail stringers.jpg36.4 KB · Views: 887
 -
 TAIL - alignment block TAKE 2.jpg37.8 KB · Views: 976
 -
 TAIL - regluing block TAKE 2.jpg63.1 KB · Views: 914