• If you are new to GiantScaleNews.com, please register, introduce yourself, and make yourself at home.

    We're 1st in Giant Scale RC because we've got the best membership on the internet! Take a look around and don't forget to register to get all of the benefits of GSN membership!

    Welcome!
  • Unless you are a paid advertiser NO more posting advertisement in the individual vendor forums. You may post in the Manufacturer's Announcements section only but only ONCE a month unless your a paid advertiser.

3dhs 92" Edge 540

Status
Not open for further replies.

gyro

GSN Contributor
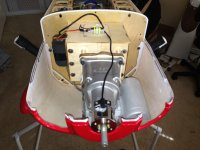
Getting some work today. Completed the cowl trimming (made room for spark plug cable) and installed the ignition. Engine is done!
ImageUploadedByTapatalk1380997731.376048.jpg

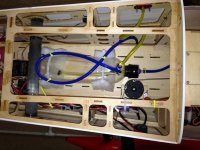
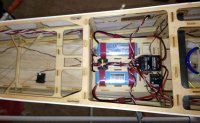
Also, got all the electronics installed, routed, and tidied up :)
ImageUploadedByTapatalk1380997780.125052.jpg
ImageUploadedByTapatalk1380997807.741776.jpg

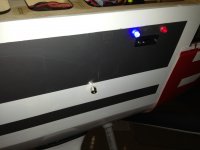
Then, I installed the soft switch and Tech Aero IBEC light. Since I'm using a Spektrum AR9110 Powersafe receiver, it doesn't have any on/off light. This led me to add a blue LED so I can easily see if its powered on.
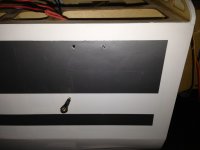
Last, I swapped out the ball link pull handle on the choke and put in a clean wheel collar that sits almost flush with the fuse when the choke is open for flight :D
ImageUploadedByTapatalk1380998059.208991.jpg
ImageUploadedByTapatalk1380997910.674971.jpg
 

gyro

GSN Contributor
Well, I can say that some of that simplicity when cutting the lower cowl, that simplicity comes as a small cost. Getting the two piece cowl lined up and installed takes a little time and patience!
But when it's done, it looks awesome and is very rewarding to look at!
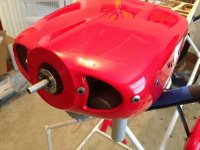
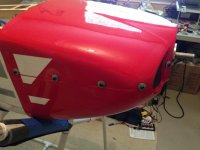
Got some bonded neoprene washers from trimcraftaviationrc installed, as I was told
Loctite eats the paint.
ImageUploadedByTapatalk1381009086.849994.jpg
ImageUploadedByTapatalk1381009100.631074.jpg

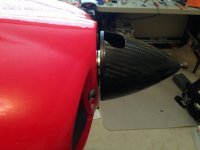
I put a spinner on for reference (actual spinner will be bigger)
ImageUploadedByTapatalk1381009133.981358.jpg
 

gyro

GSN Contributor
We installed the brand new brushless HSB-9370TH servos from Hitec. They're about 350oz/in and 10ms on 7.4v. What makes them awesome is the very low current draw of the brushless motor. Also, they're very quiet when not moving a surface, and sound like a light sabre when they do move, they're really cool!


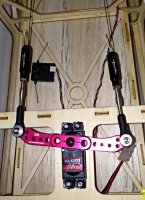
Servo install went well until the elevators. The servos are deeply recessed into the stab, and we erroneously tried to install the servo with the arm attached. This didn't work, as the arm deflection exceeded the opening slot, so we had to remove the servo, install it without the arm, and the attach the arm through the slot. It worked fine once we did this. We used the nice servo screws from trimcraftaviationrc, which made things a breeze.
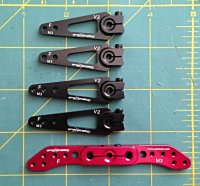
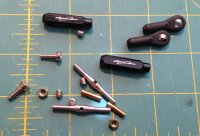
Of course, we couldn't install brand new servos without some brand new bling from Aztec Aeromodels:
ImageUploadedByTapatalk1381079820.630556.jpg

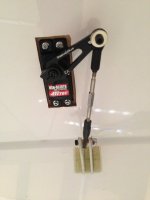
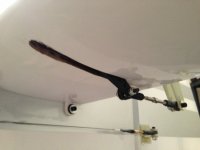
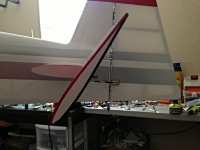
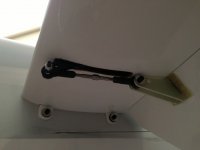
We used their v2 black SpotOn RC horns; 1.75" for the elevators, and 1.5" for the ailerons. The 1.75" are perfect for the elevators, providing full deflection to the limits of the preinstalled hinge.
ImageUploadedByTapatalk1381079603.580712.jpg
ImageUploadedByTapatalk1381079670.913781.jpg
ImageUploadedByTapatalk1381079686.964409.jpg
ImageUploadedByTapatalk1381079706.130565.jpg
ImageUploadedByTapatalk1381079722.331212.jpg

The rudder got a red 3.5" offset arm.
We also used Aztech's Seacraft pull-pull tensioner. They really make setting up the pull-pull system a breeze.
ImageUploadedByTapatalk1381080051.497641.jpg
ImageUploadedByTapatalk1381079588.197571.jpg

All the controls are done and looking great!!
 

gyro

GSN Contributor
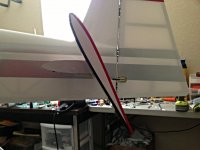
With all the hardware done, controls setup, and engine finished, only one thing left to do: decide on wingtips vs SFGs vs both.

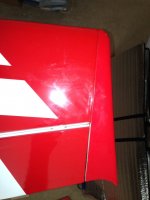
We chose the clean look of just the wingtips. One of the tips needed a tiny bit of sanding to sit flush, but once completed it looks great!
ImageUploadedByTapatalk1381080254.663940.jpg


Now the plane is done, and ready for maiden!
This was such an easy build, it really made for a fast and fun time.

The high notes were the quality of the kit, the nice included hardware and spares, easy hinging (only rudder pin needing installation), the two piece cowl made cutting our the openings for the engine a breeze, and the simple yet sexy covering scheme, that arrived looking perfect. We also like the string positioned for routing servo wires, a real time saver!

The only low point was the time required to get the cowl lined up perfectly and installed, but most would agree this is a worthwhile "cost" for the benefit of a two piece cowl. While not required, we'd like to see 3DHS begin to include the bonded neoprene washers that are best for the cowl installation, as well as a canopy cover for use at the field. The larger lexan canopies can be prone to melting in the sun, and the covers help them stay cool and retain their shape. Finally, some spare covering for patch repairs would be nice, but again, not a requirement.

Stay tuned for some nice outdoor pics and some custom vinyl to be installed!
 
Status
Not open for further replies.
Top