You are using an out of date browser. It may not display this or other websites correctly.
You should upgrade or use an alternative browser.
You should upgrade or use an alternative browser.
IMAC Double Build, Carden Pro 124" Extra 300 40%
- Thread starter orthobird
- Start date
-
- Tags
- 40% airplane build thread imac
scruffmeister
50cc
@orthobird if you go down the ZDZ route, what's your plan for mounting the engine with right-thrust? My understanding is that the PRO has no right-thrust build into firewall. I've seen people use the SWB 3deg mount with DA engines, but they don't do one to suit other makes. I'd also like to go MVVS or ZDZ so was thinking along lines of a wedge made out of hi-grade ply. I'd love to hear your opinion or that of others!
I had not thought of that at all. I have almost always used a DA motor, and on all 40%, i have never used anything else. SO I will have to make something. My friend has a CNC machine, and I have a huge rectangular piece of aluminum. I do not even know If I will get a ZDZ. I may end up with a 200.
Got around early this morning to glue on the tail tube support.
The placement of the wing tube support, I believe, once done, you have bought it. Same goes for the tail stab tube support, in that, there are two holes, and inner hole from this ply support, and the outer hole, from the balsa cut out. SO it is important to try to be as accurate as possible. I will still recheck both of them, once the fuselage sides are glued on to the motor-box.
Here is the step by step on how I did this.
trial fitting the plywood onto the truss.

then I made sure that the fuselage sides and the motorbox were square on the plans. I then weighed them down.

I then outlined where the glue needs to be placed:

I then applied the Hysol and loosely clamped in place...


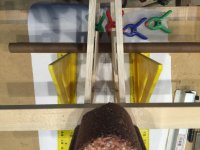
then I inserted the stab tube phenolic, with the carbon tube inside as well. then I used these two 72" long rulers, and placed them on a same point, based on the front of the fuselage and plans/.

I then used these right angles, to make sure they were equidistant.

likewise, I made sure that the distance from the stab tube to the table was the same on both sides....

then I placed as many clamps as I could get my hands on.


I will go and check them, if all is good, I will proceed to glue on the skins. (after i make them).
The placement of the wing tube support, I believe, once done, you have bought it. Same goes for the tail stab tube support, in that, there are two holes, and inner hole from this ply support, and the outer hole, from the balsa cut out. SO it is important to try to be as accurate as possible. I will still recheck both of them, once the fuselage sides are glued on to the motor-box.
Here is the step by step on how I did this.
trial fitting the plywood onto the truss.
then I made sure that the fuselage sides and the motorbox were square on the plans. I then weighed them down.
I then outlined where the glue needs to be placed:
I then applied the Hysol and loosely clamped in place...
then I inserted the stab tube phenolic, with the carbon tube inside as well. then I used these two 72" long rulers, and placed them on a same point, based on the front of the fuselage and plans/.
I then used these right angles, to make sure they were equidistant.
likewise, I made sure that the distance from the stab tube to the table was the same on both sides....
then I placed as many clamps as I could get my hands on.
I will go and check them, if all is good, I will proceed to glue on the skins. (after i make them).
Attachments
Outstanding Cam, Well I could not get the wife to say ok to another kit so I desided to start a recovering job on a OMP Sbach. I will start thread after I get some work done on it.
Keep to going Cam, loving it.
Primo, my wife still does not know I have these kits here. I am going to be in big trouble when she finds out!
I made the skin for one of the truss sides. Here is the technique.
On some kits, for sheeting the fuselage sides, or anything else, whenever you are joining balsa sheets end to end, what I have done, based on what others have stated, is to glue them at a Miter cut (45 degree angle).
For this kit, we are using 48" long balsa sheets, that are 1/8" thick and 3 and 3/4" wide.
this is plenty, it will require 4 sheets per side. the kit comes with 11 of these 1/8" thick balsa sheets.
Ok, now, due to the nature of having the vertical truss on the horizontal longerons, we can take advantage of this, and bring two 48" long balsa sheets end to end glued with a butt end together, meaning, not an angle, but!!! you must make it such that the joint will be in the middle of the 3/8" wide balsa vertical sticks.
I will demonstrate:
For one truss side, there are 4 of these sheets, as you can see, 1. they will be joined butt to butt end, and staggered. You do not want both to be on same vertical balsa stick, but staggered like this, will be even stronger. Let me demonstrate further....

This is, of course, before gluing this all together, I am making my plan. This butt to butt end, will be directly over this vertical balsa stick, but the other one, will be on a different one...

Once I marked out where this would be, I used a straight edge to make sure it was true, and made adjustments by sanding it, as needed.
then I glued the whole thing together, and now, you can see, where I have marked the two joints, the top one is to the right of the picture, and the bottom one is towards the left. I marked directly over the tape, with a fine tip sharpie.

ok, now here is the truss, over the balsa sheeting, however, it is not where it should be, this is only for demonstrating, I will not glue the truss to the sheeting here, but about 3/4" shifted to the right.

Here is where it will get glued on. Once this step comes, I will demonstrate this again.


I will wait for that to cure, and then I have to make 3 more.
On some kits, for sheeting the fuselage sides, or anything else, whenever you are joining balsa sheets end to end, what I have done, based on what others have stated, is to glue them at a Miter cut (45 degree angle).
For this kit, we are using 48" long balsa sheets, that are 1/8" thick and 3 and 3/4" wide.
this is plenty, it will require 4 sheets per side. the kit comes with 11 of these 1/8" thick balsa sheets.
Ok, now, due to the nature of having the vertical truss on the horizontal longerons, we can take advantage of this, and bring two 48" long balsa sheets end to end glued with a butt end together, meaning, not an angle, but!!! you must make it such that the joint will be in the middle of the 3/8" wide balsa vertical sticks.
I will demonstrate:
For one truss side, there are 4 of these sheets, as you can see, 1. they will be joined butt to butt end, and staggered. You do not want both to be on same vertical balsa stick, but staggered like this, will be even stronger. Let me demonstrate further....
This is, of course, before gluing this all together, I am making my plan. This butt to butt end, will be directly over this vertical balsa stick, but the other one, will be on a different one...
Once I marked out where this would be, I used a straight edge to make sure it was true, and made adjustments by sanding it, as needed.
then I glued the whole thing together, and now, you can see, where I have marked the two joints, the top one is to the right of the picture, and the bottom one is towards the left. I marked directly over the tape, with a fine tip sharpie.
ok, now here is the truss, over the balsa sheeting, however, it is not where it should be, this is only for demonstrating, I will not glue the truss to the sheeting here, but about 3/4" shifted to the right.
Here is where it will get glued on. Once this step comes, I will demonstrate this again.
I will wait for that to cure, and then I have to make 3 more.
I also got a call From Dean (FixedWing), and he also brought something to my attention, which is regarding the rudder servos. I will have to check if my servos will fit in the current location. they may bump into each other, so I will check on the plans with the servos I will be using.
Let me do that now, and I will post the pictures.
Let me do that now, and I will post the pictures.