• If you are new to GiantScaleNews.com, please register, introduce yourself, and make yourself at home.

    We're 1st in Giant Scale RC because we've got the best membership on the internet! Take a look around and don't forget to register to get all of the benefits of GSN membership!

    Welcome!
  • Unless you are a paid advertiser NO more posting advertisement in the individual vendor forums. You may post in the Manufacturer's Announcements section only but only ONCE a month unless your a paid advertiser.

Extreme Flight 60" Laser Build Thread

SnowDog

Moderator
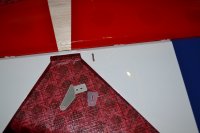
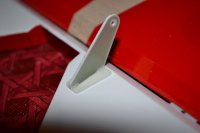
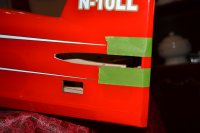
Thats okay for extensions that are not removed but this was at the connection for removing the wings. Instead of plugging in and removing aileron right at the receiver I had a 3" extension connected to the received to make this easier, soldering not an option.

Ray, sorry, I missed that comment about losing your Edge 540 in the earlier post...sad to hear about that...there has to be a better reason for rationalizing a new airframe! ;)
 

Ohio AV8TOR

Just Do It
Ray, sorry, I missed that comment about losing your Edge 540 in the earlier post...sad to hear about that...there has to be a better reason for rationalizing a new airframe! ;)
This was a must have for me either way, I saw Leo fly in Cleveland some years back but never wanted the 48". I am definitively getting another 60" Edge but I will wait till this is up and flying.
 

Ohio AV8TOR

Just Do It
Last couple of days have been filled busy, hectic and stressful so have not been progressing like I had planned and to make it worse My 4315-480 that I sent in for Ken to go over and replace the bearings seems to be lost on the return trip back to me. I am going to have an ugly phone call Monday with the USPS customer service.

Any way I am only going to show the control arms for the stab because all the rest are the same. One thing I need to stress when dry fitting the control horn with the flat plate do not force it too hard or you risk splitting the flat plate. You need to rough up the bonded surfaces and this helps with this clearance. After you get those two parts together also dry fit it in the control surface. Push it down all the way and ensure now "before" you mix glue that they all fit nicely. Take the time to get it right dry. I like to use some painters "Frog" tape to outline the area to cut the covering away. Cut in away from the tape 1mm or so. Don't press too hard to cut through into the wood. Another location to pay attention too is to look at the opposite side of the control surface to make sure the G10 control arm does not push up the covering. If it does sand off the bottom. Leave the tape on because it make a very nice wipe clean surface to get rid of the excess epoxy. When applying the epoxy I like to place a bead first on the slot so it starts to slide down in before you are ready to install them. Apply epoxy to the roughed up surface an ensure that you fill both of the holes. They are important and they form a shear pin of epoxy to help the arm not pull out.

Do not rush to put the control arms on now until you power up your radio to ensure the control arm is positioned correctly.
 

Attachments

  • DSC_0003_007.JPG
    DSC_0003_007.JPG
    167.8 KB · Views: 253
  • DSC_0004_006.JPG
    DSC_0004_006.JPG
    83 KB · Views: 280
  • DSC_0005_005.JPG
    DSC_0005_005.JPG
    136.3 KB · Views: 246
  • DSC_0006_004.JPG
    DSC_0006_004.JPG
    130.6 KB · Views: 250

Ohio AV8TOR

Just Do It
I started installing the stab and found the first problem with fit. It is not major but you need to do some relieving or your elevator throw will be limited. Use the tape method to assist you with the cutting and use an X-acto saw and without using a lot of pressure start cutting. Do not try and cut through both sides from one end or you risk cutting off line. Cut one side half way down and the flip and repeat on the other side. Sand this cut smooth and wick in some thin CA. Speaking of CA take the time to enforce the bulkheads in this tail end of the fuselage through this stab cutout. As you can see the elevator joiner hits before you get to max travel. I am going to call it a night and will cut mine out tomorrow.
 

Attachments

  • DSC_0007_003.JPG
    DSC_0007_003.JPG
    119.3 KB · Views: 276
  • DSC_0009_001.JPG
    DSC_0009_001.JPG
    59.6 KB · Views: 280

wedoitall

Member
I really like how the servo bays are sturdy and have a good amount of wood around them. I have a plane that I had to rebuild the bay because there wasn't much wood around it. It was a good lil job fixing it.
 

Fast3D

50cc
IMG_0417.jpgThanks so much Avi8tor for sharing your experience.
I noticed my control horns are not exactly the same size as you see. The top one is smaller which is the right size I think and sits in the slot nicely (1.3 cm/almost 0.5 inch for the base part that sits into the slots) and the other three are longer (1.7 cm).
Has anyone else had the same issue? Thanks.
 

Ohio AV8TOR

Just Do It
View attachment 15686Thanks so much Avi8tor for sharing your experience.
I noticed my control horns are not exactly the same size as you see. The top one is smaller which is the right size I think and sits in the slot nicely (1.3 cm/almost 0.5 inch for the base part that sits into the slots) and the other three are longer (1.7 cm).
Has anyone else had the same issue? Thanks.
I wondered about that but I did check mine and all 4 were the same. This is something that got be once and I always make it a point to look at them now. Thanks for adding the picture as it for sure will help others.
 

wedoitall

Member
I just double checked and on the MXS the short horn goes in the elevator. So im gonna guess that's where it goes on the Laser also.
 

Ohio AV8TOR

Just Do It
So I now have maximum travel on my elevator. Please see the image below on where I had to relieve on the both edges that the arrow is pointing to. I simply used a sharp Xacto blade and sliced it out which was easy. I chose that as I was worried on how the dremel would leave the covering. It needed about 1mm on each. I sent Chris an image of it and he said that he was going to send it to the factory so maybe only a problem on early batches. I can get 90º of up elevator with a minimal hinge gap, very impressive Extreme Flight. The down elevator is limited by the control horn bottoming out on the stab. I did not measure it but it is an extreme throw.
 

Attachments

  • DSC__0276.jpg
    DSC__0276.jpg
    220.8 KB · Views: 287
Top