• If you are new to GiantScaleNews.com, please register, introduce yourself, and make yourself at home.

    We're 1st in Giant Scale RC because we've got the best membership on the internet! Take a look around and don't forget to register to get all of the benefits of GSN membership!

    Welcome!
  • Unless you are a paid advertiser NO more posting advertisement in the individual vendor forums. You may post in the Manufacturer's Announcements section only but only ONCE a month unless your a paid advertiser.

Extreme Flight 60" Laser Build Thread

gyro

GSN Contributor
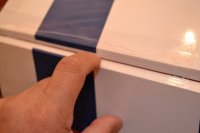
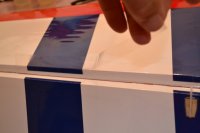
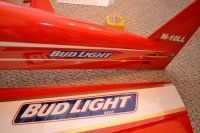
Still not back home yet to get started on my Laser but I have been talking with Eric at B&E and I sent him some art work that he matched nicely. I really want this to look like Leo's Laser so I am replacing the Extreme Flight decalse which by the way are matched nicely to Leo's Bud Light sponsor's decals. Extreme flight does not supply the extra blue matching side decals but I will have them along with Leo's tail number N-10LL. Just what I was looking for. I also have a friend cutting me Leo Loudenslager for the name on the canopy.

Eric is the bomb, he's got a ton of skill and his Air release vinyl is the best out there

Your vinyl will look awesome on the Laser Ray!
 

Nalby

50cc
Great timing mine should be here tomorrow. hope to fly it on Fri night or sat.

Now back to our regular scheduled Laser build.
 

Ohio AV8TOR

Just Do It
Put the gear on last night, no big deal same as usual. One thing I like to do that I have been doing with great results with regards to not having a wheel fall off is to locate and relieve a slot for the grub screw to be recessed into. All you have to do is slide on the wheel and lock collar on the axle and just snug down the grub screw. Remove everything and you will see on the axle the exact spot the screw made a mark in the plating on the axle. I use a dremel with a cutoff wheel and grind a flat in the axle. This will allow the screw to recess into. Re-assemble everything as before but add some blue loctite on the grub screw. Now with it going into a recess in the axle even if the screw loosens slightly it is still mechanically trapped to the axle. When you do a preflight just try and rotate the wheel collar and if it comes loose it will want to rotate some but will not come off. I have used this for all my 48", 60" and 72" planes with great results. On the 50cc size use a cotter pin through the wheel collar.

Note I do not install the wheel pant "anti rotation" screw until the plane is finished. I like to prop the plane in a wings level flying position, then I rotate the wheel pant to be lined up with the wing incidence then I install that screw.
 

Attachments

  • DSC_0242.JPG
    DSC_0242.JPG
    366.7 KB · Views: 316
  • DSC_0250.jpg
    DSC_0250.jpg
    55.4 KB · Views: 286
  • DSC_0251.jpg
    DSC_0251.jpg
    58.2 KB · Views: 327
  • DSC_0252.jpg
    DSC_0252.jpg
    53.7 KB · Views: 280
  • DSC_0240.JPG
    DSC_0240.JPG
    339.4 KB · Views: 291

Ohio AV8TOR

Just Do It
Dry fitting the aileron to the wing I am looking to see that all hinge slots are cut right to accept the hinge on both surfaces. Both wings on the Laser were perfectly cut and required no opening of the hinge slots. I like to bend over the hinges to find the half way point. This also helps prevent the hinge from sliding in but I do also mark that centerline with a thin marker to ensure that the hinge is equal. I then install the aileron and please - please rotate the wing over and make sure that one of the hinges did not accidentally miss the slot. Now is the time to find this out. I use a lot of wood coffee stirrers in my builds, here is use it to get equal spacing on the root of both ailerons to the wing spacing. Starbucks is your friend, I always grab some when I am there. Allow the aileron to fall down on it;s own and start glueing with thin CA. I pass CA into the hinge 4 times rotating so each side is down when I add some CA. Have a rag handy if you get too much on and set aside to dry.
 

Attachments

  • DSC_0254.JPG
    DSC_0254.JPG
    268.8 KB · Views: 287
  • DSC_0255.jpg
    DSC_0255.jpg
    52.8 KB · Views: 289
  • DSC_0256.jpg
    DSC_0256.jpg
    70.9 KB · Views: 280

Ohio AV8TOR

Just Do It
If you do not seal your gaps there is no time like the present and make this a part of every build. I do this a little different than some and I not only find it easier it is so cheep. In the past I have used Blenderm tape, Monocote and Ultracoat but I am telling you clear packing tape is the way to go. It is so clear it makes no difference with whatever coloring scheme you use. Something else I found is you do not have to do it all in one piece. I cut the tape in about 8" or so length which is so much easier to handle. I am using 2" wide here. Lay the wing on the table letting the aileron fall. I place the tape on the aileron trying not to let it touch the wing. Press in on your finger to get it sealed right down into the gap then allow it to touch the wing and rub it down. Take an Xacto knife and with ever the slightest pressure slide the blade to cut the tape. I so it about 1/16" down from the top of the wing. The pressure I use is only enough to score the tape not cut it and peal it back and off. I use the remaining cut off for the next strip and I overlap it 1/4" or less. Do this to finish the full gap and I take a plastic pen cap and rub it down to help work out any line. It is totally invisible and I have never developed a tear. I do this on the bottom surfaces.
Yes the slide on the right is finished so you can see how clear it is.
 

Attachments

  • DSC_0257.jpg
    DSC_0257.jpg
    49.1 KB · Views: 309
  • DSC_0258.jpg
    DSC_0258.jpg
    49.7 KB · Views: 307
  • DSC_0259.jpg
    DSC_0259.jpg
    53.1 KB · Views: 307

Ohio AV8TOR

Just Do It
I hate loose pieces so I like to attach the plastic spacer for the SFG's. These give you clearance for your ailerons. I like to use a small bead of Welders Adhesive around the perimeter just outside of the screw holes. Screw it sown with the new handle knurled screws, wipe down any excess that squeezes out and let sit over night. You will never have to worry about them again as they will be attached to your wing.
 

Attachments

  • DSC_0025.jpg
    DSC_0025.jpg
    106.6 KB · Views: 305
  • DSC_0026.jpg
    DSC_0026.jpg
    59.2 KB · Views: 273

Ohio AV8TOR

Just Do It
I didn't have time tonight to work on the plane but my graphics came in tonight to give it some Leo personality. Eric did a great job at B&E from just some photo's I sent of Leo's plane.
 

Attachments

  • DSC_0009_01.jpg
    DSC_0009_01.jpg
    120 KB · Views: 313
When stripping the gear out I did notice that one of my 3" aileron extensions had the signal pin pushed in a little more than 1/8" so I really don't know if that is why I could not stop the roll

Would you consider soldering in servo wire or eliminating the plugs altogether from the extensions and making a solid connection. I've heard of people doing this, possibly on the BigFoot build log?
 

Ohio AV8TOR

Just Do It
Would you consider soldering in servo wire or eliminating the plugs altogether from the extensions and making a solid connection. I've heard of people doing this, possibly on the BigFoot build log?

Thats okay for extensions that are not removed but this was at the connection for removing the wings. Instead of plugging in and removing aileron right at the receiver I had a 3" extension connected to the received to make this easier, soldering not an option.
 
Top