• If you are new to GiantScaleNews.com, please register, introduce yourself, and make yourself at home.

    We're 1st in Giant Scale RC because we've got the best membership on the internet! Take a look around and don't forget to register to get all of the benefits of GSN membership!

    Welcome!

30cc profile from the ashes of a 70" RIP AJ Slick - Build Log

3dNater

3DRCF Regional Ambassador
From my Blog:

Those who know me know that I am in the hobby on a severely cramped budget. I am just starting an Accounting career and have to pay for school, qualify for a house, etc. etc. The good news is that the future is bright and I am feeling very optimistic about my prospects.

What does that have to do with a 70" RIP AJ Slick? I am going to re-purpose the components of the airframe that are still usable and incorporate them into a new profile project. I have to give credit where it is due. I was first exposed to the idea when a fellow twistaholic referred me to this thread on RCG. Radfordc had finished his project and it looks like it turned out pretty amazing. Ever since I saw that thread a month or two ago I have had ideas rolling around in my head to try something for the broken Slick.

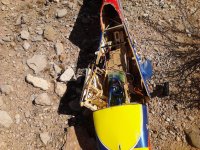
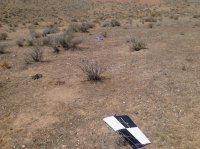
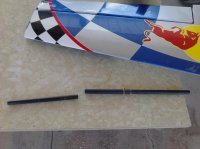
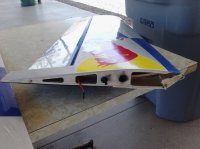
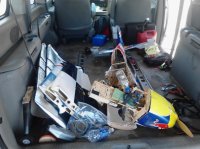
The demise of the slick was on July 24th when I was practicing high energy snaps. The airframe, having been subjected to many "mishaps" in the past was just no longer up to the task. The wing tube exited through the canopy and I found myself flying a 35cc powered fuselage. It was a surreal experience as I watched my favorite plane plummet to the earth.

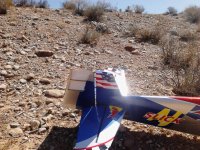
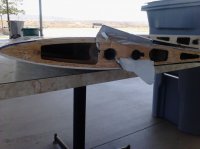
IMG_20130724_113815.jpgIMG_20130724_113826.jpgIMG_20130724_113845.jpgIMG_20130724_114203.jpgIMG_20130724_120449.jpgIMG_20130724_120459.jpgIMG_20130724_120505.jpgIMG_20130724_120748.jpg

You can see that the wings, stabs, and elevators are still in relatively decent shape. With a few minor repairs they could be put back in service... and I'd hate to waste all those great graphics :D

I plan to, and have officially started (as of last night), to build a foam core profile fuse, a new fiberglass cowl, a new rudder, and whatever else needs to be done to get this ship airworthy again. I'm sure there will be many issues to sort out, and this being the first project of this depth I have attempted in modeling, it is sure to be a fun ride so stay tuned! :D
 

3dNater

3DRCF Regional Ambassador
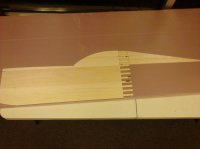
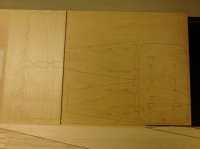
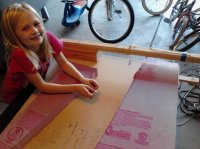
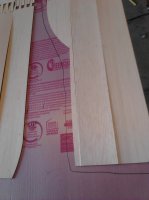
Last night we started cutting out sheeting to wrap the foam core... on a LASER :D

IMG_20130919_220745.jpg

I had a short video of the cutter operating but the site didn't like it... it's really short so I didn't want to bother with youtube. Maybe another time...

We are deviating a little from the other build I referenced for the idea, in that we are using 1/16" balsa to sheet the foam with instead of plywood. I am also planning to use titebond II wood glue, which is said to be able to be heat activated. I should be able to iron on the balsa sort of like covering. I'll post the results when they happen ;)

I picked up the remaining wood materials today and hope to get the rest of the balsa pieces cut out tonight... or sometime this weekend.

Having an official start to the project has given me a lot of energy for it... but the busy season for my job is right around the corner... can I get it done in time? We shall see...
 
Last edited by a moderator:

3dNater

3DRCF Regional Ambassador
motor box

Tonight we designed the motor box for the profile. Then we used the laser to mark out the peices on 1/4 and 1/8th beech ply. I will use a sanding disc and band saw to cut these pieces. The CAD design ensures a nice fit between the pieces. I helped with the conceptual components but Brigg is turning into an amazing draftsman for this stuff. Many thanks to him and his talent and time on this!

[video=youtube;SpEtB6crY5M]http://www.youtube.com/watch?v=SpEtB6crY5M[/video]

Here is a pic of the laser-drawn motor box pieces.

IMG_20130924_202302.jpg

The two pieces on the left are 1/8 birch ply and the ones on the right are 1/4". I'll post pics of a dry fit once I get it cut out.
 
Last edited by a moderator:

3dNater

3DRCF Regional Ambassador
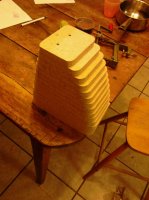
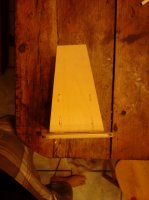
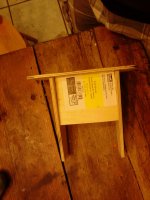
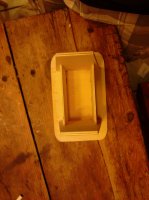
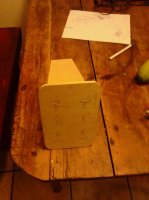
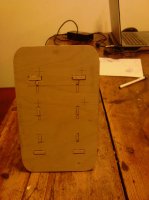
Ok people... as promised... here are pics of the motor box and cowl plug (not glued or sanded obviously).
IMG_20130926_213703.jpgIMG_20130926_213226.jpgIMG_20130926_213234.jpgIMG_20130926_213249.jpgIMG_20130926_213219.jpgIMG_20130926_213212.jpg

I'll show more pics of the cowl plug making process as we progress on that. For now, I am just really happy to have those motorbox pieces fitting together. I don't have very good tools for cutting the slots so that was actually a ton of work. If you look close you can see that we did build about 2.25 to 2.5 degrees (can't remember what we finally settled on) of right thrust into the firewall.

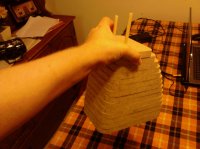
Ok, I got a chance to put the plug together. It is rdy to be sanded down. It turned out rougher than I had hoped but I think it will be fine with the help of some power tools. The worst that could happen is that I'd have to build it up a little here or there with some filler.

IMG_20130927_211750.jpg
 
Last edited by a moderator:

3dNater

3DRCF Regional Ambassador
With the motor box figured out and the cowl starting to take shape, it was time to turn my attention to constructing the foam core fuse. We have some plans to do some cool work to the foam before I sheet it with the balsa to make it a little... less profile-ish. So today I wanted to just get a rough cut out of the basic shape out of the foam. Naturally this meant I wanted to cut with a hot wire. Free-handing would have looked really bad so... I built a table, HiYa! :D

IMG_20130928_183936.jpgIMG_20130928_190100.jpgIMG_20130928_183855.jpg

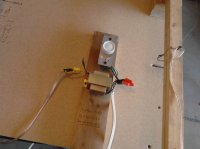
I had this foam cutting machine I had built a couple of years ago to try making some foam cores for a flying wing. The wing project was a bust (I was a noob and had the thing so tail heavy it wouldn't fly... 10+ hours to build... destroyed in 10 minutes :))
Well, the bow we had made to cut the wing cores was pretty big, like 3+ ft across where the wire spanned. With the heat turned all the way up it would barely get hot enough to cut foam. After building this table (2-3 hours or so) I hooked up the wire, put the lead on it and plugged it in. It was turned on and still at max amps. My wire turned into a glowing filament and then toasted in a matter of 5 or 6 seconds. It was totally awesome and something I would love to repeat sometime :p. Turns out there is a big difference resistance wise to heating a 3 ft wire vs. a 6 inch one. It also made the range of usable setting on my knob really small. A tiny bit too much and the wire starts glowing red. Back off a bit and it isn't hot enough. If I end up using this much more in the future I'll have to make my wire a tad longer... sort of like adding expo I guess :)

Anyway, long longer... the basic shape of the fuse is now cut out and ready for some refining. I hope we get it right the first time cuz I dun used up all my foam.
 
Last edited by a moderator:
Top