• If you are new to GiantScaleNews.com, please register, introduce yourself, and make yourself at home.

    We're 1st in Giant Scale RC because we've got the best membership on the internet! Take a look around and don't forget to register to get all of the benefits of GSN membership!

    Welcome!

3D EMHW 2.15 Ultimate

^Can't imagine doing a build without one after using it. Works exactly as advertised. Hobbylinc.com

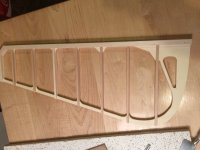
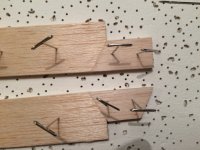
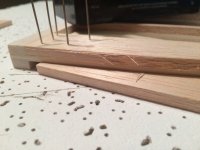
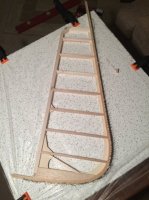
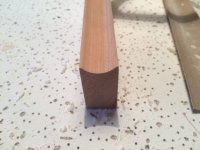
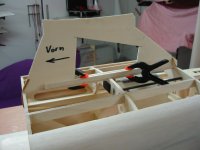
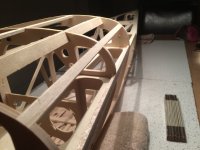
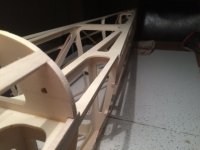
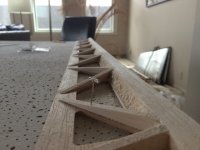
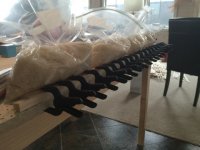
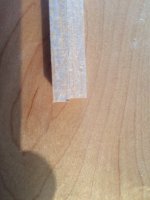
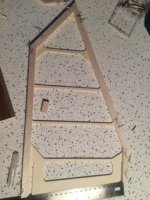
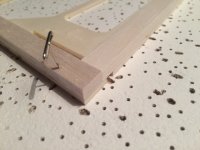
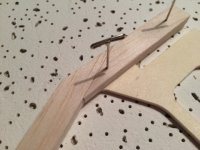
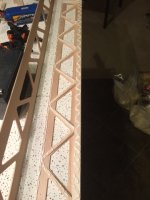
Finished sanding the big balsa stick in the ailerons to match the line of the triangles. It was easier than I expected. Used a little 60 grit CA'd to about an 8 x 1in piece of ply. This let me hit the stick without hitting the triangles. The balsa sticks extend lengthwise out past the sheeting and this makes getting the angle at the edge of the sheeting easier by supporting the sanding stick.

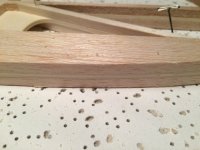
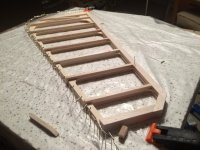
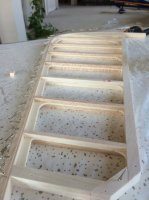
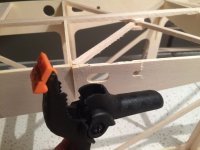
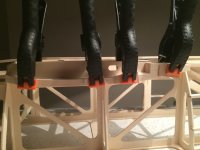
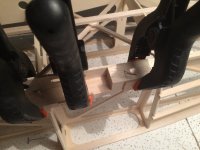
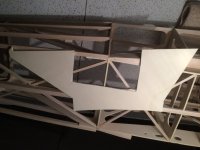
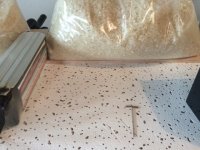
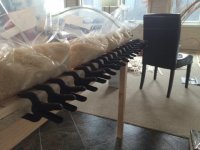
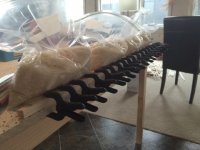
Glued the opposite sheeting on the ailerons. Surprised to see this put a bow into the ailerons. Might have some to do with the water in the glue. Fortunately the bow disappeared after weighting them down on another flat table for a few hours. Needed to make room for the next ones. I bought a ton of rice and filled gallon bags about half way. Figured this was a better idea than messing around with sand as I'll eat the rice. The sheeting really stiffened the ailerons up.

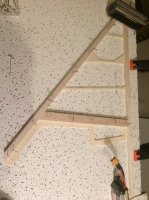
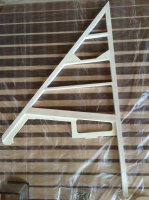
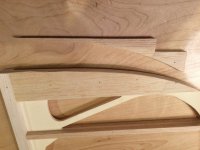
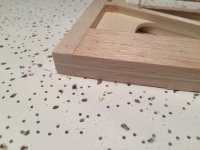
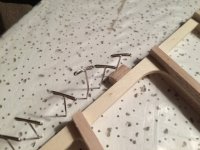
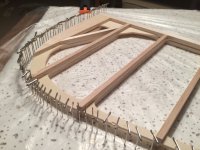
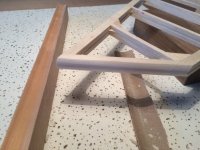
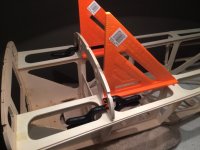
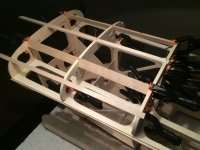
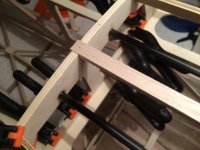
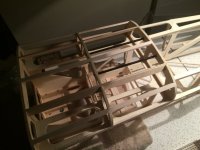
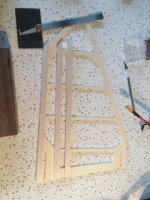
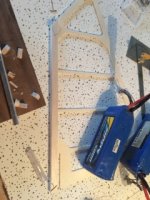
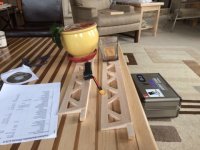
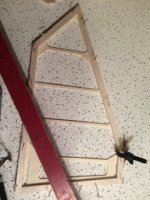
Had some room on the table so I started the stabs. These are really easy with the miter sander. There's a nice picture included on the CD so I just cut the angles the same. Balsa sticks go on either side of the ply so I cut four at a time (one for each side of the two stabs) after measuring the angles. Got one stick perfect than cut out the other three in the miter box leaving about 1mm extra length than finishing with the miter sander. Worked in a circle pinning each stick and using the last one as a reference to get the angles and length right.

Edit; These pics are getting downgraded pretty severely by my phone --> computer transfer. I'll get them straightened out..
 

Attachments

  • IMG_0440.jpg
    IMG_0440.jpg
    64.1 KB · Views: 420
  • IMG_0443.jpg
    IMG_0443.jpg
    60.9 KB · Views: 385
  • IMG_0444.jpg
    IMG_0444.jpg
    51 KB · Views: 422
  • IMG_0445.jpg
    IMG_0445.jpg
    49.2 KB · Views: 385
  • IMG_0446.jpg
    IMG_0446.jpg
    48.5 KB · Views: 396
  • IMG_0447.jpg
    IMG_0447.jpg
    35.6 KB · Views: 406
  • IMG_0448.jpg
    IMG_0448.jpg
    36.5 KB · Views: 374
  • IMG_0450.jpg
    IMG_0450.jpg
    49.4 KB · Views: 400
  • IMG_0452.jpg
    IMG_0452.jpg
    58.4 KB · Views: 416
  • IMG_0453.jpg
    IMG_0453.jpg
    35.6 KB · Views: 395
  • IMG_0454.jpg
    IMG_0454.jpg
    61.7 KB · Views: 384
  • IMG_0456.jpg
    IMG_0456.jpg
    49.3 KB · Views: 394
  • IMG_0457.jpg
    IMG_0457.jpg
    52.4 KB · Views: 376
  • IMG_0458.jpg
    IMG_0458.jpg
    34.9 KB · Views: 369
Last edited:
Have the stabs and elevators framed up after 140 miter joints!!

The manual mentions poplar for the little triangle mounting points for the flying wires. I missed this and installed balsa triangles in the elevators. Planning on doweling here as a fix. Got it right in the vertical stab. They are incredibly light for how strong they are.

Still need to sand a radius around the edges. They're 15mm thick so my plan is to find a 16-17mm bit and drill a board length wise with a drill press then rip the board down the center of the hole to give a half moon shape long enough to keep the edges straight. I'm going a little bigger on the drill bit to leave room for the sand paper.

Extended a bit of balsa scrap to get the full part for the bottom of the rudder. Then rough cut it and glued then finally sanded it round following the ply in between.

The rudder builds in much the same way with the exception of 4 15x2mm strips laminated/bent around the trailing edge. Cut a small section of each strip and glued them together for a little thickness jig to set the pattern with the pins. Pinned the rudder down and set the pins around it with the jig. May have gone overboard with the number of pins, but they hold well. The strips bent easily in boiling water. The pic doesn't show it because I needed another hand, but I had the strips bent into the boiling water.

Want to let it dry before I glue the strips.
 

Attachments

  • IMG_0476.JPG
    IMG_0476.JPG
    70.5 KB · Views: 396
  • IMG_0479.JPG
    IMG_0479.JPG
    60.8 KB · Views: 370
  • IMG_0482.JPG
    IMG_0482.JPG
    44.3 KB · Views: 349
  • IMG_0483.JPG
    IMG_0483.JPG
    108.3 KB · Views: 381
  • IMG_0487.JPG
    IMG_0487.JPG
    75 KB · Views: 391
  • IMG_0490.JPG
    IMG_0490.JPG
    86 KB · Views: 366
  • IMG_0491.JPG
    IMG_0491.JPG
    72.9 KB · Views: 380
  • IMG_0493.JPG
    IMG_0493.JPG
    62.5 KB · Views: 355
  • IMG_0495.JPG
    IMG_0495.JPG
    70.5 KB · Views: 343
  • IMG_0496.JPG
    IMG_0496.JPG
    67.6 KB · Views: 366
  • IMG_0497.JPG
    IMG_0497.JPG
    71.4 KB · Views: 376
  • IMG_0498.JPG
    IMG_0498.JPG
    89.4 KB · Views: 372
  • IMG_0499.JPG
    IMG_0499.JPG
    92.2 KB · Views: 394
  • IMG_0503.JPG
    IMG_0503.JPG
    66.7 KB · Views: 344
  • IMG_0500.JPG
    IMG_0500.JPG
    76.8 KB · Views: 365
Last edited:
Went through and re-positioned all the pins for a tighter fit. The jig got them close, but didn't transfer the curve perfectly so there were quite a few pins with a gap. The jig served its purpose, it just needed to be close to dry the strips in a curve.

Glued it up. Worked fast as the glue I'm using has a short open time.

The strips ended up much tighter after re-positioning the pins.

You can maybe see in the picture the different color of the balsa crossmembers. There was some heavier stock in the kit I tried to save for the rudder.
 

Attachments

  • IMG_0504.JPG
    IMG_0504.JPG
    48.7 KB · Views: 341
Went by the shop for a few hours and snuck in a little sanding jig for the radius on the edges of the tailfeathers. My rip a 17mm hole in half idea wasn't happening as I wanted a longer jig than the drill press has travel. Found a round router bit and in two easy passes had a decent half moon in the edge of a board. Had a dowel the right size and used that to clean it up with sand paper.

It's long enough it should be impossible to put any waviness into the edges.

There's a picture of the first edge I sanded on an elevator. Makes it easy, as hamfisted as I am doing anything free hand I need all the help I can get. :laughing:
 

Attachments

  • IMG_0505.JPG
    IMG_0505.JPG
    74 KB · Views: 367
  • IMG_0506.JPG
    IMG_0506.JPG
    89.3 KB · Views: 367
  • IMG_0507.JPG
    IMG_0507.JPG
    64.1 KB · Views: 384
Disaster Strikes! Well not bad, one of my brand new clamps cracked in half and snapped down on the frame messing the wood up a bit right at an anti rotation point.

Wicked thin CA into it and may reinforce it with a backing, we'll see how it feels when the glues dry.

Edit: Pics of what I meant to do before the "incident"..used larger clamps this time.

These are three balsa patterns glued together for thickness than after the glue drys they'll be sanded to match the curves of the formers for sheeting. They give the curve about the wing where it fits into the fuse.
 

Attachments

  • IMG_0514.jpg
    IMG_0514.jpg
    68.3 KB · Views: 371
  • IMG_0515.jpg
    IMG_0515.jpg
    66.3 KB · Views: 367
  • IMG_0516.jpg
    IMG_0516.jpg
    68.7 KB · Views: 365
Last edited:
Lots of sanding. Blended the balsa structure that fits above the lower wing. This will be sheeted over.

Put the upper deck together. It includes two pieces of heavy birch ply the carbanes will be mounted to. Surprisingly difficult to sand down and flush even with 60 grit on a heavy stick. Test fit the jig for mounting the carbanes in the right place and correct incidence and had a minor panic when it wobbled back and forth on the slightly higher middle former. Turns out in the included picture they show the jig missing a large center section that enables it to bypass the middle former and rest on balsa stick near the out formers. After removing the same section from my jig it fits perfect and no wobble. Considering it's all cnc cut I'm not sure why the jig isn't fully shaped in the ply sheet, but the pictures clearly show what needs to be done. I've included their picture so this all makes sense.

Ran two 6mm carbon tubes between predrilled holes in the formers for the tank mount. Used epoxy. A small amount to wet the wood in the holes and a small filet after positioning the tubes. Unfortunately a 1000ml fiji is a little long and the middle former interferes with the tank position. Plan on picking up two 500ml Fiji bottles and seeing how they fit side by side and I could run them in parallel or in series with one as a header tank. Thought about a 500ml and 330ml to a save a little weight since I usually only trust my concentration about 10 minutes..

Drilled the holes for the landing gear and got it on its feet for a minute. They supply blind nuts to secure the bolts, but the bolts are stainless steel and soft and even with a new allen wrench I was having trouble getting the blind nuts pulled in to the birch without stripping the bolts. I'll replace them with some steel bolts and use a drill, should be easy...

The forward area needs the tank situation figured out and the carbanes mounted and it's ready for sheeting.
 

Attachments

  • Baldachin 005.JPG
    Baldachin 005.JPG
    62.9 KB · Views: 357
  • IMG_0518.JPG
    IMG_0518.JPG
    75.7 KB · Views: 357
  • IMG_0519.JPG
    IMG_0519.JPG
    79.8 KB · Views: 368
  • IMG_0521.JPG
    IMG_0521.JPG
    70.1 KB · Views: 385
  • IMG_0522.JPG
    IMG_0522.JPG
    84.2 KB · Views: 376
  • IMG_0523.JPG
    IMG_0523.JPG
    72.1 KB · Views: 394
  • IMG_0524.JPG
    IMG_0524.JPG
    53.6 KB · Views: 355
  • IMG_0525.JPG
    IMG_0525.JPG
    45.5 KB · Views: 375
  • IMG_0526.JPG
    IMG_0526.JPG
    70.6 KB · Views: 395
Top