You are using an out of date browser. It may not display this or other websites correctly.
You should upgrade or use an alternative browser.
You should upgrade or use an alternative browser.
3D EMHW 2.15 Ultimate
- Thread starter ThePledge
- Start date
ThePledge
50cc
Hey @ThePledge,
I'm with Jetpainter. I've wanted to see one of these built too. With all the batteries I see you using for weights, are you going to make your Ultimate electric ? ? ? ? ? ?.....................
Those Zippys are fully discharged casualties from my truck. They're good for a little weight and that's about it

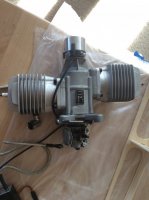
Putting a ZDZ 112 in!!
Attachments
ThePledge
50cc
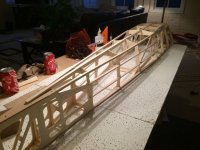
Installed the stringers and now getting some rough sanding done. I'm really going over pictures here to see what exactly needs to be sanded and how much to blend things together. What do you guys like to use for a wood filler? Would like to touch up a few places and I'm sure it will come in handy on the wings.
Attachments
ThePledge
50cc
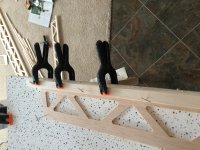
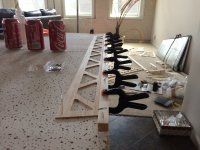
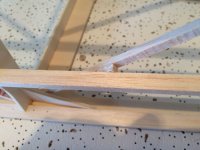
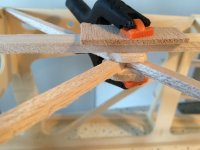
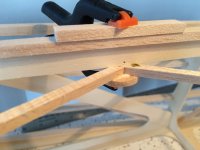
Back to the ailerons. These are really simple, but thought I'd touch on a little clamping technique as against all odds I've got a bit of experience in this small area The long balsa sticks have quite a bit of bow in them. A lot in one direction and a little in another. (Nothing against the quality, the wood is perfect...it's just how wood behaves)
Getting rid of it is easy and I approached it the same way I would in woodworking. As long as it is glued up straight the tension between the stick and the sheeting should keep it straight. Glued up using the stick as the reference the sheeting (with next to no stiffness relative to the stick) will just follow the bow on the stick.
So I've got two straight references. The edge of the balsa sheeting combined with pins covers one direction of bow and the flat table combined with clamps covers the other.
So I let the table and clamps with their greater surface area and pressure deal with the more significant bow and the pins deal with the less significant bow.
The last choice is which side of the more significant bow to place against the sheeting/table. One side has the middle touching with the ends sticking up above the sheeting and the other has the ends touching with the middle sticking up above the sheeting. I like the second option.
Put some glue down on the stick and spread it evenly then pinned and clamped from one side to the other. Since there are curves to deal with it worked best to work from one side to the other. Simply aligned the edge of the stick with edge of the sheeting and pinned and clamped as I went.
The long balsa sticks have quite a bit of bow in them. A lot in one direction and a little in another. (Nothing against the quality, the wood is perfect...it's just how wood behaves) Getting rid of it is easy and I approached it the same way I would in woodworking. As long as it is glued up straight the tension between the stick and the sheeting should keep it straight. Glued up using the stick as the reference the sheeting (with next to no stiffness relative to the stick) will just follow the bow on the stick.
So I've got two straight references. The edge of the balsa sheeting combined with pins covers one direction of bow and the flat table combined with clamps covers the other.
So I let the table and clamps with their greater surface area and pressure deal with the more significant bow and the pins deal with the less significant bow.
The last choice is which side of the more significant bow to place against the sheeting/table. One side has the middle touching with the ends sticking up above the sheeting and the other has the ends touching with the middle sticking up above the sheeting. I like the second option.
Put some glue down on the stick and spread it evenly then pinned and clamped from one side to the other. Since there are curves to deal with it worked best to work from one side to the other. Simply aligned the edge of the stick with edge of the sheeting and pinned and clamped as I went.
Attachments
Terryscustom
640cc Uber Pimp
AWESOME!!! Gone over the weekend and I completely missed the start of this thread!!!! So cool you are doing a thread on it
ThePledge
50cc
Thanks Terry. Should be a fun bauen
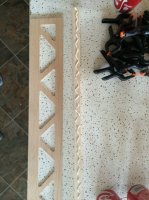
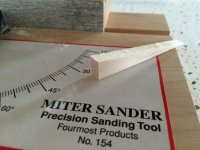
Picked up a miter box that came with a fine cut saw. It's working a treat, if I let the saw do the work it makes a clean cut and best of all the angles are true in both directions. With the hobby knife I might get the angle right in one direction, but it would never be 90 degrees with the bottom of the piece.
It only does 90 and 45 degree cuts, but once the miter sander get's here it should save some sanding time.
The ailerons need a bunch of 45 degree cuts so put it to use. Now I can do the fancy double miter ends and keep the eventual height of the ends of the little balsa triangles the same! The miter box keeps everything square and I'm much happier with the result compared to doing it by hand. Learning as I go
Attachments
ThePledge
50cc
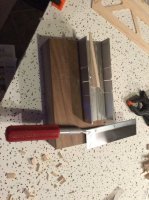
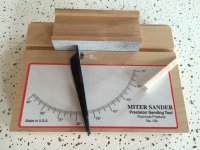
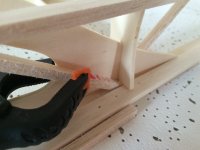
The miter sander came today. Tested it out on the balsa triangles for the ends of the ailerons and on a few cross members. It works great. Leaves a perfectly smooth, square edge and the dial sticks where it is set.
Perfect for sneaking up on the right length for cross members.
Perfect for sneaking up on the right length for cross members.
Attachments
Terryscustom
640cc Uber Pimp
Well, that's pretty darn nifty
ThePledge
50cc
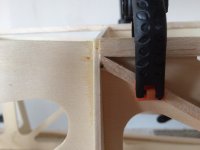
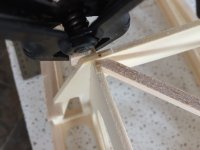
Can't say enough about that miter sander. Just works perfect and makes miters easy. Nothing happens fast so minor adjustments to angle can be made without much change in length. It also makes a compound angle at the end of a stick very accurately. Makes the idea of doing a stick build a lot less intimidating after using it for a few hours this morning.
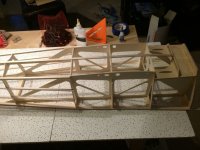
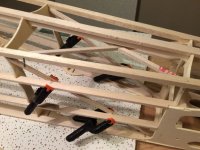
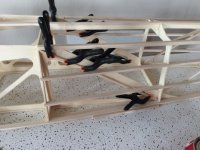
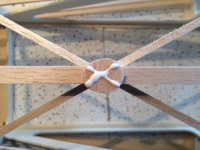
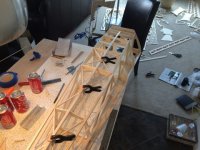
5x5mm balsa sticks are used for the crossmembers and while they probably weight next to nothing they stiffened up the fuse a ton. Glued them directly to the stringers where possible and shimmed in the few places they didn't connect. Also made a few little balsa circles to tie the middles together and connect them to the center stringer.
5x5mm balsa sticks are used for the crossmembers and while they probably weight next to nothing they stiffened up the fuse a ton. Glued them directly to the stringers where possible and shimmed in the few places they didn't connect. Also made a few little balsa circles to tie the middles together and connect them to the center stringer.
Attachments
-
 IMG_0426.jpg96.6 KB · Views: 656
 -
 IMG_0427.jpg79.2 KB · Views: 717
 -
 IMG_0428.jpg83.9 KB · Views: 717
 -
 IMG_0429.jpg64.5 KB · Views: 687
 -
 IMG_0430.jpg78.6 KB · Views: 714
 -
 IMG_0431.jpg71.3 KB · Views: 681
 -
 IMG_0432.jpg67.8 KB · Views: 668
 -
 IMG_0433.jpg93.5 KB · Views: 678
 -
 IMG_0434.jpg94.1 KB · Views: 653
 -
 IMG_0435.jpg88.8 KB · Views: 712