The Yak Is Back

Oh my and Yakkity Yak. The Yak is indeed back in the biggest, best and baddest way possible, which is as an Extreme Flight Experimental Progressive (EXP).
I was just starting to fly 3D when the original Extreme Flight 48" Yak 54 sold out for the final time. I've had a chance to fly a few since and really enjoyed them, which makes me all the more anxious to see how good one can be when given the EXP treatment. The first 48" Extreme Flight Yak 54 was a ground breaking airframe that really raised the performance bar in this size. Along with the 45" Extra 300E and Edge 540T also made by Extreme Flight, the popularity of the Yak is what put this company at the forefront of the small, high performance electric market. Extreme Flight is sort of known as "The Yak company," and the recent absence of their variant was a colossal hole in the 48" market.
Now with the advent of the EXP series, both the 45" Extra and Edge have been replaced with modern, ultra high performance 48" versions, so I think we all knew it was only a matter of time before we saw the Yak 54 EXP. The surprise was how much time, but that is what it took for "The Boss" to get the refined performance he was after, which is considerable.
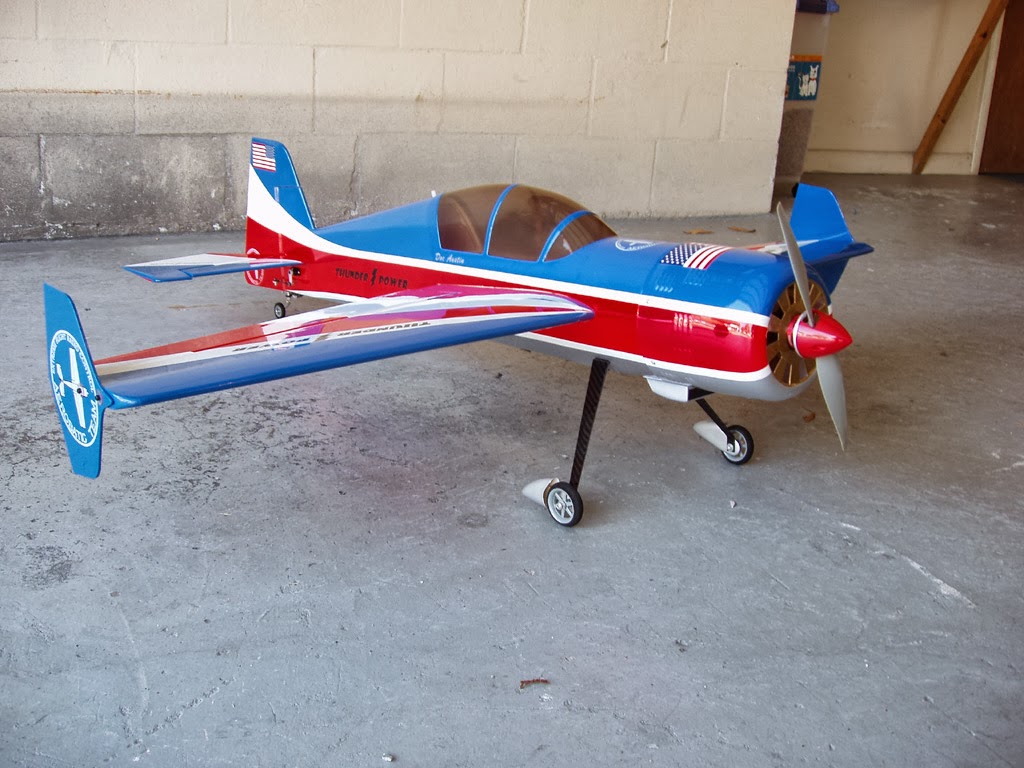
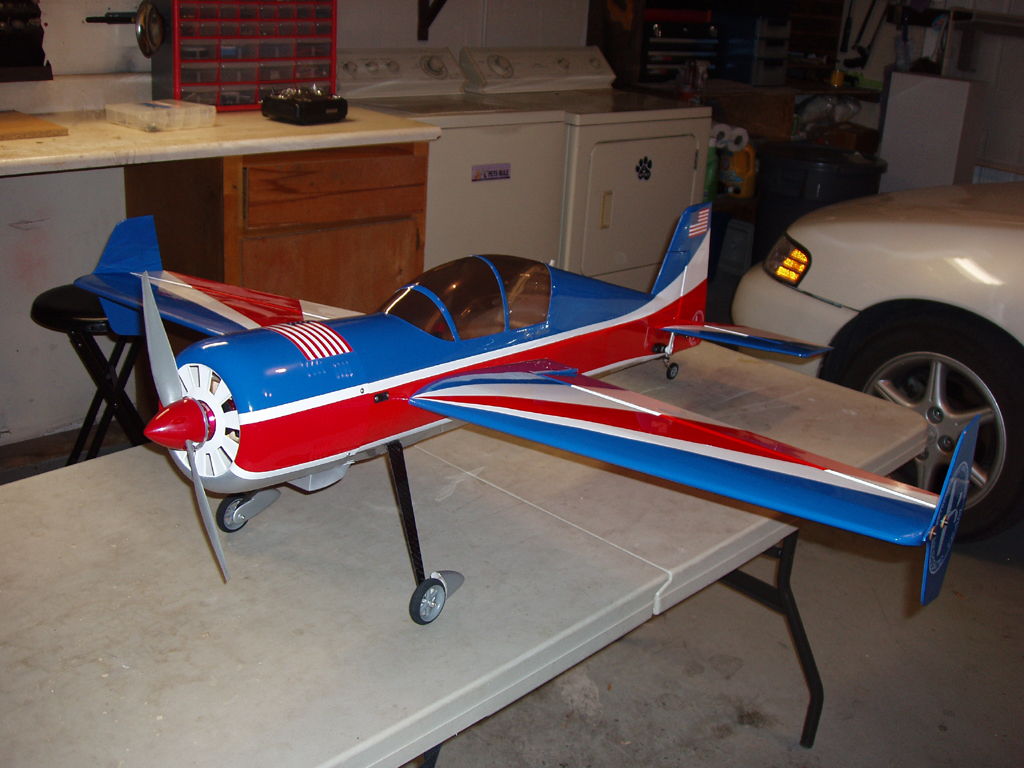
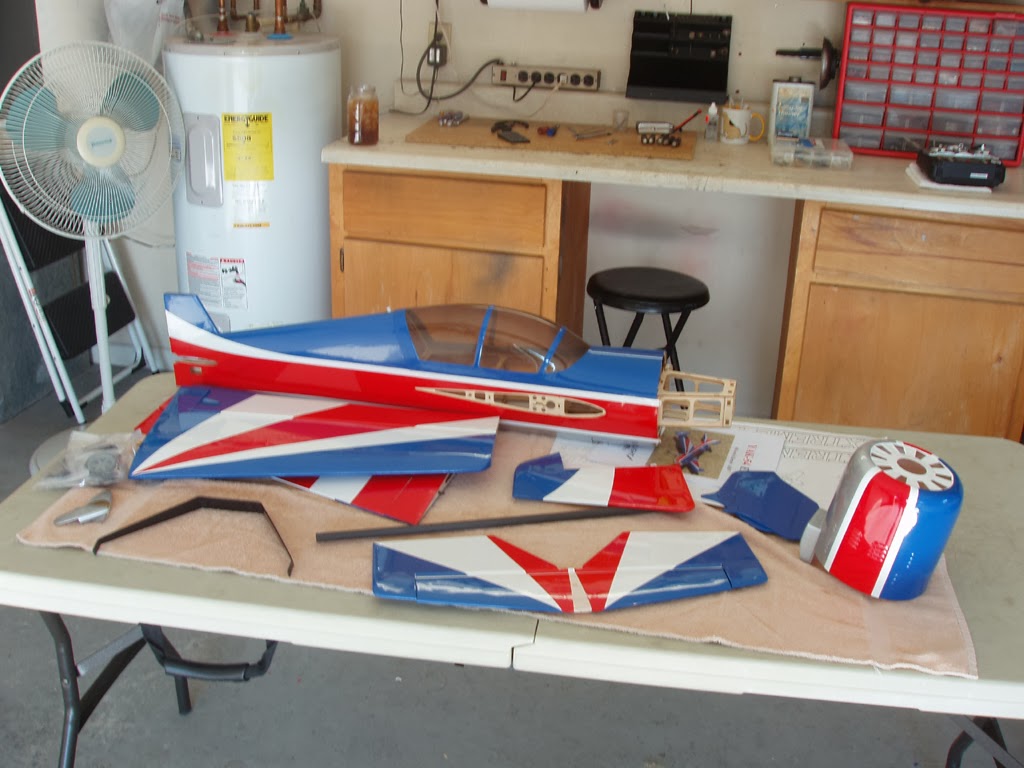
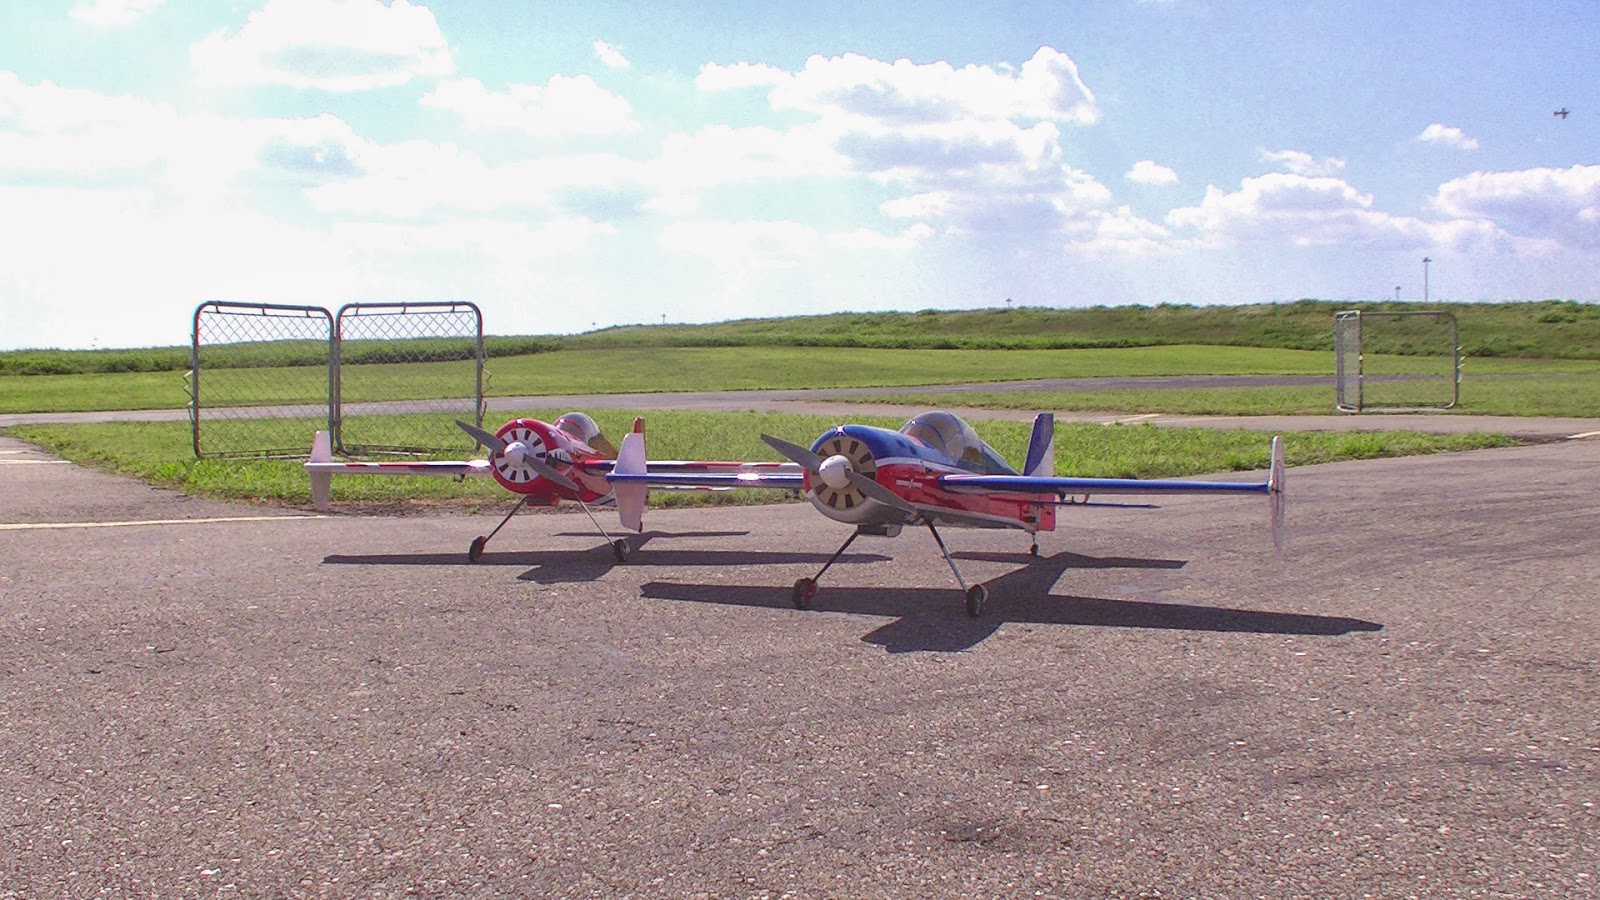
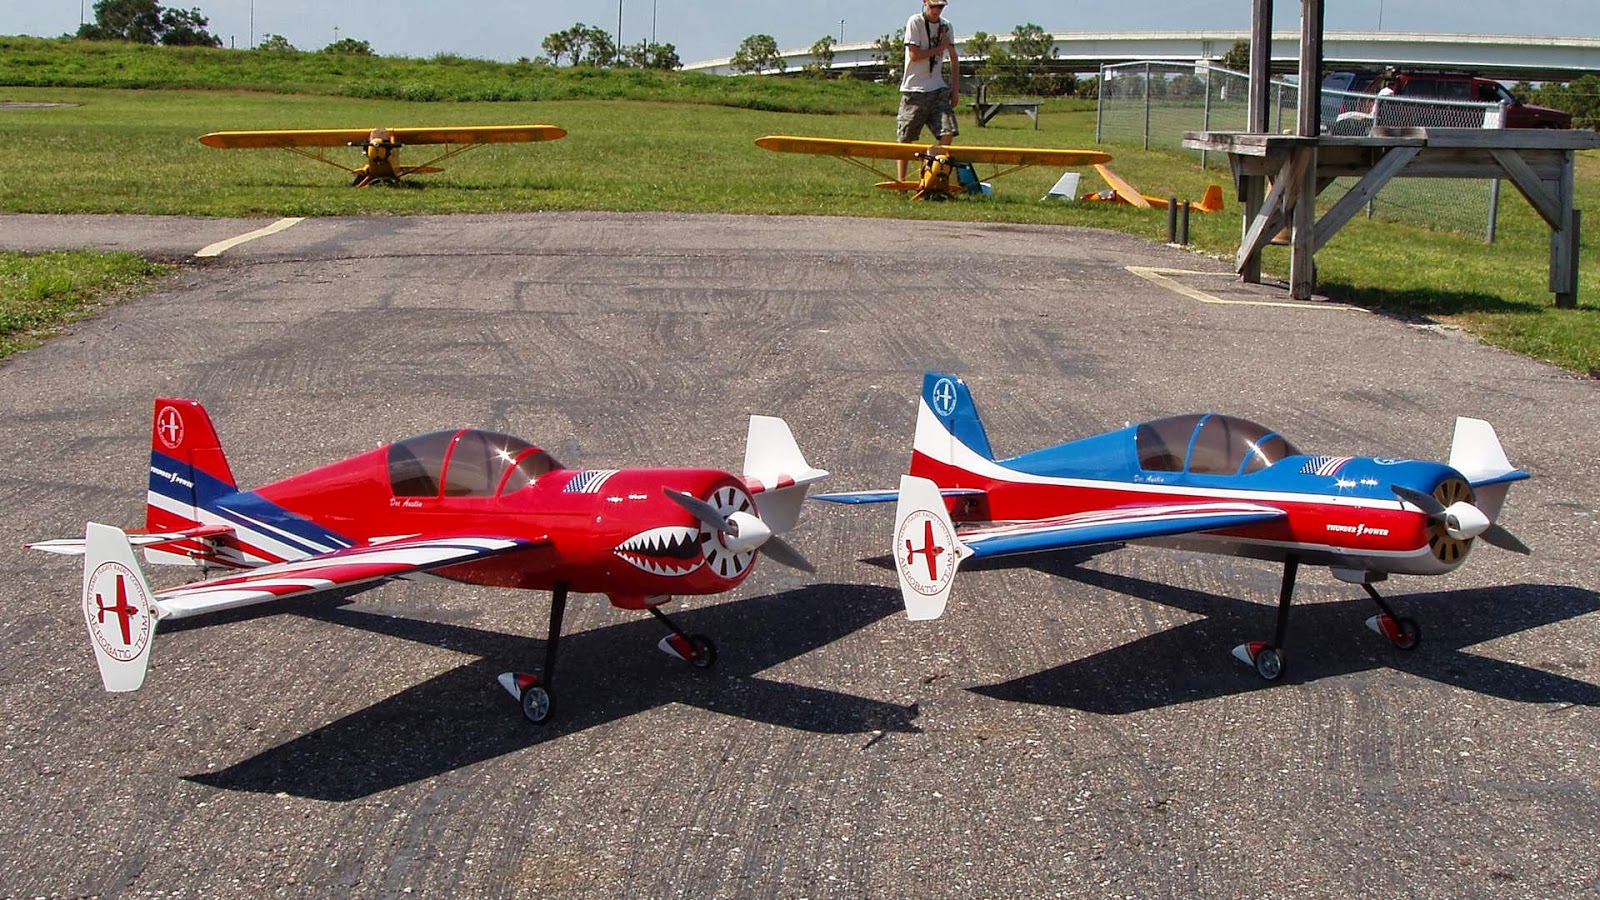
The 48" Yak is available in two great color schemes. First is an updated version of the classic "Russian Thunder" scheme in red, white and blue. It's a very slick and familiar looking plane.
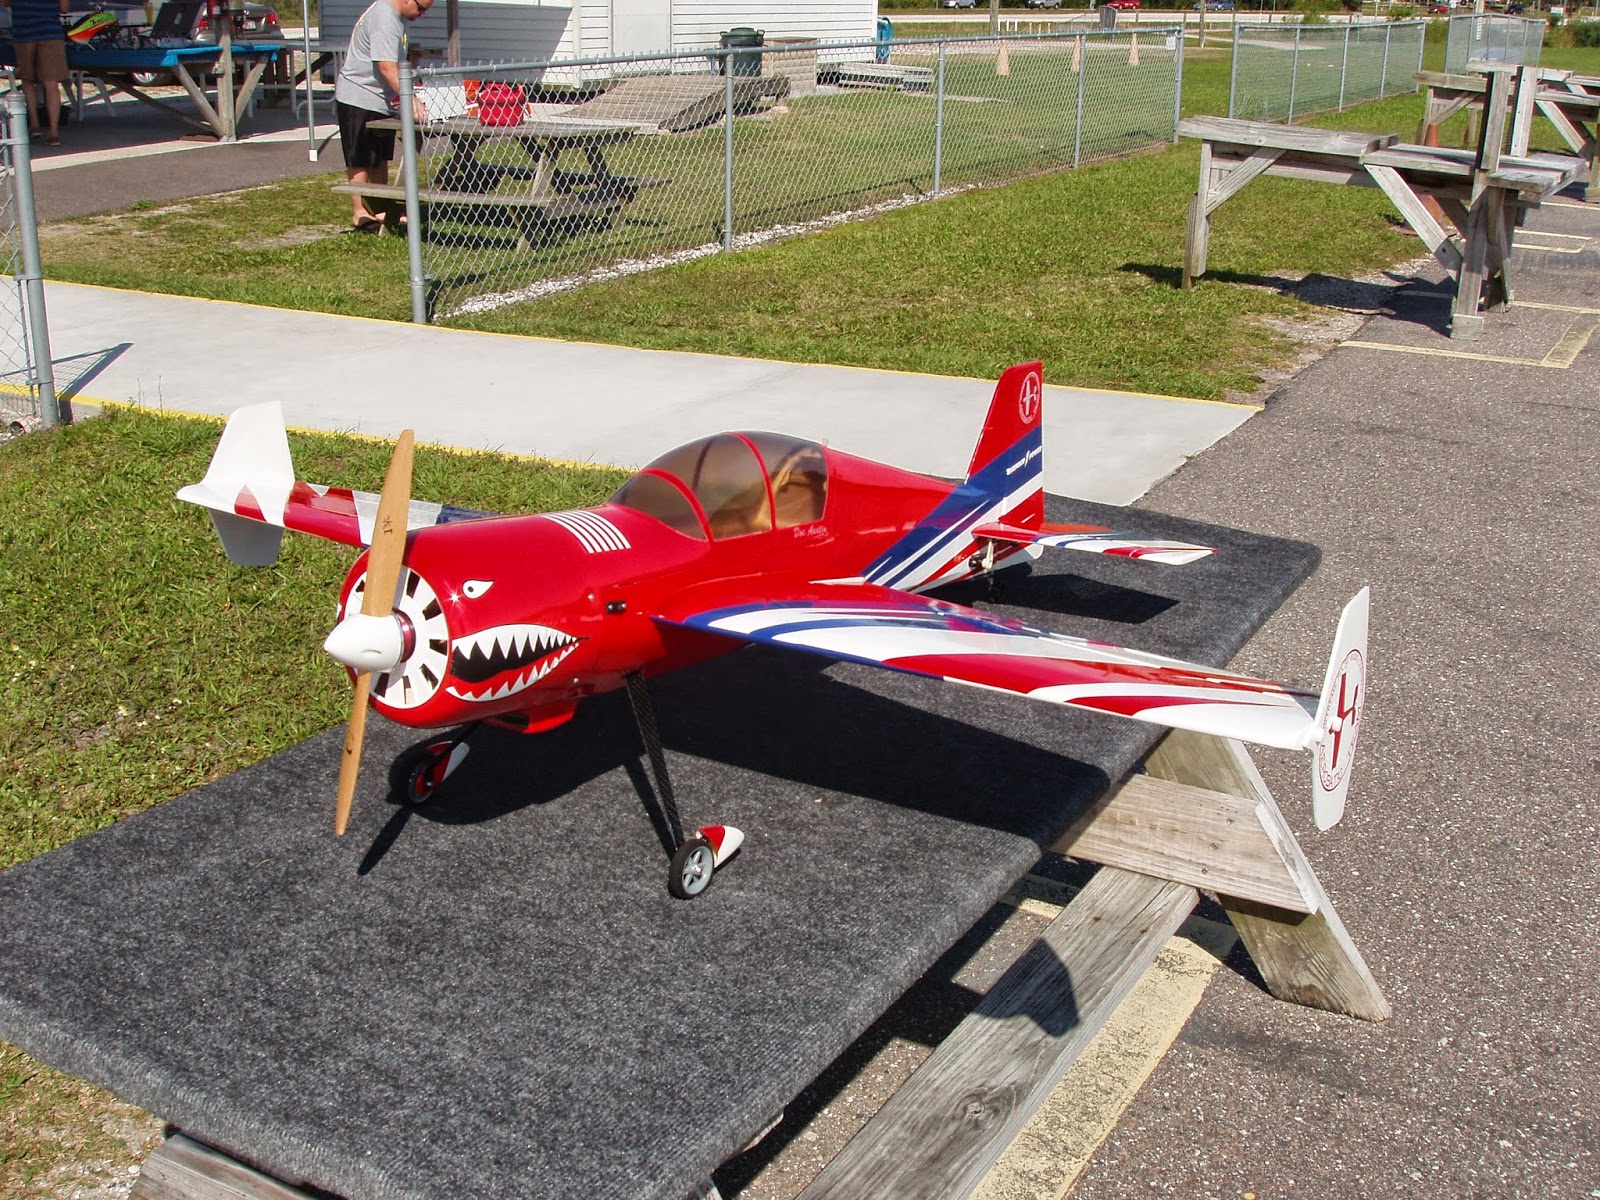
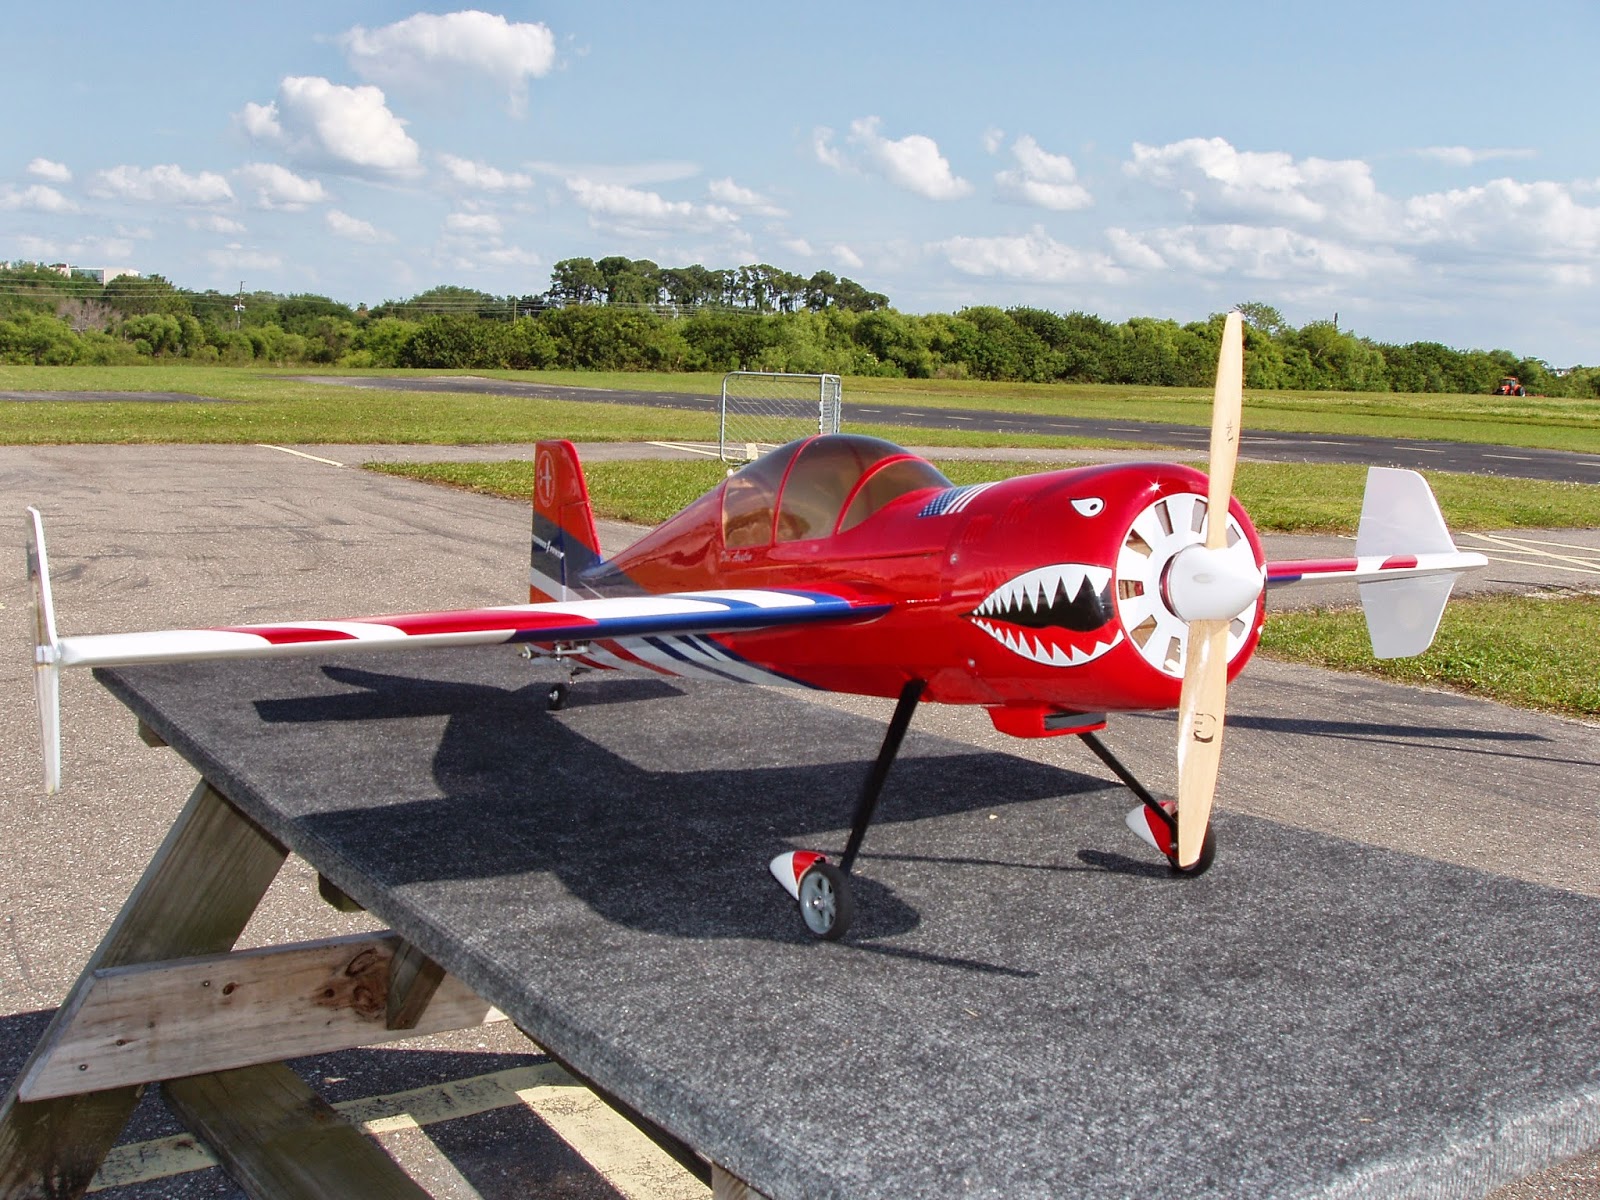
Next is another red, white, and blue version that is a bit a bit reminiscent of the new 60" Extra EXP scheme With two red, white and blue schemes it gets a bit confusing, you I just refer to this one as the "Splinter" scheme. I have to admit that while I like the Russian Thunder a lot, but "splinter" Yak is my favorite. On mine I added a 40 shark mouth decal that I had made up locally out of 3M high performance vinyl and it give the plane a pretty fierce look.
Opening The Kit
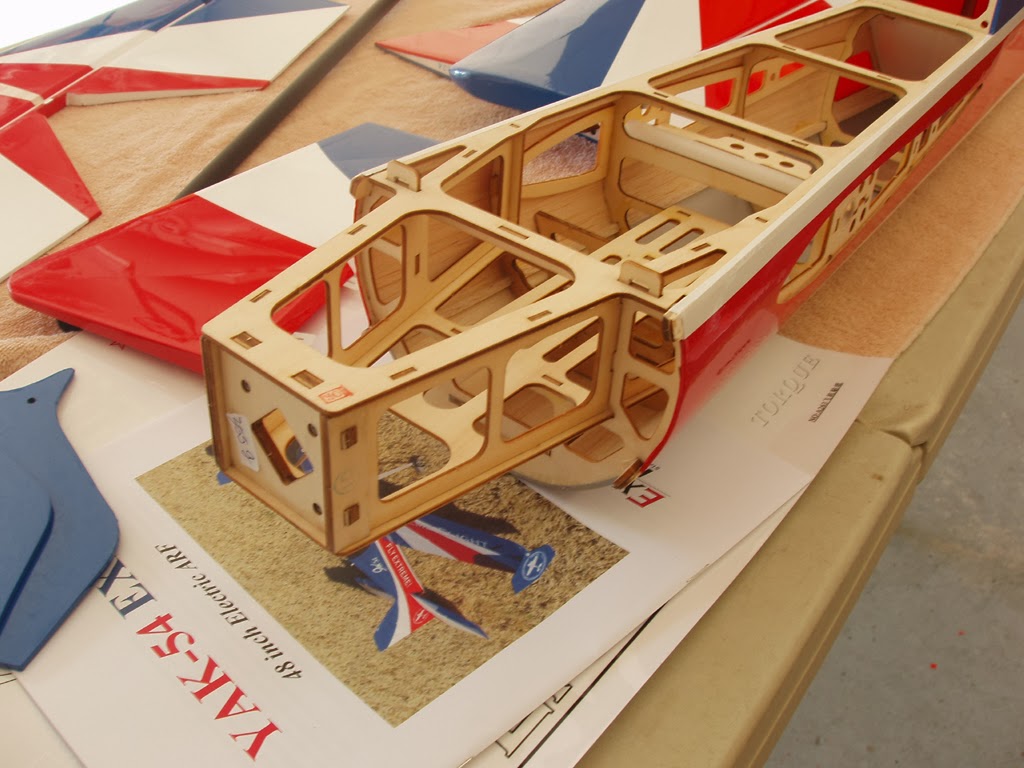
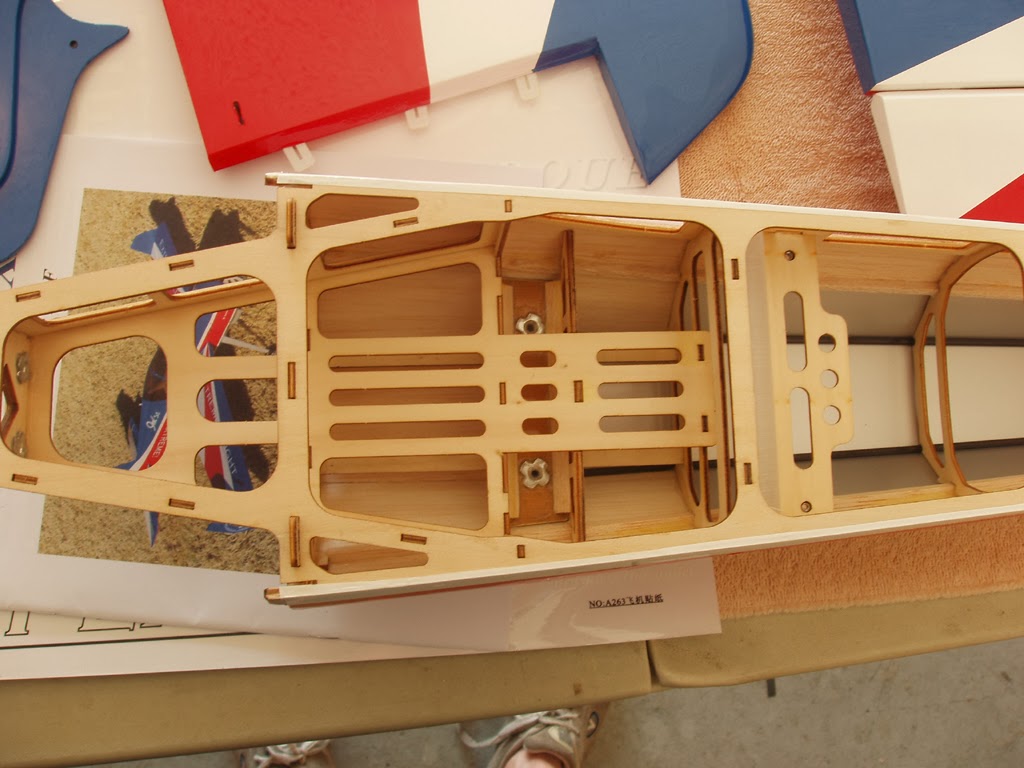
Like all EXPs, the quality of the kit itself is top shelf. Since the debut of the 48" Laser EXP and 64" MXS EXP, the factory has been using some newer construction techniques such as recessed wings and angled motor box sides. This makes for a stronger plane, and as is the case with the recessed wings, a better looking one too.
Covering
The covering on my example had one or two edges on the control surfaces that needed a little sealing down with the trim iron, but for the most part the work was awesome, and certainly a lot better than I could have done. Having done a lot of covering work back in the dark ages before quality ARFs, I can attest this would have been a difficult scheme to have put on the old way. I tend to be very obsessive about having my covering perfect, so it is always nice to get off to a good start like this.
Hardware
All the hardware is the same stuff we have been using on all the other EXPs, so you will be right at home assembling this plane. The dual ball link hardware for the push rods means that you set it up once and you will probably never have to tinker with it again for the lifetime of the aircraft.
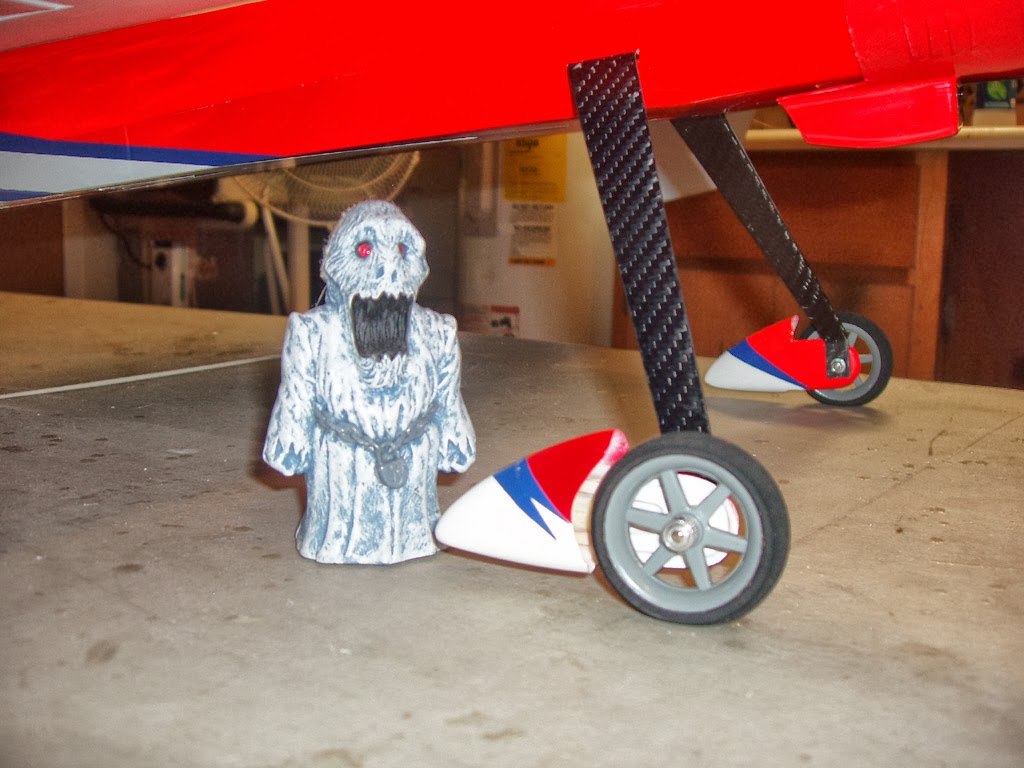
I especially like the lightweight Extreme Flight carbon tail wheel bracket, which could not be easier to install, maintain, or (if necessary) replace. The wheels and axles come straight out of the EXP hardware pack, and those work so well it is reassuring to have them on this plane as well.
Outside of that, it's all nuts and bolts, so everything is really pretty simple. This is actually more of a good thing that you might imagine. Complicated things can fall apart in a very spectacular and ugly way in the sky, so simple yet bulletproof is the best way as far as I can see. The Boss has come up with a good hardware pack for the EXPs. The stuff is light and strong, and I don't remember ever having a piece of it fail, outside of ripping the tail wheel assembly off in a full speed crash. Imagine that.
In the building frenzy I simply forgot to take pictures of the hardware pack, but if you check my other 48" blog reports, all the hardware is the same great stuff.
The wheel pants are a bit weird, but remember, this is a Yak. The pants are more like little spats (for lack of a better word) that smooth out the airflow coming off the backside of the wheel. I suppose that aerodynamically they work fine, but they sure look odd. Oh, wait, what did we expect on a Russian plane?
The Build
The Yak EXP goes together very much like the Extra and Laser EXP, and I have built so many of them that this plane was nearly second nature to assemble. The Yak went together pretty much effortlessly.
As always, the best bet is going to be to check Herc's Awesome EXP Build Videos, which you can find on the Extreme Flight website. I can't cover everything here, because actually seeing how it is done on video is a lot better than reading my blabbering about it. You know, seeing it is worth a billion words and all, and Herc does a great job with his videos.
The Boss has a nice little formula for cranking out and building Bad Ass airplanes, and mostly they all assemble in a similar fashion. If you have any questions, you can ask them on RC Groups Extreme Flight 48" Yak 54 EXP Tread, or send me a private message there.
Mounting the Tail
This is the one area of any build that stresses me out a bit. If you get the tail in crooked the plane is not going to fly straight. Basically, take your time, pin it into place, and then measure it over and over. If you get it wrong, you're screwed, so don't get it wrong.
Outside of gluing the tail, you can undo almost any other mistake you can make on the build without a lot of effort. Once it's in, though, getting the stab out is a tough job, so it's better to get it right the first time.
SET UP
The Boss pretty much figured out how he wanted all of this done with the Extra EXP. Steel push rods with ball links on both ends is the best way to get a tight connection between the servo and control surface that moves smoothly with no drag. Unlike other methods of attaching a push rod to the servo arm or control arm, ball links generally do not get sloppy or develop friction and drag over time. They just stay tight and operate smoothly, which is exactly what you want them to do and exactly why the Boss includes this kind of hardware.
Also worth noting is how close the servos are to the control surfaces. While weight is a consideration, more important is that a shorter push rod is going to be stiffer and flex less. This gives you a more direct and precise command of the control surface and absolutely no chance that it is going to do anything but exactly what you demand from it.
Before we get into the linkages and set up itself, here's a little more on ball links: You can over tighten them and induce drag. You don't want drag because that can interfere with the servo centering properly.
I like to use Dubro 2mm X 12mm hardened steel allen bolts for securing my ball links. For one thing, that allows me to use one single allen driver tool for every bolt and screw on the airplane. Less importantly, though still important enough, I like the way they look.
I also like to use a 2mm aircraft locking nut that I get from Micro fasteners. I tighten this down until I start to feel a little drag on the ball link. Then I take a standard 2mm hex nut and put it on over top of the lock nut and snug it down. I back the lock nut off into the hex nut while holding it and that locks them together forever. This technique is called "jam nutting," and if you put a drop of thick CA on the few exposed threads, those are not coming off even in a nuclear Holocaust.
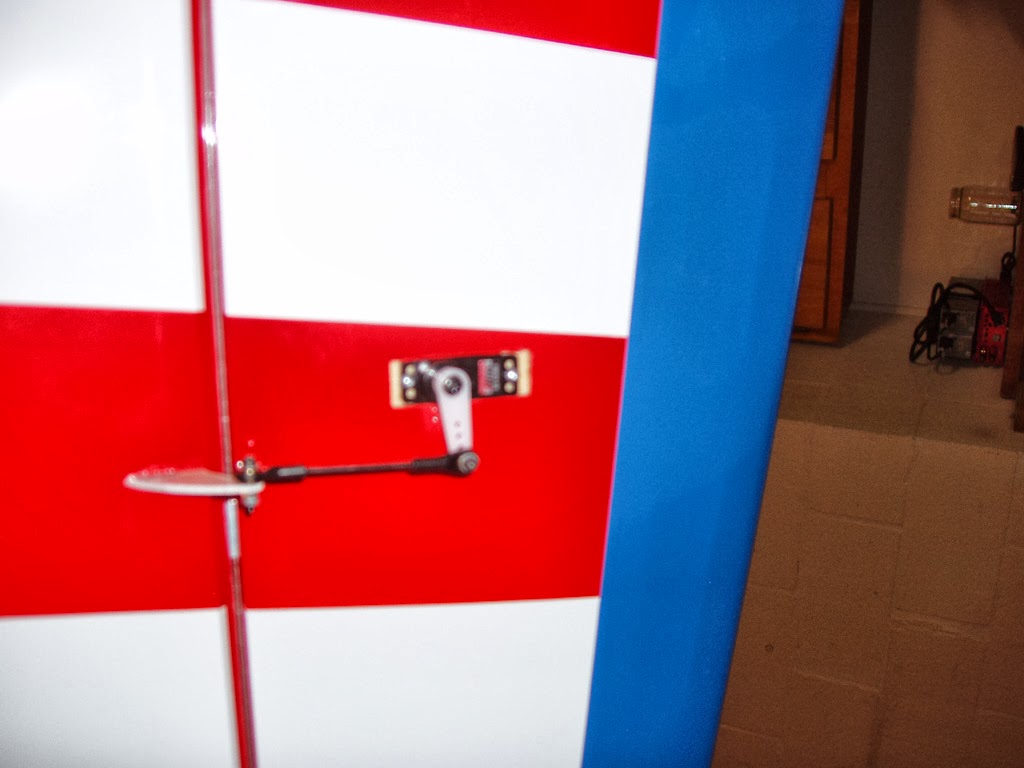
Ailerons
It sure seems like we have seen this before, doesn't it? Well, that's because we have on all of the other EXPs. This system works so well that The Boss just keeps using it. It's simple and bulletproof, and that's reason enough to do it again and again.
One thing I have been getting wrong on a lot of my previous EXPs Is putting the ball link on the wrong side of the control horn. I was using the old sport flyer technique of setting the push rod up to be completely straight when the servo is centered. In 3D, you run so much throw that you want the push rod straight at maximum deflection. This is the best geometry for getting maximum mechanical advantage out of the linkage when using full throws.
Here, so can see we use the longest servo arms that come with the Hi Tec HS65MG servo, and maxxed out the end points. This is pretty close to bevel-to-bevel, and it feels just right to me.
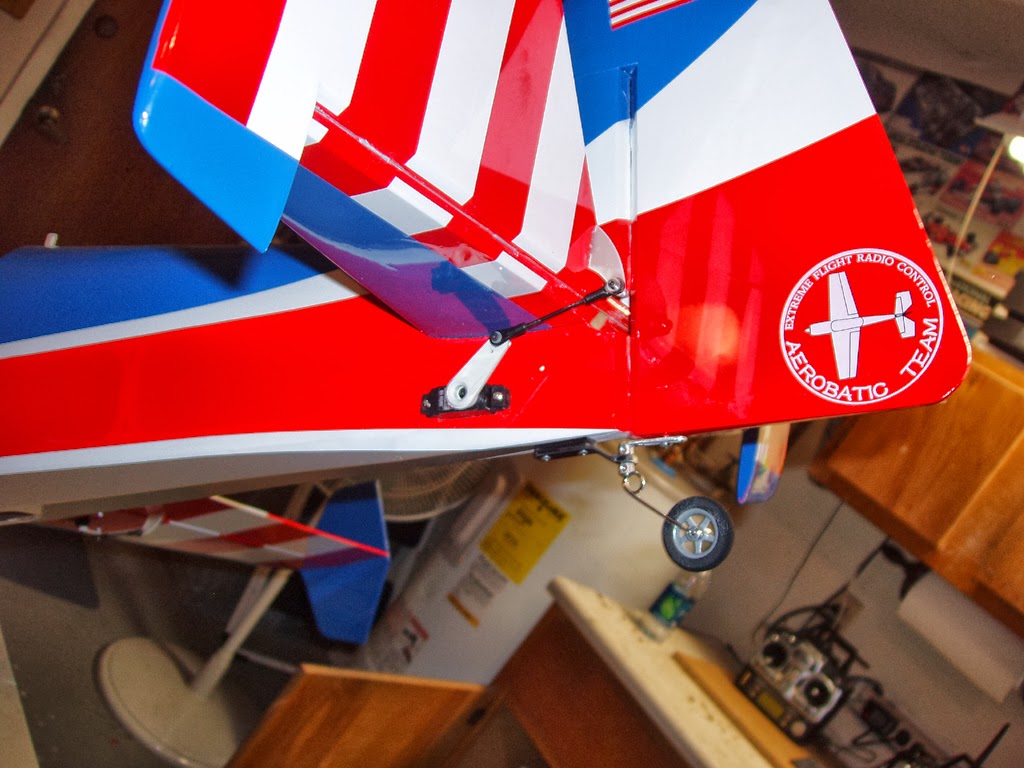
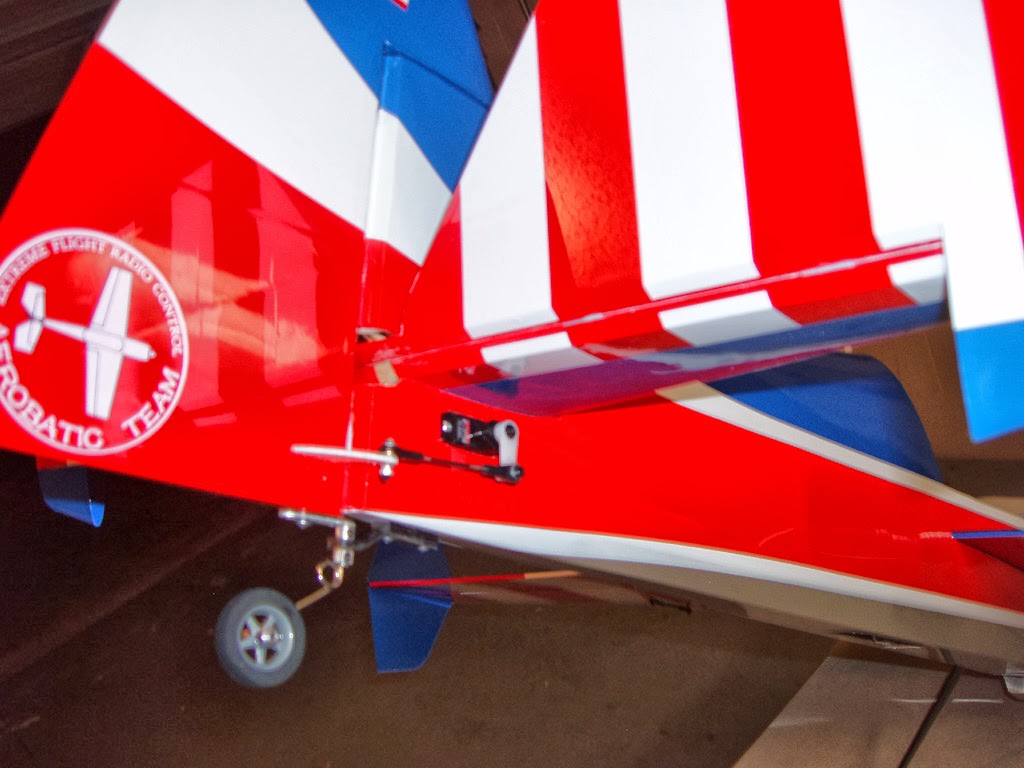
Elevator
Again, this looks just about like any other EXP, which is awesome because I know I can trust it, something that is really important on an elevator! Since I love big elevator throws, I used a Hi Tec HS85MG with the Dubro Heavy duty arm, and the ball link bolted to the second to the outside hole. With the end points maxxed, I am getting right at 88 degrees of up elevator. On the down side, I back off the end points so the control horn doesn't hit the bottom of the stab.
Rudder
Here I used one of the double sided arms that comes with the HS65MG servo, put it on straight (if it doesn't center, flip it over and use the other side), and snipped off the unused arm. Like this and with the end points maxxed out, you get just about the right amount of throw.
Rates, Expo and CG
Like always, follow the manual. The Boss puts a lot of time nd effort into developing the right set up for all the EXPs, so take advantage of that. Odds are pretty good that you might tweak one of two things to suit your own preference, but there is no better place to start than the set up from the manual. Generally I run my low aileron rates on all my EXPs just a little slower than the manual, but everything else is right out of the book,
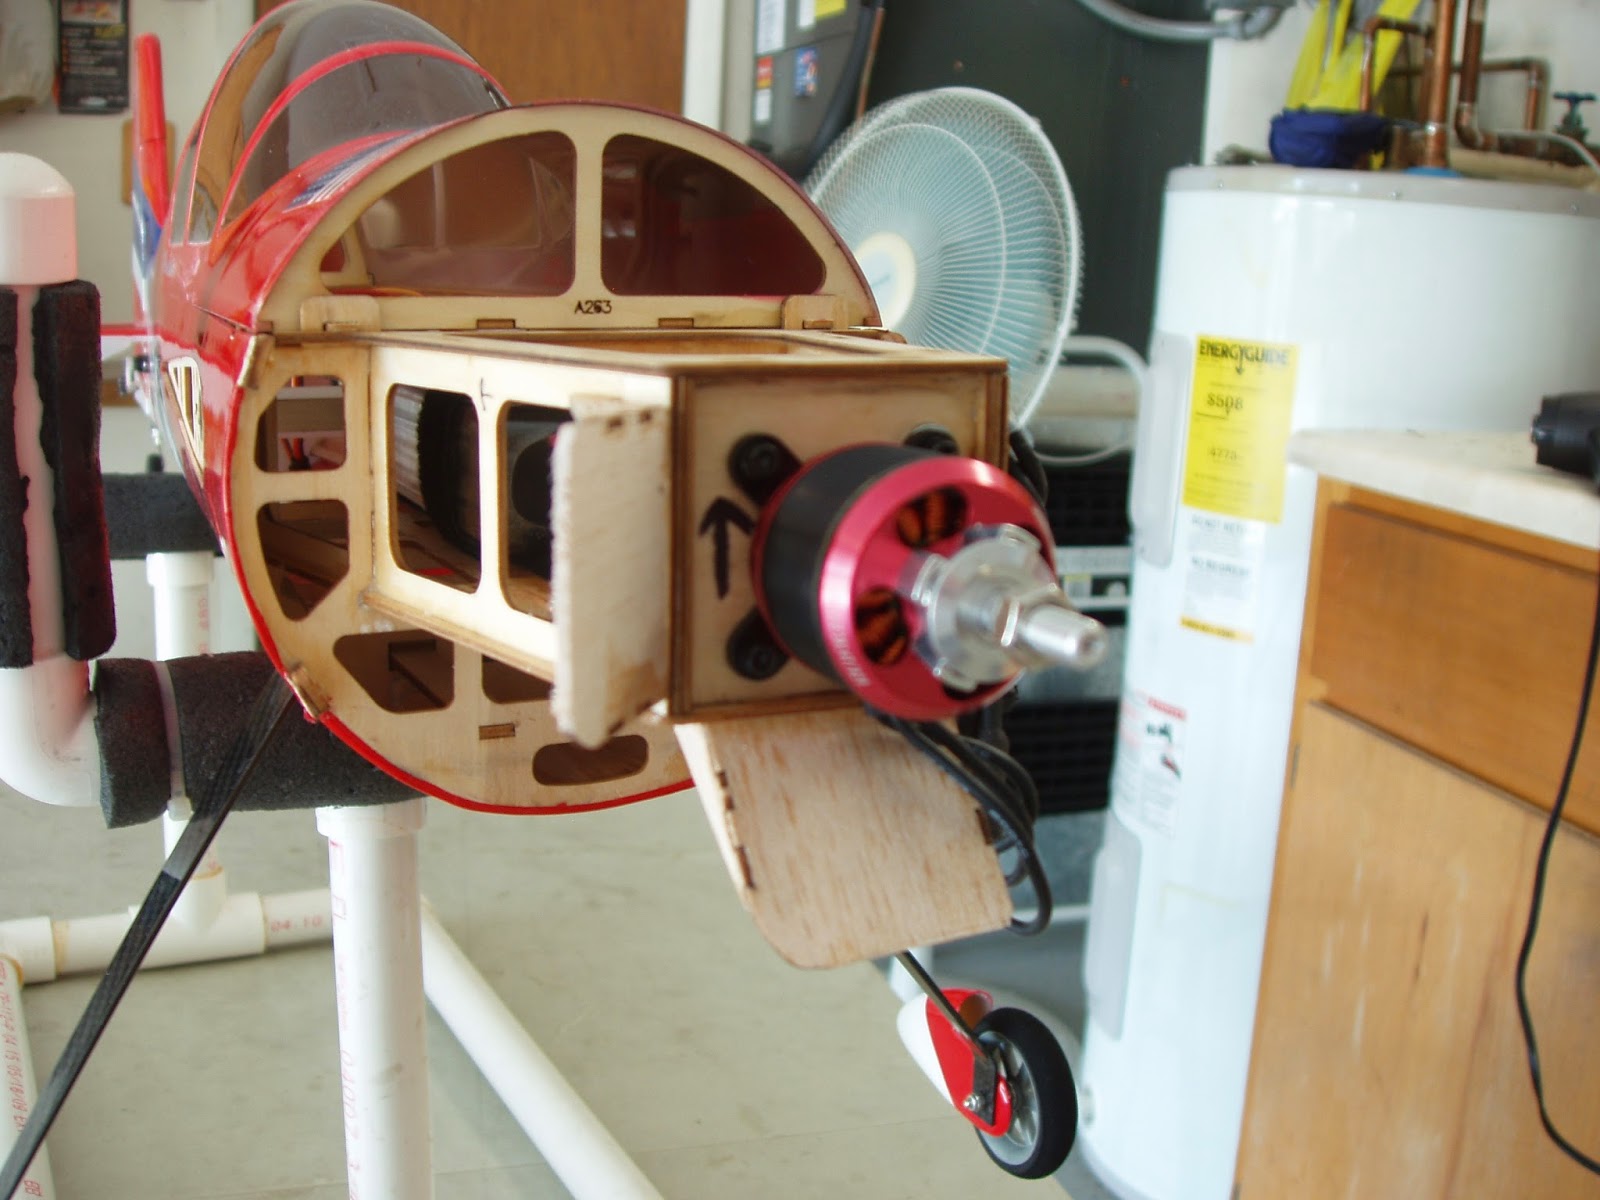
Power System Set Up
As always, nothing less than Extreme Flight Torque Motors and Airboss Elite ESCs will do for any of my projects. This is the Torque 2814 motor and Airboss 45, which is the same set up I use on all my 48" EXPs. The motor bolts right up to the firewall and the cooling slots on the back of the motor align perfectly with the cooling holes in the firewall. This gives the motor exceptional, unrestricted cooling airflow into the front of the motor, straight through and out the backside, then through the firewall.
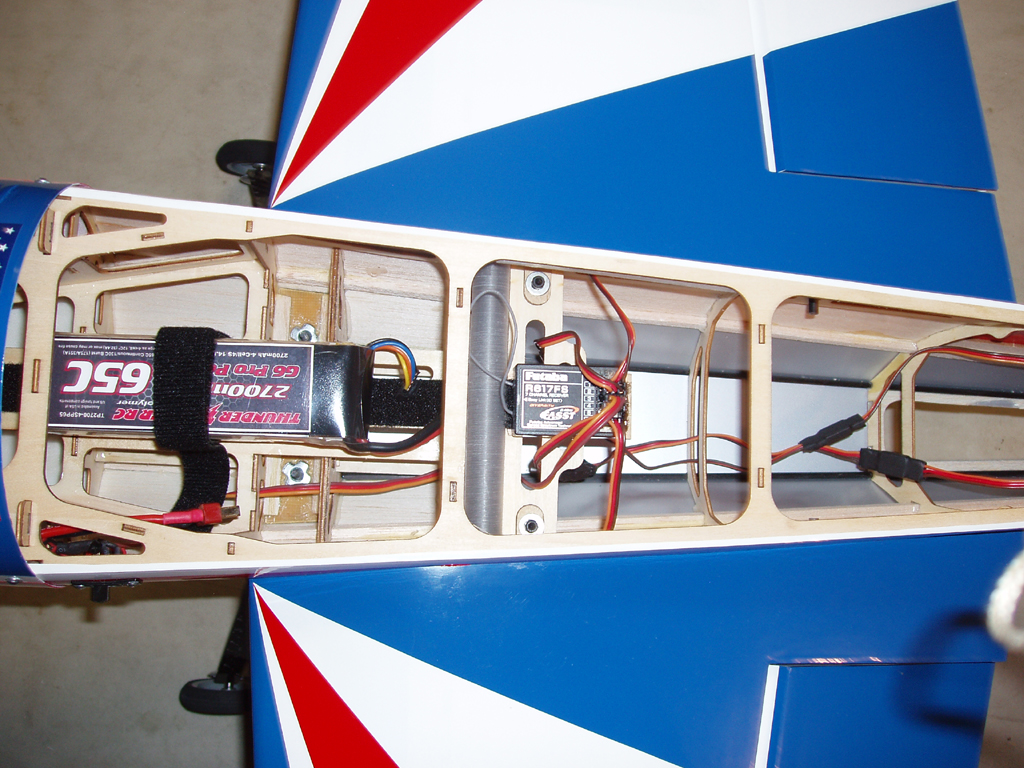
Radio Installation
I have always loved how The Boss has figured everything out for us. There's a little tray for the receiver, and when mounted there the aileron servos plug in with merely a 3" extension. This cuts down on the unnecessary spaghetti, and saves the weight of longer extensions.
As you can also see, the bulkheads have nice little openings to thread the wires through. This keeps them from slapping around as badly inside the fuselage during hard maneuvering. Some people dig the sound, and some don't. The beauty here is that you get to choose.
Of course, everyone has their own favorite method of securing their antennas. I like to use translucent plastic tubing I get from my local hobby shop. I rough them up with an Emory board and then thick CA them into place. Let these set up over night so you don't glue your antenna into the tube!
I had a pretty good idea of what to expect from the yak and I was not surprised by what I got. I liked it right away. I did one pass to check the trims and then just started flying it. As you'll see in the video, I was completely comfortable with the plane right from the start. A lot of this is confidence in Extreme Flight and The Boss' design work, but also, like all EXPs, the Yak is a reassuring airplane to fly. It is smooth and solid and it tells you that in no uncertain terms.
I figured it would be a lot like the Laser and Extra, and in a lot of ways it is. The big difference is that with the wing, stab and thrust all on one datum line, all the parts are on the same axis during rolls, snaps, spins and tumbles. In these sort of maneuvers it is very precise.
As you'll see in the video, slow and point rolls are really really crisp, and easy to get precise, in spite of the wind. It's all extremely axial, because of the central datum line.
The timing on snap maneuvers is a bit different and at first I had to be careful not to snap past where I wanted it to stop. This turned out to be more of a timing thing and after a few snap I had it figured out. The Yak seems to snap a bit more eagerly than the other EXPs, and when you hit the timing right it's pretty sweet.
The Yak is very predictable and nothing about it surprised me except it's willingness to snap roll on command. With the wing, stab and thrust all being on the same line, everything rolls, snaps, and spins on the same axis, and while not being an enginner, I am guessing that's why the snap timing is a little different on this plane. Like I said on the blog, it's just something you adapt to.
[video=vimeo;92003994]https://vimeo.com/92003994[/video]
This plane spins really nice, though I didn't try a flat spin yet. In the typical 3D spin (with down elevator instead of up), the Yak comes down in an absolutely perfect straight line. It does that spin so nice that it's a little unnerving. I kept taking it out early because it was spinning so nice I thought it might get stuck, but it would stop instantly once I let off the sticks.
The Yak does a solid knife edge, though I am creeping up on getting them lower.
Considering this plane has a big, round fuselage and a slab sided front to the cowling, harrier was much better than I was expecting. I think I will just have to get used to holding the nose up a little higher and this plane will harrier as good as the other EXPs. It's just a matter of adapting to something different.
Well worth noting is that I was comfortable flying the Yak hard right away. It has a very familiar feel to it, which makes sense because it's an EXP, after all
[video=vimeo;92068137]https://vimeo.com/92068137[/video]
Dialing In The CG
First, the Yak is not temperamental or hard to set up. It just rewards you more if you take the time to get it spot on. It's also simply a different kind of plane that flies a bit differently and likes a bit different set up. None of this is hard. It's the same thing you go through with any other 3D style plane, but with the Yak, having the right set up makes it really come alive. If you are lazy, this isn't the right plane for you, but if you take the time to get it right, it's an amazing airframe.
The Yak seems to be a bit different from the other EXPs in that it is a bit less forgiving on the center of gravity (CG) location. Initially I started off nose heavy, because I generally like them a little forward of having a neutral CG. A little nose heavy makes the plane track and groove better at high speed, but it also makes 3D a little bit more difficult. Everyone seems to prefer something different, and lately I have been moving my CGs back and trying to get closer to neutral.
[video=vimeo;76739103]https://vimeo.com/79824335[/video]
For this plane, that was a good plan. I just wasn't comfortable flying it really hard. It wasn't bad by any means, but I knew I was not getting the most I could out of the plane. The more I moved the battery pack back, the better the plane felt. Now I can drive it around all day with the nose pointed way up there, and turn it extremely hard on the rudder in a harrier, and both directions too.
Once I got the CG where I liked it, then it was a matter of learning to grab that elevator and hold the nose up as high as I could get it. That was the final step in gaining complete confidence in this airframe, emphasizing once again how critical set up is on all high performance planes.
I always suggest starting with the CG from the manual, but this time for experienced pilots, I recommend starting at the rear of what the manual calls for. That will get you really, really, close, and from there, it's a matter of personal preference where to put it. Don't be afraid to move that CG back, but do it in small increments. This way, if you get too tail heavy you can get it back down without a lot of drama, and then move the pack back forward.
I got mine too tail heavy and it was not a big deal to land, make the adjustment and then everything was perfect. I generally keep moving back until it gets too tail heavy, and then go back to where I was the flight before.
The Yak has me re-evaluating how I set the CG on my planes. I was already moving the pack back on my Extra EXPs, and now I think I am beginning to prefer something closer to a neutral CG instead of slightly ahead of that.
[video=vimeo;76739103]https://vimeo.com/76739103[/video]
Crazy spins
With the yak having all it's thrust and flying surfaces on a central datum line, everything snaps, rolls and spins on a single axis. Since the components are not fighting each other, the Yak is a bit more agile on that axis. As a result, I have dialed my aileron end point controls back from 150% to 125%. It rolls so fast that I simply don't need that much, and I can fly it smoother with a little less throw.
One thing you will see on the following video is a crazy spin I came up with. I did it by screwing up a blender and giving it the wrong control. As with any violent maneuver, speed is your friend, so I start by diving the plane straight down, and let it build up to terminal velocity. Yes, this is hard on the airframe, but the EXPs are so hearty that they can take it.
Then, I put the plane into a full right aileron roll heading straight down. From here, the drag on the ailerons slow the plane a bit, so you only want to do two or three turns before you slam in full right rudder and down elevator, and then hang on. The Yak goes absolutely batsnitt crazy. It spins so fast that I simply can't keep up with it and it never comes out pointed where I want it too. If you try this, I heartily suggest you leave yourself a fat margin to the ground, at least the first few times.
Go to 0:45 to see the spin. This one was a bit too low, but we're shooting more video today with Russian Thunder and we'll try to get another one.
[video=vimeo;76739052]https://vimeo.com/79824335[/video]