• If you are new to GiantScaleNews.com, please register, introduce yourself, and make yourself at home.

    We're 1st in Giant Scale RC because we've got the best membership on the internet! Take a look around and don't forget to register to get all of the benefits of GSN membership!

    Welcome!

3D Viper-ST 100-120cc scratch build......it continues!

Terryscustom

640cc Uber Pimp
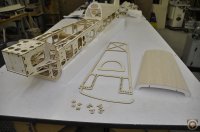
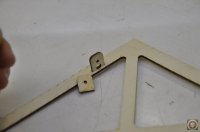
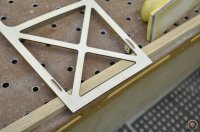
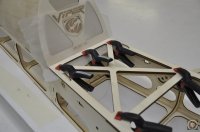
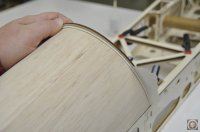
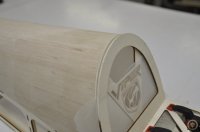
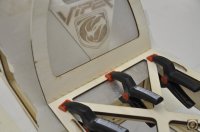
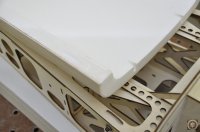
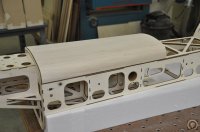
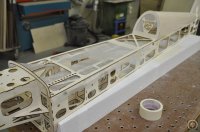
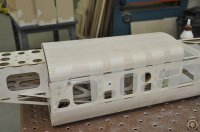
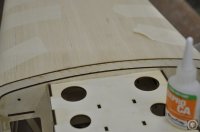
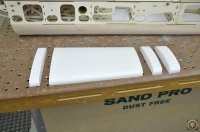
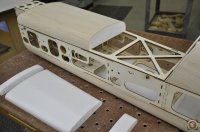
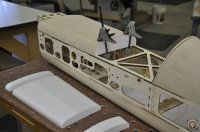
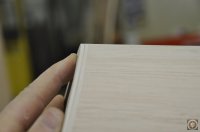
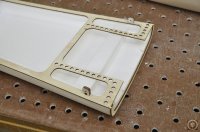
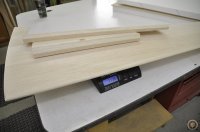
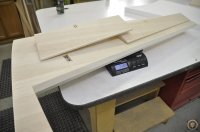
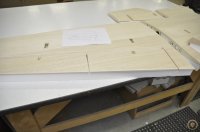
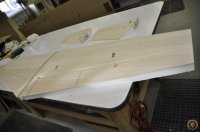
Next is the optional split ailerons and the final end caps. Always cool when the last of the foam is covered and you know you're almost done building!!

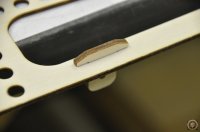
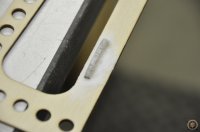
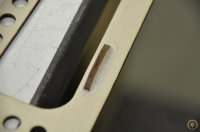
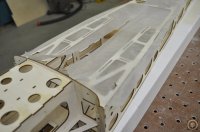
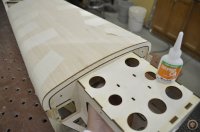
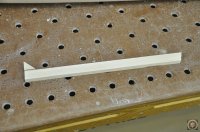
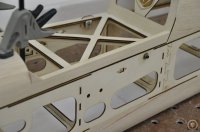
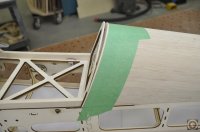
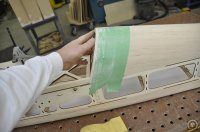
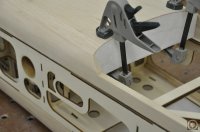
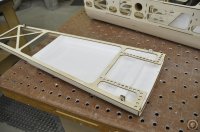
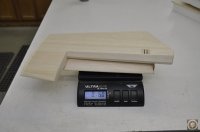
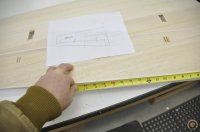
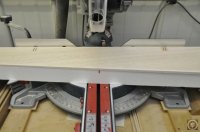
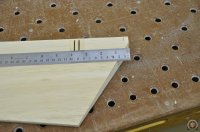
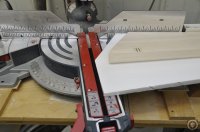
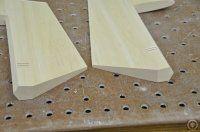
I use my miter saw to split the ailerons. The cut is 90 degrees form the hinge line, but you must put the aileron back into the foam what was cut out when the ailerons were cut out. That way the cut will be perpendicular to the horizontal center of the wing (see pics). Mark the end of the inner aileron and then 3/16" out from there.

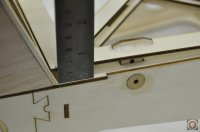
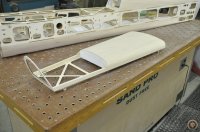
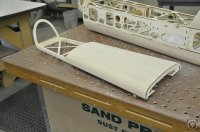
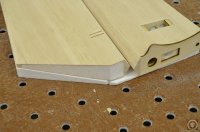
On the elevator you also have to remove some stock from the inner edge to give plenty of clearance next to the fuselage. I normally take off 3/8". All of these foam areas that are exposed now get sheeted with 1/16" balsa scraps from the sheeting process.
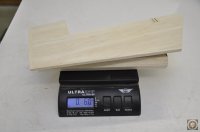
_DSC0686.JPG
 

Attachments

  • _DSC0678.JPG
    _DSC0678.JPG
    68.5 KB · Views: 282
  • _DSC0679.JPG
    _DSC0679.JPG
    77.5 KB · Views: 284
  • _DSC0680.JPG
    _DSC0680.JPG
    66.9 KB · Views: 274
  • _DSC0681.JPG
    _DSC0681.JPG
    107.4 KB · Views: 318
  • _DSC0682.JPG
    _DSC0682.JPG
    90.9 KB · Views: 299
  • _DSC0683.JPG
    _DSC0683.JPG
    94.3 KB · Views: 278
  • _DSC0684.JPG
    _DSC0684.JPG
    73.5 KB · Views: 356
  • _DSC0685.JPG
    _DSC0685.JPG
    90.7 KB · Views: 375
Last edited:

Terryscustom

640cc Uber Pimp
Next up for today is to start the hatch assembly. One thing I want to note is that the belly pan, turtle deck and canopy deck sheeted parts have only been sanded just short of the edges. I also have done NO sanding on the outside of the fuse or the joints where these parts attach to it. It comes out much better if you wait and do this all in one step......soon.

The hatch is also a part that new builders often worry about (myself included) so I've tried to take every step to make it easy and painless. The canopy mounting tabs are birch ply so they need to be sanded slightly until they are a nice slightly snug fit into the canopy bottom plate. Since I'm using the new titebond medium CA glue on this build I glued in the tabs from the top and applied some micro-balloons to form a fillet and act as a kicker. Then there is a plywood doubler that gets installed on the bottom side and inside of the tabs. Put a small tab of glue with micro-balloons on the sides to form a fillet there as well. Make sure that no glue is on the outsides of the tabs.

As mentioned in the turtle deck installation the canopy bottom plate is a little long to allow you some fudge room. To get this to size, put the back tabs in the slots on top of the fuse. Now use a straight edge to make a line on the canopy deck on both sides. Mark a straight line across the back. Use a sanding block on the back edge and when you are just shy of the pencil line, angle to match the canopy deck. With wax paper between the deck and turtle deck, glue in with medium CA, let soak for a minute and then use some kicker. After kicker, apply another small bead about 1/2" from each edge and apply some micro-balloons.

Next install the front edge of the canopy deck. With wax paper on the ends clamp the front arch in place and apply a drop of medium CA. Let it soak in completely. Apply another drop and once soaked in use some kicker. The base assembly of the of the canopy deck is now complete and ready for foam.

_DSC0709.JPG
 

Attachments

  • _DSC0688.JPG
    _DSC0688.JPG
    80.4 KB · Views: 277
  • _DSC0689.JPG
    _DSC0689.JPG
    64.8 KB · Views: 271
  • _DSC0690.JPG
    _DSC0690.JPG
    53.4 KB · Views: 254
  • _DSC0691.JPG
    _DSC0691.JPG
    50.1 KB · Views: 293
  • _DSC0692.JPG
    _DSC0692.JPG
    51.5 KB · Views: 274
  • _DSC0693.JPG
    _DSC0693.JPG
    43.1 KB · Views: 267
  • _DSC0694.JPG
    _DSC0694.JPG
    51.5 KB · Views: 268
  • _DSC0695.JPG
    _DSC0695.JPG
    61.1 KB · Views: 272
  • _DSC0696.JPG
    _DSC0696.JPG
    88.4 KB · Views: 270
  • _DSC0697.JPG
    _DSC0697.JPG
    66.5 KB · Views: 285
  • _DSC0698.JPG
    _DSC0698.JPG
    90.3 KB · Views: 254
  • _DSC0699.JPG
    _DSC0699.JPG
    69.6 KB · Views: 245
  • _DSC0700.JPG
    _DSC0700.JPG
    66.2 KB · Views: 286
  • _DSC0701.JPG
    _DSC0701.JPG
    49.9 KB · Views: 286
  • _DSC0702.JPG
    _DSC0702.JPG
    59.1 KB · Views: 258
  • _DSC0703.JPG
    _DSC0703.JPG
    65.3 KB · Views: 253
  • _DSC0704.JPG
    _DSC0704.JPG
    62.3 KB · Views: 247
  • _DSC0705.JPG
    _DSC0705.JPG
    96 KB · Views: 276
  • _DSC0706.JPG
    _DSC0706.JPG
    98.3 KB · Views: 253
  • _DSC0707.JPG
    _DSC0707.JPG
    60.5 KB · Views: 242
  • _DSC0708.JPG
    _DSC0708.JPG
    53.1 KB · Views: 271

Yakman

70cc twin V2
I have always been an ARF guy, until seeing this build, talking to Terry, and seeing the vids posted here, I am more than confident you could build one! I have known Terry personally now for a few years, when he says he designed it for a simple build, he means it! I myself am getting one of these kits to build, and to be honest looking really forward to doing it! If you even have an inkling to build or repair anything, you can do this! Also with Fibertech cutting the foam for the kits, there is very little work to do to get things covered! I assure you, if your looking into kits, Start with this one! Terry, Lori, and Rick have done 50% of the work for you in design and laser cutting, so well, all you really need to do is glue things together, and sand a little. If I can do this- You Can Too!
You bet i can, I have built many kits since 1991 or so.
 

Terryscustom

640cc Uber Pimp
Although I would probably not recommend a DA120 in this plane without making the wing spar extender and carbon laminates a mandatory update, I've heard the GP is similar but maybe smoother I'd still recommend these things in the build....... Here is the cowl width. The engine is offset to the left (right when looking at the front) by 5/16". The inside of the cowl is about 12 5/8" wide. Will be a little close for engines with straight plugs, but perfect fit for 100cc+ with angled plugs.

Looking at this again, if someone wanted to use a da120 or gp123 I would strongly suggest you contact me and let me cut an additional engine box support to fit inside the engine box. I would also potentially shrink or remove the lightening holes in the engine box and just behind F1 former. I've seen DA120's break hinges and mess up sevos with the power and vibration they have, that means lots of extra forces on the engine box that the 100 / 111 engines don't have. The plane was actually designed to perform like a typical 120 powered plane while using the plentiful supply of slightly smaller engines on the market.

_DSC0687.JPG
 
Last edited:
I'm loving this build. hey terry I'll take that one when you get it in rdy to cover forum lol

Sent from my SAMSUNG-SGH-I337 using Tapatalk
 

Terryscustom

640cc Uber Pimp
I took a couple hours this AM to work on the canopy assembly. Pictures really tell a lot so I'll abbreviate the details:

- Install the canopy plate and clamp down solid to the top of the fuse. Drill from the outside of the fuse with a 9/64 bit and drill straight! This will drill through the little longeron spacer that was installed a long time ago and align all the holes.
- Remove the canopy and drill the mounting tabs with an 11/64
- Install 6-32 blind nuts, high quality and test fit the screws. If there is any friction, chase the blind nuts with a tap.
- Install canopy plate with screws and wax paper under where the foam will be installed.
- Test fit and glue the canopy on with wood glue but only glue the bottom.....NOT the front arch. Tape securely.
- Reach inside the fuse and push the center of the foam flush with the center of the front plywood arch. Tack with foam safe CA.
- Repeat that at several places around the arch. When wood glue is dry, remove the canopy and glue the front arch from the bottom side with foam safe CA as well.
- In between glue drying is a good time to rough cut the canopy shell. Cut close to each end and at the bottom you will see a line that I scratched into the canopy plug. Do not cut above that line! You will see that there is some flexibility with the placement of the shell to suit your own test. I normally set it so that I trim off about 1" off the back edge. We'll get back to the shell installation later...
- I like to take a couple of slices out of the inside scrap of the canopy foam and install them as ribs. The rear one is taken about 3" in from the back and fits nicely right at the back edge of the canopy foam. This one helps push out the sides flush with the fuse top and is lighter than plywood structure that would otherwise be needed. The forward one is an option and it is mainly just helping to keep the split front in shape for a long life.
- Install some 3/8" x 3/4" rails along the edge between the foam and back plate. Make sure you do this while the canopy is attached to the fuselage with it's mounting screws so you don't get a twist!!
_DSC0740.JPG
 

Attachments

  • _DSC0710.JPG
    _DSC0710.JPG
    109.5 KB · Views: 292
  • _DSC0711.JPG
    _DSC0711.JPG
    48.9 KB · Views: 253
  • _DSC0712.JPG
    _DSC0712.JPG
    61.2 KB · Views: 298
  • _DSC0713.JPG
    _DSC0713.JPG
    41.8 KB · Views: 234
  • _DSC0714.JPG
    _DSC0714.JPG
    80.1 KB · Views: 247
  • _DSC0715.JPG
    _DSC0715.JPG
    65.6 KB · Views: 264
  • _DSC0716.JPG
    _DSC0716.JPG
    80.2 KB · Views: 281
  • _DSC0717.JPG
    _DSC0717.JPG
    79 KB · Views: 280
  • _DSC0718.JPG
    _DSC0718.JPG
    88.9 KB · Views: 254
  • _DSC0719.JPG
    _DSC0719.JPG
    80.6 KB · Views: 261
  • _DSC0720.JPG
    _DSC0720.JPG
    44.3 KB · Views: 244
  • _DSC0721.JPG
    _DSC0721.JPG
    43.6 KB · Views: 282
  • _DSC0722.JPG
    _DSC0722.JPG
    75.3 KB · Views: 226
  • _DSC0723.JPG
    _DSC0723.JPG
    76.3 KB · Views: 229
  • _DSC0724.JPG
    _DSC0724.JPG
    71 KB · Views: 218
  • _DSC0725.JPG
    _DSC0725.JPG
    72.3 KB · Views: 270
  • _DSC0726.JPG
    _DSC0726.JPG
    53.3 KB · Views: 213
  • _DSC0727.JPG
    _DSC0727.JPG
    94.6 KB · Views: 254
  • _DSC0728.JPG
    _DSC0728.JPG
    91.6 KB · Views: 230
  • _DSC0729.JPG
    _DSC0729.JPG
    88.1 KB · Views: 286
  • _DSC0730.JPG
    _DSC0730.JPG
    121.4 KB · Views: 255
  • _DSC0731.JPG
    _DSC0731.JPG
    74 KB · Views: 231
  • _DSC0732.JPG
    _DSC0732.JPG
    75.8 KB · Views: 219
  • _DSC0733.JPG
    _DSC0733.JPG
    91.4 KB · Views: 262
  • _DSC0734.JPG
    _DSC0734.JPG
    37.9 KB · Views: 217
  • _DSC0735.JPG
    _DSC0735.JPG
    71.6 KB · Views: 261
  • _DSC0736.JPG
    _DSC0736.JPG
    107.9 KB · Views: 259
  • _DSC0737.JPG
    _DSC0737.JPG
    103.3 KB · Views: 274
  • _DSC0738.JPG
    _DSC0738.JPG
    100.5 KB · Views: 223
  • _DSC0739.JPG
    _DSC0739.JPG
    107.3 KB · Views: 274

Terryscustom

640cc Uber Pimp
OK, we are just about ready to do the sanding on the fuse and the final sanding before covering and hinging. There is nothing other than the canopy shell and canopy glass left to install on the plane so I thought it would be a good time for a preliminary weigh in. I've beefed up a few areas on the kit version and since this is the first one and has no lightening, and also has some added strength weight with the carbon.....it's a good candidate for worst case on weight.

Fuse = 4lb 6.5
Rudd = 5.2
L Stab = 6
R Stab = 6
L Wing = 1lb 13.4
R Wing = 1lb 13.6
Cowl = 15.5

Total 10lb 13 oz

Paint, covering, 100 / 111cc engine, mufflers servos all wiring, batteries, spinner, prop, gear, wheels and all the fixin's has been averaging 15lb +/-.

So, with no lightening at all on the plane we are looking at 26lb RFT. On the Yellow Viper prototype I think I took out about a pound of weight in the coring of the belly, ailerons, elevators and rudder. I may core out the belly of this fuse to save about 7 oz. but I'll leave the rest to ensure that the CG comes out exactly as the others did.
 

Attachments

  • _DSC0741.JPG
    _DSC0741.JPG
    82.5 KB · Views: 204
  • _DSC0742.JPG
    _DSC0742.JPG
    55.4 KB · Views: 216
  • _DSC0743.JPG
    _DSC0743.JPG
    53.9 KB · Views: 401
  • _DSC0744.JPG
    _DSC0744.JPG
    57.1 KB · Views: 414
  • _DSC0745.JPG
    _DSC0745.JPG
    70.2 KB · Views: 219
  • _DSC0746.JPG
    _DSC0746.JPG
    73.7 KB · Views: 206
  • _DSC0747.jpg
    _DSC0747.jpg
    42.1 KB · Views: 222

Skyluc

50cc
It definitely would be more than enough. Personally the DA100L and DLE111 are perfect. I've got this one with a DLE120 and it's really exciting once the engine breaks in, but it is also a very smooth engine. Does anyone have a width from cap to cap on a GP123 engine?

The GP123 is 12" width from cap to cap
 

Terryscustom

640cc Uber Pimp
Should theoretically fit then but cap would be extremely close. May have to put some "fuzzy" side velcro on the inside of the cowl to keep it from rubbing.
 
Top