• If you are new to GiantScaleNews.com, please register, introduce yourself, and make yourself at home.

    We're 1st in Giant Scale RC because we've got the best membership on the internet! Take a look around and don't forget to register to get all of the benefits of GSN membership!

    Welcome!

3D Viper-ST 100-120cc scratch build......it continues!

tylerzx9r

100cc
Easy to see, this is for advanced builders.
I have always been an ARF guy, until seeing this build, talking to Terry, and seeing the vids posted here, I am more than confident you could build one! I have known Terry personally now for a few years, when he says he designed it for a simple build, he means it! I myself am getting one of these kits to build, and to be honest looking really forward to doing it! If you even have an inkling to build or repair anything, you can do this! Also with Fibertech cutting the foam for the kits, there is very little work to do to get things covered! I assure you, if your looking into kits, Start with this one! Terry, Lori, and Rick have done 50% of the work for you in design and laser cutting, so well, all you really need to do is glue things together, and sand a little. If I can do this- You Can Too!
 

tylerzx9r

100cc
I wish I has this kind of time and talent.. I'm itching to build a kit or a short kit but just don't have the time

Sent from my SAMSUNG-SGH-I337 using Tapatalk
If your itching, PULL The TRIGGER on this one, You won't regret it! Besides- You will have much more enjoyment in a plane when you know you assembled the thing to life! As Terry has stated several times, you only really need a few solid days, he has already done most of the work! the kit will go together so well you will be amazed! You won't find another kit out there this nice for this price!
 

Terryscustom

640cc Uber Pimp
Tyler is doing a wonderful job as my new marketing director:yesss:

Just kidding, I know you are pumped! Can't wait till you get to come up here for a weekend build session. Paul is kicking around doing that as well sometime down the road.
 
I'm sure thinking about one this winter... terry is a gp123 to much for it or would a 111 be plenty

Sent from my SAMSUNG-SGH-I337 using Tapatalk
 

Terryscustom

640cc Uber Pimp
I'm sure thinking about one this winter... terry is a gp123 to much for it or would a 111 be plenty

Sent from my SAMSUNG-SGH-I337 using Tapatalk

It definitely would be more than enough. Personally the DA100L and DLE111 are perfect. I've got this one with a DLE120 and it's really exciting once the engine breaks in, but it is also a very smooth engine. Does anyone have a width from cap to cap on a GP123 engine?


ericb

Team WTFO
GSN Contributor
Get your order in now guys. These are amazing kits. If you build one of these, everything else will seem sub par. Kind of like "why doesn't everybody make a kit this nice".? Paul and Tyler, let me know when you are coming and I will help out if I can.
 

Terryscustom

640cc Uber Pimp
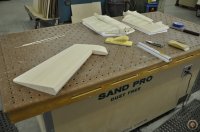
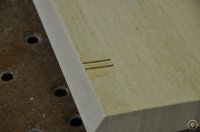
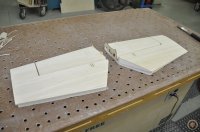
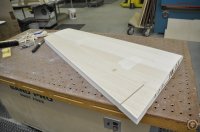
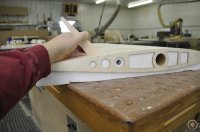
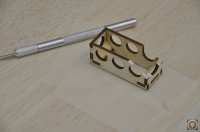
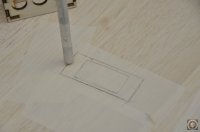
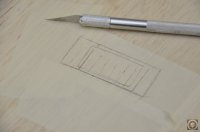
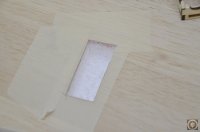
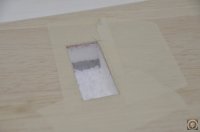
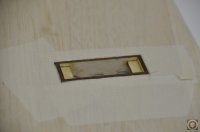
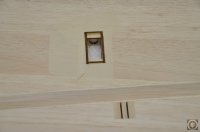
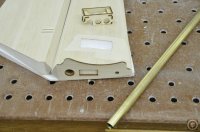
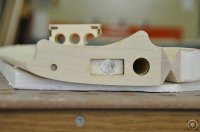
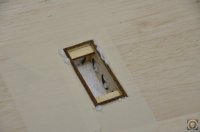
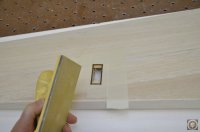
Next up is servo boxes. I assembled them earlier so they are ready to install. I had already laid out the location for the boxes on some masking tape. The installation is very simple. Set the box upside down on the tape and trace around it with the exacto knife. Score along the tape line a couple of times until you cut through the sheeting. Then cut to the depth of the blade similar to what was done when installing the control horn blocks. Make sure the cuts are straight down / perpendicular to the face. When cut all around, cut across a few times. Then I use a shop vac and a knife.....pluck out the middle and let the vac suck up the scraps. Scrape the bottom of the hole with the blade tip until the bottom of the hole is even. Test fit the box and make sure it fits, it should fit snug but you should not have to force it in place.

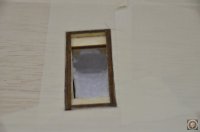
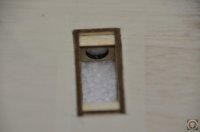
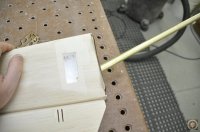
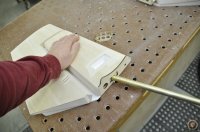
Before installing the stab boxes use the brass tube and cut a wire chase hole for the servo wire. Easier to do now than after the servo box is installed. Once all holes are cut and boxes are test fit, the boxes are installed with quick poly glue. Use a popsicle stick to apply glue evenly to the sides (not bottom) of the servo box hole. Make sure it is thin, and spread evenly. Mist the box itself with water and install the box. Check on them every couple minutes for 10-15 minutes and when the glue foams up into the hole, use a stick and push down the bubbles. If you don't do this it is more work to remove it after the glue has cured.

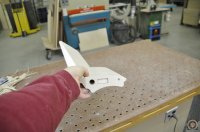
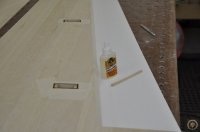
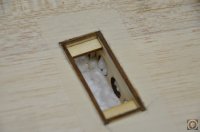
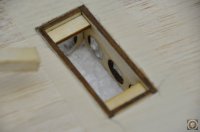
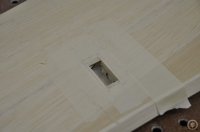
After the about 30 minutes or so (or as soon as the glue is not sticky when you touch it) you can sand the top of the boxes flush. Apply some more tape around the box so that you don't accidentally sand into the sheeting. Sand the box down to the surface of the tape. Remove the tape and sand with the grain until the top of the box is flush with the sheeting.

_DSC0653.JPG
_DSC0677.JPG
 

Attachments

  • _DSC0648.JPG
    _DSC0648.JPG
    97.9 KB · Views: 280
  • _DSC0649.JPG
    _DSC0649.JPG
    77.1 KB · Views: 300
  • _DSC0650.JPG
    _DSC0650.JPG
    57 KB · Views: 270
  • _DSC0651.JPG
    _DSC0651.JPG
    66.8 KB · Views: 255
  • _DSC0652.JPG
    _DSC0652.JPG
    99.9 KB · Views: 245
  • _DSC0654.JPG
    _DSC0654.JPG
    92.8 KB · Views: 255
  • _DSC0655.JPG
    _DSC0655.JPG
    79.4 KB · Views: 268
  • _DSC0656.JPG
    _DSC0656.JPG
    75 KB · Views: 276
  • _DSC0657.JPG
    _DSC0657.JPG
    61.5 KB · Views: 242
  • _DSC0658.JPG
    _DSC0658.JPG
    50.5 KB · Views: 263
  • _DSC0659.JPG
    _DSC0659.JPG
    51.6 KB · Views: 237
  • _DSC0660.JPG
    _DSC0660.JPG
    48.7 KB · Views: 267
  • _DSC0661.JPG
    _DSC0661.JPG
    38 KB · Views: 252
  • _DSC0662.JPG
    _DSC0662.JPG
    38.6 KB · Views: 275
  • _DSC0663.JPG
    _DSC0663.JPG
    38.2 KB · Views: 270
  • _DSC0664.JPG
    _DSC0664.JPG
    54.4 KB · Views: 280
  • _DSC0665.JPG
    _DSC0665.JPG
    57.1 KB · Views: 261
  • _DSC0666.JPG
    _DSC0666.JPG
    32.3 KB · Views: 255
  • _DSC0667.JPG
    _DSC0667.JPG
    58.3 KB · Views: 281
  • _DSC0668.JPG
    _DSC0668.JPG
    51.1 KB · Views: 299
  • _DSC0669.JPG
    _DSC0669.JPG
    101.9 KB · Views: 294
  • _DSC0670.JPG
    _DSC0670.JPG
    81.1 KB · Views: 291
  • _DSC0671.JPG
    _DSC0671.JPG
    97.7 KB · Views: 279
  • _DSC0672.JPG
    _DSC0672.JPG
    56.6 KB · Views: 300
  • _DSC0673.JPG
    _DSC0673.JPG
    56.7 KB · Views: 271
  • _DSC0674.JPG
    _DSC0674.JPG
    51.9 KB · Views: 286
  • _DSC0675.JPG
    _DSC0675.JPG
    63.2 KB · Views: 261
  • _DSC0676.JPG
    _DSC0676.JPG
    51.2 KB · Views: 248
Last edited:
Top