49dimes
Damn I'm hungry
To let you all know.......That motor had issues from the get go. When I first assembled the plane the motor had metallic debris in it and I had cleaned it all out (at least I thought I did ). HK Turnigy motors such as the NTM, Motor Match and Prop Drive series are usually pretty decent. The motor used in the plane looks like a "Kontronic" which is made by "Hextronic" and from my experience have sucked. The plane is ok though and I have A bit more powerful motor for it and I will be making a different type motor mount for it and strengthening the front of the plane. Of all the "gear" servos, motor, speed ctrl (The speed control seems decent ) will now have been all changed out except speed control. It is a 70 amp opto with an attached 6 amp UBEC you can set to 5 or 6 volts.
I don't think it was a bearing failure but it may have been. I pain stakenly balanced the prop and spinner before and after painting and running it in the shop was pretty darn smooth. I amped the motor and it showed 58 amps which is probably a tad much for the CHEAP motor. New motor wont have a problem at all swinging a big prop. 16x8 is what is going on the new motor. At 500kv on 4 cells I doubt it will draw over 50 amps.


I don't think it was a bearing failure but it may have been. I pain stakenly balanced the prop and spinner before and after painting and running it in the shop was pretty darn smooth. I amped the motor and it showed 58 amps which is probably a tad much for the CHEAP motor. New motor wont have a problem at all swinging a big prop. 16x8 is what is going on the new motor. At 500kv on 4 cells I doubt it will draw over 50 amps.
 . Cuz I CHEAP!
 .
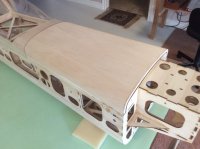
. . Plane is unharmed and will do some mods over the next few days to "strengthen" things up because I CHEAP. But seriously the front of the plane is really weak and I can see multiple hard snaps to a pop top taking its toll and breaking off the front of the plane. Better yet! May be I should just get the Sig XA-41 built up Sbach? Nahhhhh I CHEAP!!!!
 ..........
 .
.