• If you are new to GiantScaleNews.com, please register, introduce yourself, and make yourself at home.

    We're 1st in Giant Scale RC because we've got the best membership on the internet! Take a look around and don't forget to register to get all of the benefits of GSN membership!

    Welcome!
  • Unless you are a paid advertiser NO more posting advertisement in the individual vendor forums. You may post in the Manufacturer's Announcements section only but only ONCE a month unless your a paid advertiser.

Redwing 89" Extra 330SC

gyro

GSN Contributor
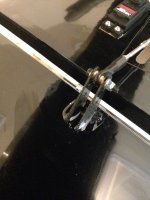
Continuing to get some work done, a little at a time. Right now, I've got the aileron and rudder control horns drying, and then I'll install the hinges.
ImageUploadedByTapatalk1404057963.066306.jpgImageUploadedByTapatalk1404057972.895761.jpg

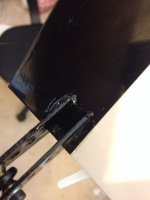
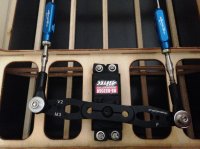
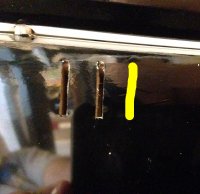
One thing to note, is that there are three slots available for the aileron control horns in the wings. Following @bbrown2828's guess/suggestion on one of his builds, I choose the outboard pair to use with the surface mount servo spot, where as someone using the recessed servo location would use the inboard pair.
ImageUploadedByTapatalk1404058220.541516.jpg

So, more on the wings....
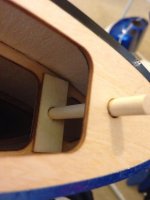
First, add some thin ca to the anti rotation pins. They look very dry and soaked up a ton of glue.
ImageUploadedByTapatalk1404057471.350395.jpg

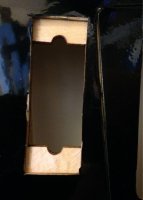
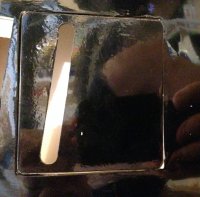
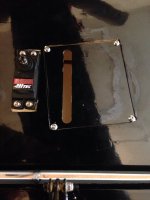
On to the aileron servos and the recessed pocket. While I think the recessed look is cool, to me it's not strong enough for a 3D plane pushing 300+ oz/in torque to some big ailerons. So, I chose to install my servos in the traditional surface mount spots (also built in directly adjacent to the pocket).
ImageUploadedByTapatalk1404057934.826646.jpgImageUploadedByTapatalk1404057945.170650.jpg


Now my gripe: I've still got the pocket cover and slot to deal with on the wing. No screws for the cover were included in my kit but I had some in parts box to use. It's really cool to have the option to pick, but I think the recessed pocket should be covered over like the surface mount spot. Then, you decide which you want and cut the covering accordingly. The cover with slot can be included in the parts kit with the plane for those who need it.
since I chose not to use the recessed location, my underwing looks a little messy to me. I think I'll eventually add some black covering over the open cutout.
ImageUploadedByTapatalk1404058363.655118.jpg
 

3dmike

640cc Uber Pimp
Looking good Gyro! What servos are you using in that thing again? Ohhhh ya right, Hitec. :-D
 

SnowDog

Moderator
Instead of providing two covers, just keep the one covered...some one who wants to use the internal mount option can cut the covering from the mount panel easily.
I plan tho use the surface mount option as well...and I'll use a small amount of trim covering to cover up the slot. I suppose if you wanted a super clean look you could just glue that panel in instead of using screws.
 
Last edited by a moderator:

gyro

GSN Contributor
Instead of providing two covers, just keep the one covered...some one who wants to use the internal mount option can cut the covering from the mount panel easily.
I plan tho use the surface mount option as well...and I'll use a small amount of trim covering to cover up the slot. I suppose if you wanted a super clean look you could just glue that panel in instead of using screws.

What I mean by providing two covers, is rather than ship the plane with the cover installed at all, just include the two covers (one for each wing) in the parts box. Completely cover the wing with no holes. Let the end user choose what to cut.
 

gyro

GSN Contributor
Should be plenty big enough :)
ImageUploadedByTapatalk1404067304.920573.jpg

Happy to report my only hinging left is the ailerons. I'm definitely not a fan of hinging, but you do get a nice sense of accomplishment when it comes out nicely.
 

cardenflyer

70cc twin V2
Looks great, just got done with a killer 5 day event. Got a new to me Redwing35cc slick to get set up tomorrow then my build will start! Looks great as always. How can you not like hinging? You are a pro arf builder, you do more in 3 months than I have in 3 years ;)
 

SnowDog

Moderator
Jake, this is snowdog sending a wave your way...passing through Council Bluffs on I80 on my way home to Chicago from Colorado Springs. Ill be starting my build as soon as I get home!
 

gyro

GSN Contributor
Looks great, just got done with a killer 5 day event. Got a new to me Redwing35cc slick to get set up tomorrow then my build will start! Looks great as always. How can you not like hinging? You are a pro arf builder, you do more in 3 months than I have in 3 years ;)

I just don't enjoy the hinging part... luckily about half the arfs come with hinges done, so I just suck it up when it's epoxy time :)

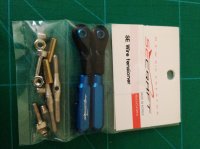
Ok, hinging is all done, on to installing some of the gear in my final bit of work for this weekend:

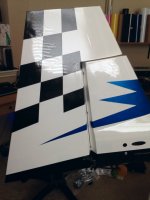
Of course, gotta have some blue bling on the plane!
IMG_4261.JPGIMG_4264.JPG

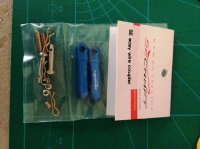
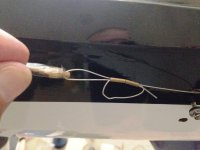
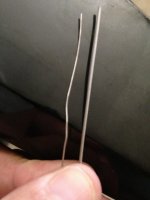
One thing I noticed, that I decided to change was the pull-pull wire. While it's nicely pre-run, and comes with the turnbuckle already installed and ready to crimp, I just didn't like the thickness of the wire. It is similar diameter to some of my 60" electric planes. I had some 1mm secraft wire in the parts bin, so I installed that instead.
IMG_4262.JPGIMG_4263.JPG

Pull-pull setup came out NICE :D
IMG_4265.JPG

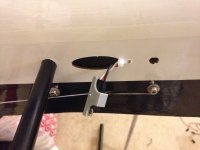
Also, since the holes in the aft fuse are really small, I decided to drill a small hole adjacent to the opening, so that my wires won't get lost in the fuse. There is a enough slack to push the connected plugs back into the fuse during flight, and the zip tie also keeps things from banging around or hitting the pull-pull cables back there.
IMG_4273.JPG

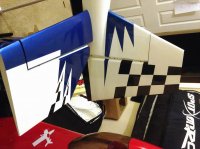
The tail is all done. Again, I can't believe how big the H-stabs/elevators are... nearly as big as the rudder. This plane won't be short on pitch authority.
IMG_4274.JPG
 

gyro

GSN Contributor
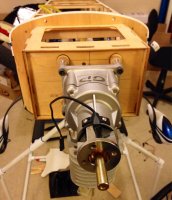
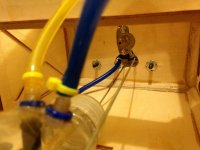
Got the engine on, and am working on installing the throttle servo and a choke bell crank.
ImageUploadedByTapatalk1404359630.880335.jpgImageUploadedByTapatalk1404359642.699429.jpg
 
Top