• If you are new to GiantScaleNews.com, please register, introduce yourself, and make yourself at home.

    We're 1st in Giant Scale RC because we've got the best membership on the internet! Take a look around and don't forget to register to get all of the benefits of GSN membership!

    Welcome!

Scale Balsa USA 1/3 Scale Super Cub Kit " NIB "

fencelake

70cc twin V2
I'm pretty happy with the way it came out. I had to use a little dacron to tie off a couple of spots and use some gorilla glue to really get a good joint, but it's pretty true! I just followed the instructions!
 

Attachments

  • 01a11615699da8a1f7b7b738f2b1b6c7b7e2a8447d.jpg
    01a11615699da8a1f7b7b738f2b1b6c7b7e2a8447d.jpg
    32.9 KB · Views: 52
  • 011e57f15e04ef47f4fcbad0c8ab287f2550e1cfa9.jpg
    011e57f15e04ef47f4fcbad0c8ab287f2550e1cfa9.jpg
    34.9 KB · Views: 52
  • 016db5dd258b84dfb0edfd4affbaa765f3a3ecb463.jpg
    016db5dd258b84dfb0edfd4affbaa765f3a3ecb463.jpg
    53.5 KB · Views: 51

fencelake

70cc twin V2
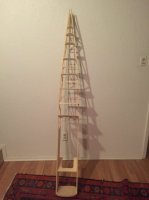
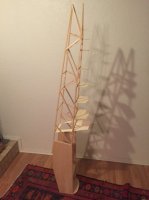
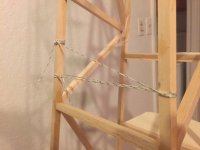
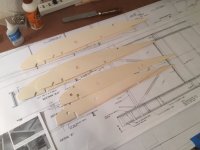
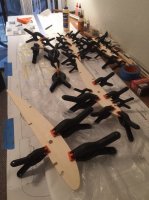
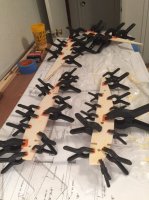
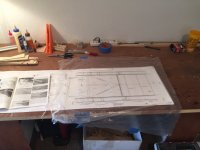
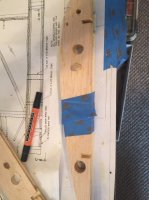
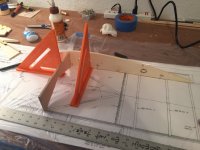
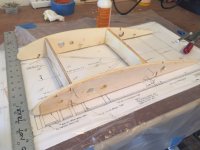
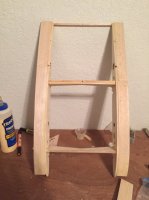
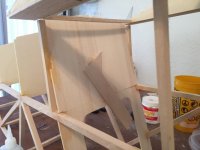
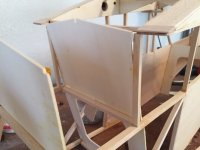
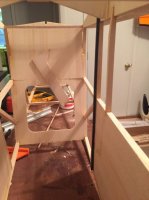
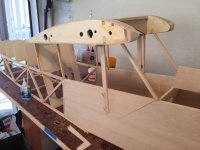
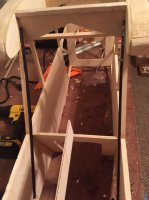
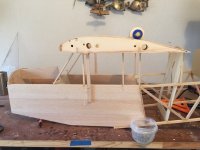
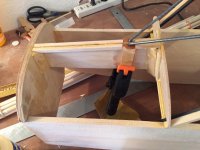
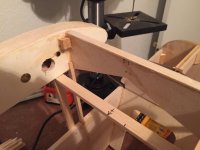
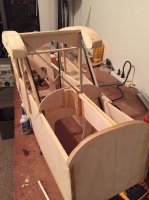
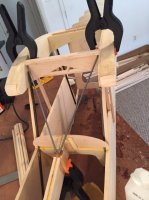
I've started on the cabin top by laminating all the necessary ribs as well as locating and drilling 1/2 pilot holes for the wing tubes. I would like to say that I bought this kit used, but I've had great luck with all the parts just popping out and the wood being in great shape! I've read a few threads about this kit, and granted the threads were from 2004, and beyond, but so far everything's worked as advertised! I've stopped for the evening, but tomorrow I'll get the cabin top built, mounted... and hopefully get all the doweling in place as well. I've also decided to add 1/4" carbon fiber square tubing to the window mullions as added support for the cabin top. I think this plus the other structural members ought to be pretty sturdy. We'll see!
 

Attachments

  • 0193e5ad27cecc9ec7addebc507d87e7daa536effa.jpg
    0193e5ad27cecc9ec7addebc507d87e7daa536effa.jpg
    69.8 KB · Views: 38

fencelake

70cc twin V2
One last thing... if you are going to build a kit... go to Home Depot or Lowes and buy AT LEAST 2 bags of these clips... they're around $10.00 a piece and crucial!
 

Attachments

  • 012c2f416dde0dc71acc5036337d2d20afb028d596.jpg
    012c2f416dde0dc71acc5036337d2d20afb028d596.jpg
    58.4 KB · Views: 44
  • 01196b3b76d96845d1990e9be265d35437648538d3.jpg
    01196b3b76d96845d1990e9be265d35437648538d3.jpg
    61.8 KB · Views: 45

fencelake

70cc twin V2
In the last week or so I've made some progress! The first order of business was to build the cabin top. Before I started I cleaned off my work area and sort of hit the reset button on my work space. The second thing I did was to pre-drill 7/8" diameter holes in the cabin top ribs these will be sanded a little bit more for the addition of the wing tube sleeves when I receive them. I went ahead and purchased a drill press, which I've needed for props and other things long before this. I don't know how I did it without one!
 

Attachments

  • Work Table Reset.jpg
    Work Table Reset.jpg
    69.4 KB · Views: 397
  • Drilling Ribs.jpg
    Drilling Ribs.jpg
    54.6 KB · Views: 435

fencelake

70cc twin V2
I built the cabin top over the course of a few days, due to some other obligations. I also want to get this plane right, so if I'm tired I don't really do too much because I find myself trying to hurry through it. So far everything else has been pretty easy, but this took a little more time and effort. One thing you'll notice the leading edge is pretty rough, and the instructions call for this until final sanding with the wings attached. I think it came out pretty well!
 

Attachments

  • Building Cabin Top.jpg
    Building Cabin Top.jpg
    89.4 KB · Views: 399
  • Cabin Top Build 2.jpg
    Cabin Top Build 2.jpg
    80.8 KB · Views: 388
  • Cabin Top.jpg
    Cabin Top.jpg
    46.8 KB · Views: 425

fencelake

70cc twin V2
Next I moved on to attaching the cabin top to the fuselage. Now because I'm customizing it with the L-21 style windows I had to account for the removal of the top half of former F-4, as well as the vertical stays right there, so they are glued ONLY to the removable top half of F-4, and will be removed in a little while.
 

Attachments

  • F4 Breakaway Detail.jpg
    F4 Breakaway Detail.jpg
    62.5 KB · Views: 403
  • F4 with Verticals.jpg
    F4 with Verticals.jpg
    59.6 KB · Views: 421

fencelake

70cc twin V2
Adding the cabin top was not too difficult. I did have to remove it once to reset it because it was -1 degree from level, and I couldn't live with that. LOL! But I got reset and glued in place. I also added (4) 1/4" x 1/4" carbon fiber square tubes to the inside of the assembly for extra support, which it definitely needs. Every thread I've read has some sort of additional support, and with just those tubes in place it makes a HUGE difference.
 

Attachments

  • 014d12304ab3b7db44a7604f73ce9585149578d2a3.jpg
    014d12304ab3b7db44a7604f73ce9585149578d2a3.jpg
    44.6 KB · Views: 399
  • Cabin attached from fwd qrter.jpg
    Cabin attached from fwd qrter.jpg
    77 KB · Views: 417
  • Carbon fiber rods installed.jpg
    Carbon fiber rods installed.jpg
    52.7 KB · Views: 393
  • Glue cabin top.jpg
    Glue cabin top.jpg
    80.8 KB · Views: 433

fencelake

70cc twin V2
Pushing along with the fuselage, I installed the metal braces at the windshield, as well as, the other bracing members up front. Everything fit nicely, and went together without a hitch. The pre-bent wire was bent to fit just right. Where the bracing attaches through the cabin top, the instructions call for simply epoxying the wire on the inside of the former, but I added some wood blocking with epoxy for added strength.
Here are a few photos.
 

Attachments

  • front from top.jpg
    front from top.jpg
    84.3 KB · Views: 422
  • windshield bars at cabin top.jpg
    windshield bars at cabin top.jpg
    66.5 KB · Views: 391
  • windshield bars detail from front.jpg
    windshield bars detail from front.jpg
    53 KB · Views: 414
  • windshield bars gluing.jpg
    windshield bars gluing.jpg
    58.5 KB · Views: 444
Top