• If you are new to GiantScaleNews.com, please register, introduce yourself, and make yourself at home.

    We're 1st in Giant Scale RC because we've got the best membership on the internet! Take a look around and don't forget to register to get all of the benefits of GSN membership!

    Welcome!

The 'What did you do in your workshop tonight?' thread

stangflyer

I like 'em "BIG"!
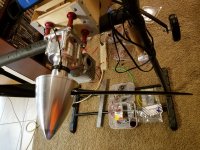
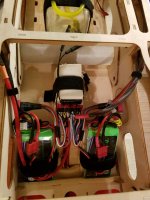
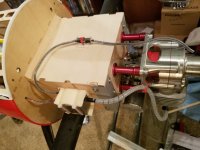
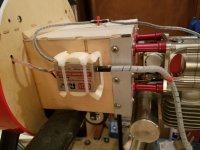
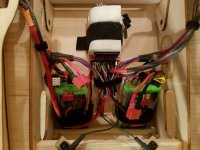
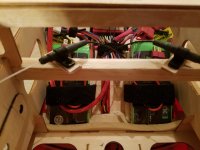
Before I take a Saturday afternoon old man nap, I thought I would share some exciting news. First the photos of the nearly finished up baby Yak. Got the throttle servo in and programmed. Also got the choke pull rod engineered for perfect operation. Cleaned up the inside of the fuse. That wiring was driving me nuts. I also got the newly retreaded White Rose wheels mounted on the landing gear and installed on the fuse. I am just about almost finished. About all that is left now is to put the top motor box cover on, cut the bottom of the cowl for the Jtec Pitts muffler...(yes, I decided to go with it.) and lastly, build a baffle in the front of the cowl.
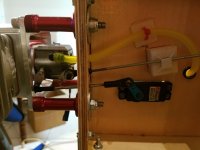
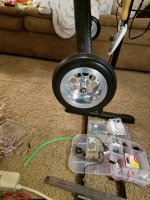
20171103_211642.jpg 20171103_211745.jpg 20171103_211841.jpg 20171103_211856.jpg

Now for the exciting news. As mentioned, I decided to try a variety of different exhaust systems....but stalled at the Jtec Pitts. After going through the BE 62 it ran pretty ok. But just not what I felt it was capable of. I really felt it's potential was still out there. So of course going through the ignition system and timing it like I do my "dubs", bolted on the Falcon CF 24x9. Then bolting the Pitts muffler on instead of the stock exhaust....I fired her up. It took quite a bit to get her going. Bone dry from being apart. But once she got fuel, she fired right up. And Ho ho holy cow was I surprised. I was told that maybe I should try a 23x8 to 24x6 to start with. Yean, not so much. (Not enough prop for this little beasty) A few days ago I tried the Mejzlik 24x10 and got just over 6300. That was before I went through the ignition system. First run with the Falcon 24x9, she topped out at 6710 on the rpm.

20171104_153941.jpg


I let her cool down for a few minutes....(It's about 40 degrees outside right now) After I was satisfied that the engine had cooled down enough, I reached over and flipped the prop twice with no choke....and "vrrroooooom" to life. Cleared her throat a tad and topped her out. 6720!

20171104_160358.jpg


She is already gaining and has not even left the ground yet. I am very impressed and quite pleased already. The throttle transition is glass smooth and lightening fast. Zero...(yes, zero) midrange burble. I am going to static thrust test her maybe tomorrow. I am anxious to see what she is pulling. At 19ish pounds and 95" wingspan...this baby Yak is shaping up to run with the big dogs. Heck, I am not so sure any of my 3w's run any better.
shocked-smiley-emoticon.gif


Something else...I love my big planes. And I will probably never give them up. But I am really starting to understand why these 90" plus wing span planes are so cool. Light, easy to work on. I will post some assembled photos soon.
 

AKNick

640cc Uber Pimp
Run a bead of Welders or Foam-Tac along both sides and let it tack up for a couple minutes. Then press them together and hold for a bit. Then take a couple short strips of Blenderm and glue them on each end of the aileron as reinforcements. Blenderm doesn't stick to EPP very well by itself so that's why you have to glue it on.

I did re glue them together with welders, curious if I should cut a clean line to sever the airlerons and do the blenderm to welders trick to improve the flexibility. It see's like the welders makes everything stiff, and the EPP hinges sure dont help with the flexibility. Iv hear of guys cutting out open slots and leaving EPP hinges followed by blenderm... might be work a try
 

49dimes

Damn I'm hungry
@Snoopy1 here is something that is like the MKS wheels and arms. You could adapt those fiberglass arms to an aluminum wheel just as easy. I used the supplied aluminum arms that I got and found some aluminum wheels on ebay. The holes in the middle of the arms are smaller than the diameter of the servo wheel spline hub. It measured 24/64" or 3/8". I drilled the arm centers with a 23/64" carbon steel drill bit and press fitted the arm to the wheel nice and snug. The 4 screw holes in the servo wheel are tapped 3mm. I used a 3/32" carbon steel drill bit to drill the 4 mounting screw holes in the arm by way of the existing holes in the wheels. Not to worry. The 3/32" drill is small enough not to damage the M3 threads in the wheels. I then used a 3mm tap to extend the threads through the arms. I used red lock-tight to secure it all together with M3 x 6mm button head cap screws. Once dry I used a dremel cut off wheel to cut the excess portion of the button head cap screw protruding. No nuts or washers needed :). Good looking and strong aluminum servo arms ;). There is some scuffing from the cut off wheel on the backside but don't tell anybody. It is hidden anyway.

1104171756-01.jpg
1104171756-02.jpg
 

pawnshopmike

Staff member
I did re glue them together with welders, curious if I should cut a clean line to sever the airlerons and do the blenderm to welders trick to improve the flexibility. It see's like the welders makes everything stiff, and the EPP hinges sure dont help with the flexibility. Iv hear of guys cutting out open slots and leaving EPP hinges followed by blenderm... might be work a try
To soften up the hinge and make it more flexible, flip the wing over and lay it on a solid surface. Then take the edge of a dull object like a plastic spatula and mash the foam along the hinge line. It will make it more flexible without making it weaker like cutting slots in it.
 

Jetpainter

640cc Uber Pimp
I've been making some slow progress on the new gear for my Hangar 9 Extra. I drilled all the holes in it the other night, and today I painted it black. I'll probably put it on tomorrow.
You can see how bent the old ones were, since the new ones are only 2" narrower than the originals were originally.

20171101_212816_resized.jpg
20171104_162534_resized(1).jpg
 

Snoopy1

640cc Uber Pimp
Thanks for the help and guidance I asked because it just looked good but I did not feel good about it. It has been put to one side and I will buy 8 new aluminum arms for the plane thanks again.
 

stangflyer

I like 'em "BIG"!
I've been making some slow progress on the new gear for my Hangar 9 Extra. I drilled all the holes in it the other night, and today I painted it black. I'll probably put it on tomorrow.
You can see how bent the old ones were, since the new ones are only 2" narrower than the originals were originally.

View attachment 100001 View attachment 100002
See the problem is this, aluminum bends under pressure. You knew that though right? Soooo....to solve the problem, just don't land. Bwaa haaa haaa.... J/K. I hope the new gear works better than the last. :way_to_go:
 

stangflyer

I like 'em "BIG"!
Well the Baby Yak-ster fuse is pretty much done. Got the motor box top cut and glued into position. Installed some protective wrap on the sensor lead. And then buttoned everything up. Also mounted the rx. antennas and finalized the wiring in the fuse. All that is left now is the cowl fitting process. Going to do that tomorrow.

20171105_010613.jpg 20171105_010620.jpg 20171105_010638.jpg 20171105_010642.jpg

Along with what I did tonight, I also double checked my throws on all the surfaces. I was bugged by the fact I had like 50+ degress throw on the elevators both up and down. Same with the rudder. Although I can not use all the rudder travel available, it is still there. But the ailerons just would not deflect past about 20 degrees. I could not program in more through the radio so I figured I would get to that later. Then I got to thinking....this was a brand new never flown "lectric" setup and the guy who had it probably programmed the aileron servos for less throw. I pulled out the HP25 programmer and checked the aileron servos. Yup...just as I thought. They had been backed off. So I reset to factory default settings and holy moly, talk about throw. I have not measured them accurately yet, but from my eye balls sight....they look to be around 45 or so degrees. I will fine tune them as well as all other surfaces before the maiden. Lesson learned. Even though you may purchase a brand new never flown airframe with new servos pre-installed, don't automatically assume they are at factory default settings.

Hopefully I can get the cowl cut for the Pitts muffler, baffle in place and do a static thrust test tomorrow. And then????? Wait for some decent weather to blast off the Beasty Baby Yak-ster.
 

Snoopy1

640cc Uber Pimp
That little Yak or baby Yak as you have named it looks good, a lot of nice hardware has been used and all goes together nicely. You are going to get maybe one flight on before the end of the season and then you are going to be looking at all winter dying to fly it again. So now you have finished the plane what are you going to do for the next 5 months.
 
Top