You are using an out of date browser. It may not display this or other websites correctly.
You should upgrade or use an alternative browser.
You should upgrade or use an alternative browser.
35 Sbach Scratchbuild
- Thread starter abaser
- Start date
abaser
50cc
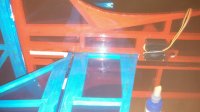
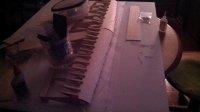
Progression shots of the fuselage and elevator/horizontal. Like I said before, simple cut and glue over the plans up to this point. No real issues to report thus far.
For those who have never scratch built, its a wise idea to cover your plans with wax paper to avoid gluing your parts to them. I tried press and seal on this one, but don't recommend it. The glue sticks to it pretty bad and upon removal,I ended up with a lot of it stuck to my parts.
To be continued.......
Attachments

abaser
50cc
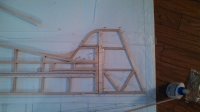
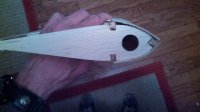
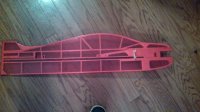
The rudder. No issues, just a change to the plans. You can see, I changed the bottom bracing for a little more support. I've read of others having problems when covering with the bottom piece warping if stretched tightly, so I decided to eliminate that problem for myself.
Attachments
abaser
50cc
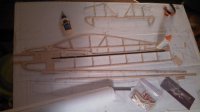
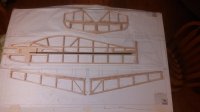
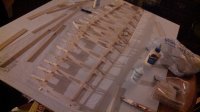
Now to the wings. I actually built them first, so there's not many pics as my excitement was so high, I couldn't bare to stop and take any. But here you go. Basic wing construction I guess. You build the wings upside down, starting by laying the spars on the plans, and placing the pre cut ribs in their correct locations. Once glued, them the other rib, trailing edge sheeting, shear webs, leading edge sheeting, and root sheeting. If you do it correctly, you have a nice simple set of wings. However, mine wasn't so simple. I'll go into details in my next post.
Attachments
abaser
50cc
Ok, as you can see here, in my hurried, excited state, I forgot one of the spars was warped a little. Now, when I saw this, I panicked and thought the build was lost. After calming down and studying the situation a bit, I decided to cut the sheeting along the spar, glue the sheeting to the ribs and spar side, then sand it smooth. Hopefully, this will work out ok.
Next entry, a modification to the servo location in the wing.
Next entry, a modification to the servo location in the wing.
Attachments
abaser
50cc
This is your first scratch build? wow...coming along nicely!
I have used wax paper and it works just fine...never tried press'n'seal, always used wax paper.
Thanks.
Yup. First scratch build. Its been ongoing since March I believe, but I'm pleased with how its turned out.
I don't recommend the press and seal at all, other than it seems easier to see the plans. The wax paper I had was so thick, I couldn't see them good enough.
Last edited by a moderator:
abaser
50cc
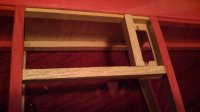
For my next installment, here's a modification I made to the servo location. The plans call for the servos to be placed in the root sheeted area between the second and third ribs. I initially placed them in that location, but had concerns. Then someone brought up my very concerns in my other build thread. Once that happened, I had to move them. I was really concerned with this being a 3D plane, there would be a lot of stress on the servos in the original location.
So, here is the mod I made. It would've been nice to have done this before the wing was covered, but I feel it was worth it. I cut the covering from the center most rib bay and built a servo tray that is more centrally located in the wing to distribute the pressure on the ailerons more evenly. Once finished, I simply recovered the rib bay, and installed the servo
So, here is the mod I made. It would've been nice to have done this before the wing was covered, but I feel it was worth it. I cut the covering from the center most rib bay and built a servo tray that is more centrally located in the wing to distribute the pressure on the ailerons more evenly. Once finished, I simply recovered the rib bay, and installed the servo
Attachments

abaser
50cc
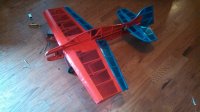
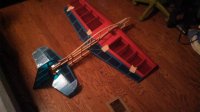
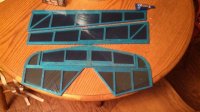
Well, that pretty much wraps up the build portion. Now its on to covering. Now, I'm nowhere near qualified to try and give tips on covering, so I'll just adprogress pics as I posted previously.
Attachments
abaser
50cc
This post will bring you up to speed on the progress. As you can see here, the elevator halves are only connected by 1/4"stock. Not good enough for me. With the elevator being the most critical part on a plane in my eyes, I want strength. I found an elevator off my dearly departed hog bipe that had a metal joiner. So, I incorporated it onto this model. Now,I don't feel it'll break near as easy.
Well, I hope you've enjoyed so far. Any further progress reports will be real time reports. So until next time, burn up the sky, and have fun!
Well, I hope you've enjoyed so far. Any further progress reports will be real time reports. So until next time, burn up the sky, and have fun!