• If you are new to GiantScaleNews.com, please register, introduce yourself, and make yourself at home.

    We're 1st in Giant Scale RC because we've got the best membership on the internet! Take a look around and don't forget to register to get all of the benefits of GSN membership!

    Welcome!

3D Twisted Hobbies Mini MXS-C

ericb

Team WTFO
GSN Contributor
I picked one of these up and thought I would do a build thread, so here goes. I will try and be detailed so others can use it like an assembly manual also.

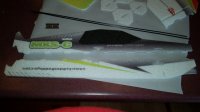
Here is what is in the box. I forgot to take a pic of the fuse, wings and h-stab before I stuck them together.

First thing is to bend all of the control surfaces back onto themselves and put a weight on them for a couple of hours. I did this before I went to bed and they were ready the next morning. I forgot to take a pic of this, so I stole one off of the interwebs. I layed everything under the box that the plane came in and put some weight ontop of the box.
I apologize for some of the pics, my daughter was taking pics for me.

S5 pictures 474.jpg
S5 pictures 475.jpg
S5 pictures 476.jpg
S5 pictures 477.jpg
15906976732_af67d8bd64_b.jpg
 
Last edited:

ericb

Team WTFO
GSN Contributor
S5 pictures 473.jpg
S5 pictures 474.jpg
First assembly item is to glue the wings and horizontal stab onto the fuse. I use the "dry" method for this. I put welders on the end of the wings and h-stab. I press the edges onto the fuse and work the glue a little and then pull apart and let dry for a couple of minutes. After a couple of minutes, press the parts back onto the fuse and it will stick for good.
 
Last edited:

ericb

Team WTFO
GSN Contributor
Next is to put the spars in the wings and elevator. The wing spars are 2 pieces that must be glued together. Use a small amount of CA to glue the 2 together. Next you cut the openings using a razor blade. The openings are marked on the wigns and elevator. To glue them in, I put welders inside the entire opening and put the spar in place making sure there is an even coat on all of the parts. I remove the spar for about 2 minutes and then put it back into place. A weight on either side of the spar will help keep some pressure and hold things tight. If you want you can just hold it all together until it sets up. It doesn't take too long to set up. Set this aside to dry and check the joint every so often. I kept checking it and pushing the joint together to make sure it was good and tight.

S5 pictures 479.jpg
S5 pictures 480.jpg
S5 pictures 481.jpg
S5 pictures 482.jpg
S5 pictures 483.jpg
S5 pictures 484.jpg
S5 pictures 485.jpg
S5 pictures 486.jpg
S5 pictures 487.jpg
S5 pictures 488.jpg
 

ericb

Team WTFO
GSN Contributor
Next the vertical fuse needs to be cut in half. There are little notches right down the middle to assist in this. You can use a straight edge if you like, but with the notches, it was very easy without one.
 

Attachments

  • S5 pictures 478.jpg
    S5 pictures 478.jpg
    86.4 KB · Views: 365

ericb

Team WTFO
GSN Contributor
Next is to glue the rudder onto the top of the vertical fuse. Use the dry method for this and it goes very quickly.
S5 pictures 489.jpg
S5 pictures 490.jpg
S5 pictures 491.jpg
 

ericb

Team WTFO
GSN Contributor
Next on the list is the control horns. There are 3 different sizes. 2 large ones for the ailerons, 1 medium for the rudder, and 1 small for the elevator. Since all of the assemblies are flat right now, this is a very easy task. Put some welders in the hole for the control horns. Insert the control horns and then remove and make sure the welders is covering the entire part that is inside the hole. Let dry for a short time (not completely dry) and then reinstall the horns. Make sure the hole in the arm is in line with the hinge line.
S5 pictures 494.jpg
S5 pictures 495.jpg
S5 pictures 497.jpg
S5 pictures 498.jpg
S5 pictures 499.jpg
S5 pictures 500.jpg
 

ericb

Team WTFO
GSN Contributor
While everything dries, I set up the electronics and got the servos centered. I am using the Power Combo from twisted hobbies on this one.
S5 pictures 501.jpg
S5 pictures 503.jpg
 

ericb

Team WTFO
GSN Contributor
Next is to attach the bottom of the vertical fuse. I use the dry method for this also. Only apply the welders to the parts between the holes. Do not put any inside the holes at this time. Use a square to make sure the parts are square to each other.

S5 pictures 505.jpg
S5 pictures 506.jpg
 

ericb

Team WTFO
GSN Contributor
Next is the landing gear. The gear is made up by 2 CF "rods", fuse spacer, discs, and "wheels" with pants.

S5 pictures 507.jpg
S5 pictures 508.jpg
S5 pictures 509.jpg
S5 pictures 510.jpg
 
Top