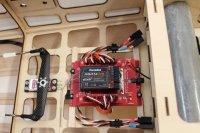
• If you are new to GiantScaleNews.com, please register, introduce yourself, and make yourself at home.

    We're 1st in Giant Scale RC because we've got the best membership on the internet! Take a look around and don't forget to register to get all of the benefits of GSN membership!

    Welcome!

Brand New PAU........Viper-ST Announced!!!!!!!!

Terryscustom

640cc Uber Pimp
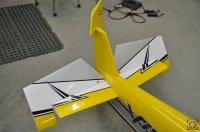
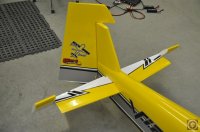
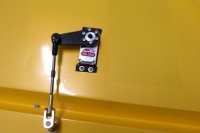
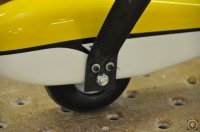
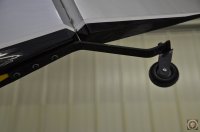
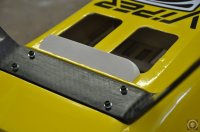
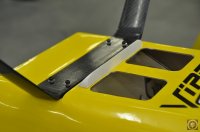
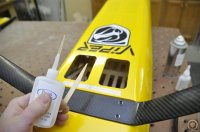
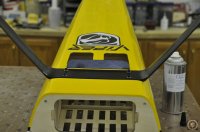
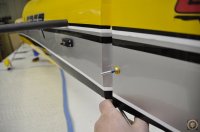
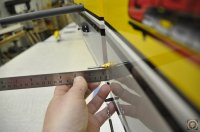
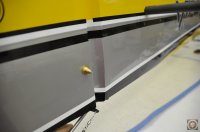
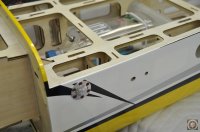
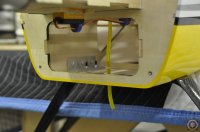
Backing up a couple steps, the plane comes with hardware and blind nuts to install the wheel pants. I like to use bonded washers on any and all bolts that go into blind nuts. I also put a little dab of goop on the head of the bolt after installation to keep the wheel pant bolts from backing out should they ever come loose. I also use a little blue locktite on the wheel pant and tail wheel bolts.
 

Attachments

  • _DSC0427.JPG
    _DSC0427.JPG
    57.9 KB · Views: 286
  • _DSC0428.JPG
    _DSC0428.JPG
    44.3 KB · Views: 285

Terryscustom

640cc Uber Pimp
Next I wanted to open a couple more holes in the bottom for proper air exit. I opened these up, ironed the edges and also sealed the edge with thin CA. I put the CA on a stick and went around to let it wick into the edge so I did not drip glue all over the plane and table.

Next I want a low pressure lip on here as well to really suck the air out, so I made myself a piece of 5/8" tri-stock. I covered it in black and installed it with epoxy.
 

Attachments

  • _DSC0429.JPG
    _DSC0429.JPG
    83.8 KB · Views: 320
  • _DSC0430.JPG
    _DSC0430.JPG
    70.8 KB · Views: 333
  • _DSC0431.JPG
    _DSC0431.JPG
    56.5 KB · Views: 348
  • _DSC0432.JPG
    _DSC0432.JPG
    76.4 KB · Views: 308
  • _DSC0433.JPG
    _DSC0433.JPG
    78.1 KB · Views: 339

Terryscustom

640cc Uber Pimp
I wrapped up my tailwheel and installed the rudder servo and control horn. Since I'm using a single servo push-pull setup I need to modify the threaded rod. I am going to be using a 2" arm with the pushrod installed in the 1.75" hole. So I want to have the threaded rod stick out a little more than 2" so I can get the link threaded on and have a couple threads still exposed. Install the little cone shaped nuts with locktite and I trimmed off the excess from the opposite side after I was happy.
 

Attachments

  • _DSC0434.JPG
    _DSC0434.JPG
    52.7 KB · Views: 340
  • _DSC0435.JPG
    _DSC0435.JPG
    66.9 KB · Views: 291
  • _DSC0436.JPG
    _DSC0436.JPG
    51 KB · Views: 292

Terryscustom

640cc Uber Pimp
Basic two line fuel system installed. I install the tank with two 2" strips of sticky back velcro on the bottom and a couple of zip ties. I route the vent line and secure loosely with zip ties. Where the vent exits I like to put a small section of brass tube in the vent line, dill a 1/8" hole and put the brass tube through it. Then push on a couple inch piece of tygon on the outside to get any spillage away from the fuse. Lastly anywhere that fuel line stands any chance of rubbing I put a small dab of goop to hold it in place and stop any chance of vibration damage.
 

Attachments

  • _DSC0437.JPG
    _DSC0437.JPG
    76.3 KB · Views: 311
  • _DSC0438.JPG
    _DSC0438.JPG
    75 KB · Views: 333
  • _DSC0439.JPG
    _DSC0439.JPG
    93.5 KB · Views: 296
  • _DSC0440.JPG
    _DSC0440.JPG
    74.6 KB · Views: 325
  • _DSC0441.JPG
    _DSC0441.JPG
    72.1 KB · Views: 299
  • _DSC0442.JPG
    _DSC0442.JPG
    61.1 KB · Views: 305
  • _DSC0443.JPG
    _DSC0443.JPG
    68.9 KB · Views: 329
  • _DSC0444.JPG
    _DSC0444.JPG
    61.7 KB · Views: 329
I've been using the 6mm foam wire routers that Azhar sells to route my all my fuel lines. A little med glue to hold the keeper and then a little zap goo to secure the line into the keeper. I do also use velcro straps to retain my fuels tanks. A little velcro on the bottom and a little bit of truck topper foam on the backside of the tank to keep from rubbing the tube socket. :)

Keep up the killer job man!! Love how in depth you go with your threads.
 

Terryscustom

640cc Uber Pimp
Yea I use tons of those little foam wire keepers to keep the wiring in line, great idea to use for fuel lines. I seem to do about 50/50 with zip ties or Verlcro around the tank. I think it usually depends on if I have velcro straps handy.

Not much to take pics of during servo setup. I got the throttle set up how I want and my idle up switch set. Rudder is all hooked up, functioning very well. I can get more than 45 degrees but I think 45 should be plenty. I spent a fair amount of time on the stabs making sure they were centered at center, end points and matched throughout their motion. Pretty much have to set up the wing servos, install canopy shell and do some baffling under the hood.
 

Attachments

  • _DSC0446.JPG
    _DSC0446.JPG
    84.5 KB · Views: 266
  • _DSC0447.JPG
    _DSC0447.JPG
    88 KB · Views: 288

Islandflyer

GSN Sponsor Tier 1
Same airplane, slight variation in equipment and set up:
I am using MKS brushless servos X8 model HBL380
I went with Pull-Pull
IMG_0068.JPG
 

Attachments

  • IMG_0072.JPG
    IMG_0072.JPG
    39 KB · Views: 353
  • IMG_0069.JPG
    IMG_0069.JPG
    76.6 KB · Views: 273
  • IMG_0070.JPG
    IMG_0070.JPG
    97.1 KB · Views: 282

Islandflyer

GSN Sponsor Tier 1
For fuel dot, I use McFueler: these are my favorites. they look scale, and inner bit swivels freely when you turn the cap, so the tubing doesn't twist.
IMG_0077.JPG
 

Attachments

  • IMG_0077.JPG
    IMG_0077.JPG
    44.9 KB · Views: 229

jhelber08

70cc twin V2
Head Honcho.....Do you know if those 380's are as smooth in the gears as the 777's?


Don't mean to get off point.

I got a peak at some a few weeks ago, those servos are awesome and every bit as smooth...and they are noticeably/crazy fast. I'm hoping to get my hands on some when the black friday sales role around.
 
Top