• If you are new to GiantScaleNews.com, please register, introduce yourself, and make yourself at home.

    We're 1st in Giant Scale RC because we've got the best membership on the internet! Take a look around and don't forget to register to get all of the benefits of GSN membership!

    Welcome!

70cc PAU Extra 300SP build...

Jetpainter

640cc Uber Pimp
Terry, is that the Spektrum 9020 reciever? I've been using a couple of those for a few years, and they've been great, but the stacked plug configuration and the way it's labeled drives me insane at times. They need a big arrow for me that says 'This row numbnuts";)
 

Terryscustom

640cc Uber Pimp
Terry, is that the Spektrum 9020 reciever? I've been using a couple of those for a few years, and they've been great, but the stacked plug configuration and the way it's labeled drives me insane at times. They need a big arrow for me that says 'This row numbnuts";)

Yes, it is funny that it has a label on both sides and the labels are just opposite. They are a great RX though, and paired with a batt share switch they work amazing for this size plane.
 

Terryscustom

640cc Uber Pimp
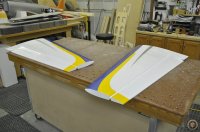
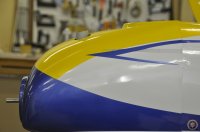
I spent quite a bit of time on the covering since there is a lot of covering over top of covering I used a fresh xacto knife to pop the little bubbles and smooth them out. Came out great!

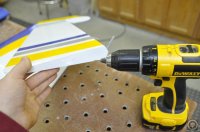
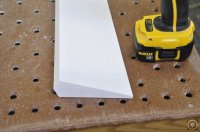
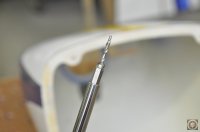
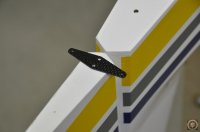
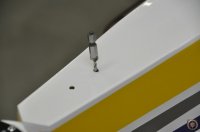
**TIP! - here is one not many people know about.... Ever have your plane out in the sun and your ailerons are all puffed up, then take it home and the covering is all wrinkled? Or you have one spot that is wrinkled and as soon as you heat it the aileron puffs up and the whole thing gets wrinkled?? Here is what you do - Take a 1/16" drill bit and drill a single hole in the bottom of the rudder, root side of the ailerons and elevators. No more pressurized surfaces!!

I hinged with 30 minute epoxy, to lube the hinges I like to melt some petroleum jelly and dip the hing point into it from both sides, place on towel so it does not run on the part that gets glue.

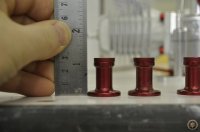
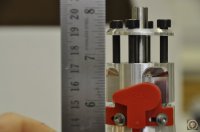
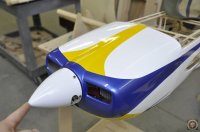
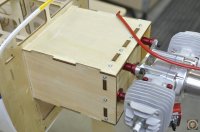
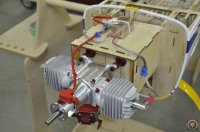
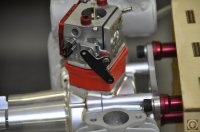
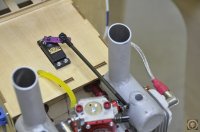
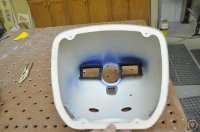
Time to mount the engine! If you are putting a DA70 in this plane you will need 1 1/8" engine standoffs. Little measuring and marking, drilling and I installed with 6mm bolts, SWB standoffs, fender washers (don't use standard size washers behind the firewall!!!) and nylock nuts.

**TIP-2 - For ANY ARF assembly, make sure to chase ALL blind nuts with a tap before installing a bolt!!! China blind nuts are stamped so sometimes they need a little chaser to clean them up. Also sometimes glue can get in there during assembly at the factory.

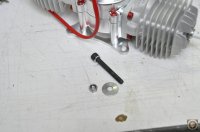
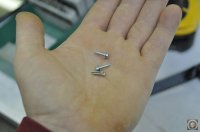
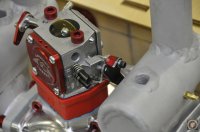
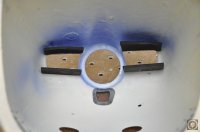
Next I pinned the firewall by drilling small holes, harden with CA and install servo screws.

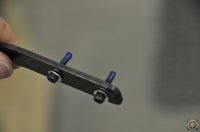
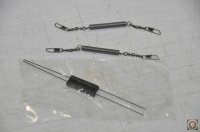
I decided to use the stock tail wheel, it is a perfect size for this plane, no problems rubbing the rudder when harriering on the deck. The little screws for assembling the tiller arm to the rudder are fine, but a little small so I like to use 7/16" servo screws. For springs I buy them from McMaster Carr and install them with some fishing line swivels, either #2 or #3 in size. Quick, easy and nice if you need to service them.

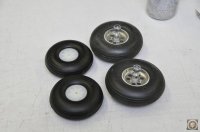
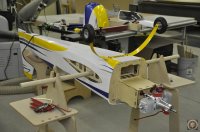
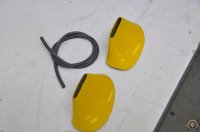
Gear is installed. Stock wheels are just fine, but I fly on a LOT of different fields so I prefer a 4" wheel on this size plane. I will put the gear cuffs on later, I just bolted the wheels on in case I need to get the plane off the stand for any reason. I'll install the cuffs and pants towards the end.

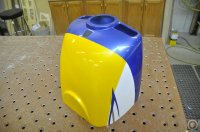
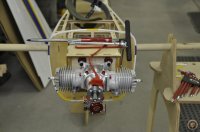
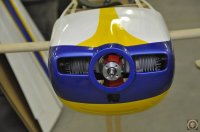
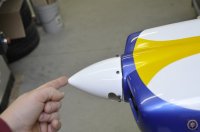
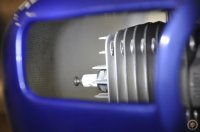
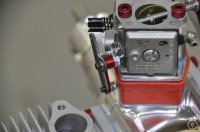
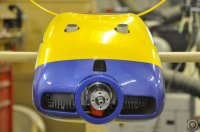
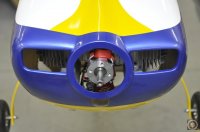
NOTE: I am getting asked this a few times, and YES I can confirm that the DA70 fits in this cowl with a solid 1/4" of space from the plug cap to the inside of the cowl

image037.jpg
 

Attachments

  • image001.jpg
    image001.jpg
    94.3 KB · Views: 389
  • image002.jpg
    image002.jpg
    78.3 KB · Views: 394
  • image003.jpg
    image003.jpg
    88.6 KB · Views: 398
  • image004.jpg
    image004.jpg
    60.4 KB · Views: 407
  • image005.jpg
    image005.jpg
    77.7 KB · Views: 409
  • image006.jpg
    image006.jpg
    102 KB · Views: 368
  • image007.jpg
    image007.jpg
    98.6 KB · Views: 380
  • image008.jpg
    image008.jpg
    83.9 KB · Views: 385
  • image009.jpg
    image009.jpg
    53.9 KB · Views: 382
  • image010.jpg
    image010.jpg
    56.4 KB · Views: 360
  • image011.jpg
    image011.jpg
    51.8 KB · Views: 377
  • image012.jpg
    image012.jpg
    66.3 KB · Views: 398
  • image013.jpg
    image013.jpg
    74.8 KB · Views: 433
  • image014.jpg
    image014.jpg
    78.1 KB · Views: 426
  • image015.jpg
    image015.jpg
    37.6 KB · Views: 409
  • image016.jpg
    image016.jpg
    64.1 KB · Views: 402
  • image017.jpg
    image017.jpg
    64.8 KB · Views: 391
  • image018.jpg
    image018.jpg
    47.3 KB · Views: 391
  • image019.jpg
    image019.jpg
    84.5 KB · Views: 378
  • image020.jpg
    image020.jpg
    53.4 KB · Views: 390
  • image021.jpg
    image021.jpg
    55 KB · Views: 374
  • image022.jpg
    image022.jpg
    66.7 KB · Views: 345
  • image023.jpg
    image023.jpg
    43.1 KB · Views: 362
  • image024.jpg
    image024.jpg
    51.6 KB · Views: 384
  • image025.jpg
    image025.jpg
    40.4 KB · Views: 356
  • image026.jpg
    image026.jpg
    35.6 KB · Views: 349
  • image027.jpg
    image027.jpg
    38.1 KB · Views: 381
  • image028.jpg
    image028.jpg
    63.7 KB · Views: 393
  • image029.jpg
    image029.jpg
    55.8 KB · Views: 353
  • image030.jpg
    image030.jpg
    71.5 KB · Views: 377
  • image031.jpg
    image031.jpg
    105.1 KB · Views: 384
  • image032.jpg
    image032.jpg
    34.7 KB · Views: 366
  • image033.jpg
    image033.jpg
    73.6 KB · Views: 357
  • image034.jpg
    image034.jpg
    67.6 KB · Views: 356
  • image035.jpg
    image035.jpg
    96 KB · Views: 362
  • image036.jpg
    image036.jpg
    59.8 KB · Views: 352

Terryscustom

640cc Uber Pimp
Engine compartment and cowl complete, all buttoned up!
- I made a new arm to solve the issue of the carb arm pointed towards the firewall and interference with the muffler.
- Next up was cowl installation and cutting. I determined if I take 1/2" off the mufflers and angle the stacks at 14 degrees I can get the cowl on without cutting a huge slot in the bottom. (y)
- Next was throttle servo, I used an MKS 1250 with a .75" arm. I determined where I wanted it for good linkage geometry and cut the hole, installed some blocks on the inside for screws and support. Pushrod made from stainless 4-40 all thread, sleeved with carbon.
- Next is baffling. I get asked quite a bit and see it asked online quite a bit...."do I need to baffle". Short answer, YES!!! You'll be rewarded with a cooler running engine, more power and a longer life out of your engine. I did this one with creative foam (or the similar material I got from Amazon). Install with medium CA and I hit the corners inside with "goop".

image018.jpg
 

Attachments

  • image001.jpg
    image001.jpg
    87.1 KB · Views: 329
  • image002.jpg
    image002.jpg
    71.3 KB · Views: 319
  • image003.jpg
    image003.jpg
    75.6 KB · Views: 342
  • image004.jpg
    image004.jpg
    74 KB · Views: 331
  • image005.jpg
    image005.jpg
    77.7 KB · Views: 362
  • image006.jpg
    image006.jpg
    58.5 KB · Views: 394
  • image007.jpg
    image007.jpg
    58 KB · Views: 299
  • image008.jpg
    image008.jpg
    72.8 KB · Views: 325
  • image009.jpg
    image009.jpg
    63.6 KB · Views: 295
  • image010.jpg
    image010.jpg
    55.6 KB · Views: 316
  • image011.jpg
    image011.jpg
    71.7 KB · Views: 305
  • image012.jpg
    image012.jpg
    65.1 KB · Views: 312
  • image013.jpg
    image013.jpg
    65.7 KB · Views: 332
  • image014.jpg
    image014.jpg
    62.9 KB · Views: 308
  • image015.jpg
    image015.jpg
    64.4 KB · Views: 323
  • image016.jpg
    image016.jpg
    61.8 KB · Views: 329
  • image017.jpg
    image017.jpg
    88 KB · Views: 332
  • image019.jpg
    image019.jpg
    52.8 KB · Views: 294
  • image020.jpg
    image020.jpg
    54.9 KB · Views: 320
Top