• If you are new to GiantScaleNews.com, please register, introduce yourself, and make yourself at home.

    We're 1st in Giant Scale RC because we've got the best membership on the internet! Take a look around and don't forget to register to get all of the benefits of GSN membership!

    Welcome!

Sport 30% Edge 540 Pete Marshall Plans with Laser Cut Short Kit

Bluepilot2003

70cc twin V2
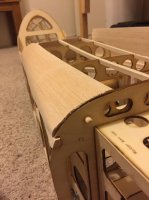
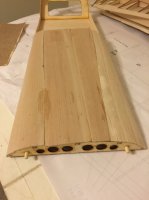
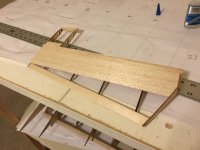
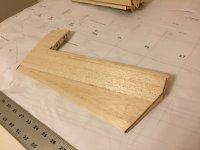
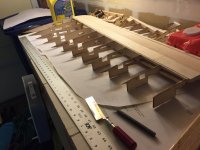
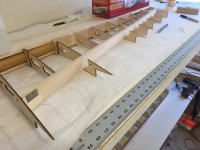
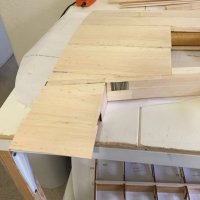
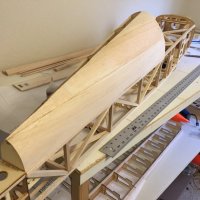
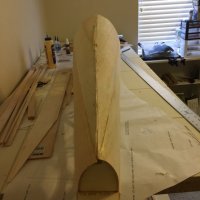
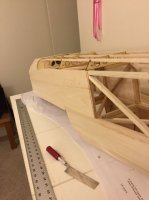
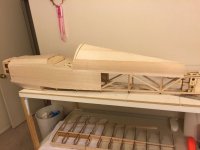
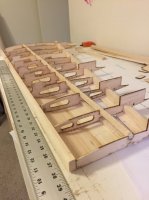
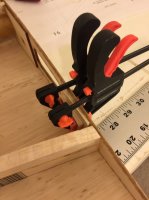
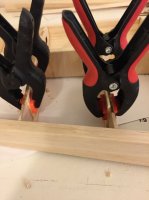
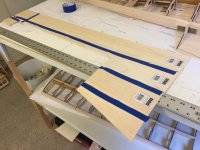
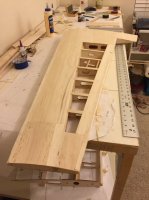
I forgot a picture on the last post about the wing. I sheeted the top half of one wing and cut out the pieces in the ribs where the balsa sticks go that make up the beveled areas. My plan is to glue in the aileron piece into place, then cut it away from the rest of the wing.

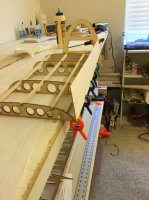
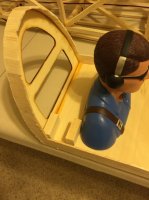
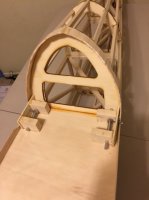
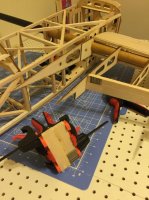
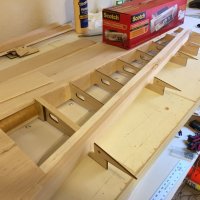
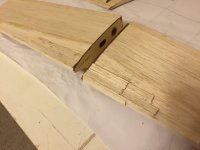
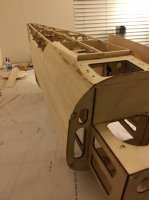
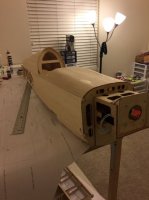
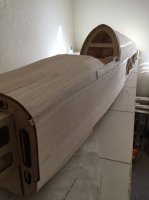
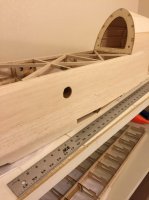
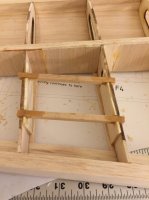
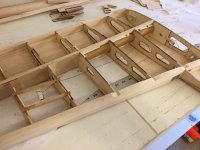
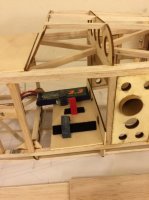
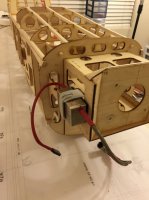
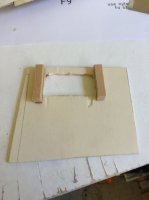
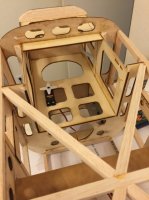
As for the elevator servos, they still would not fit with the servo completely embedded into the stabilizer. So you can see the placement of where the servos are going to go into the fuselage. I used basswood for the servo rail and epoxied them into place. Transporting for day-to-day flying will not require taking the stabilizers off so disconnecting a linkage every now and then does not bother me.

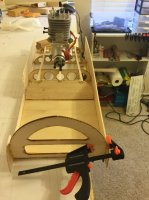
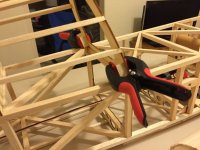
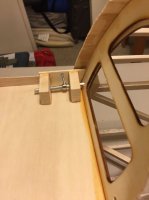
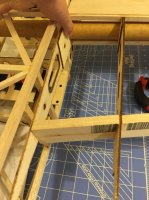
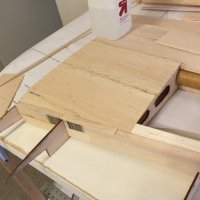
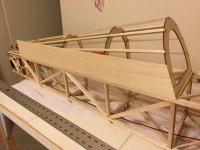
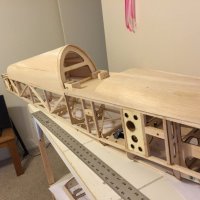
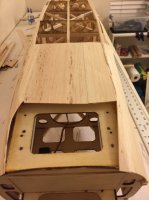
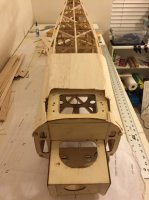
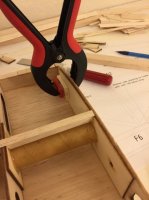
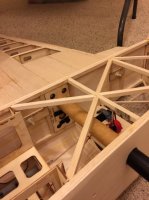
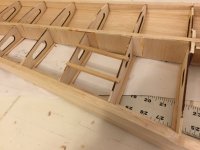
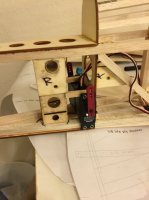
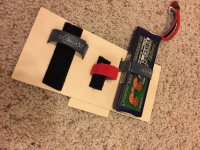
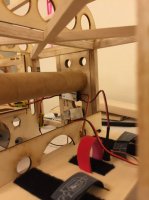
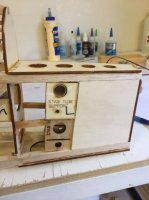
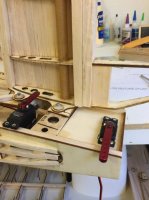
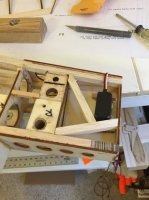
I worked on the receiver and battery tray next. I cut a piece of plywood to fit into the spot just aft of F-3. With that piece, I wanted it removable in the case I needed to replace a velcro strap. So I screwed that piece into the stringers. To make the slots for the battery strap, I used a Dremel cutting tool. As you can see, there is plenty of room on that piece for my 2x 2s 3300 batteries (one for ignition, one for radio). Then I placed velcro with straps on the right side of the motor box for the ignition and routed the rest of the ignition system through the plane for placement of the regulator and the optical kill switch which were placed as shown.

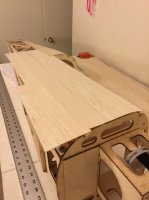
Next on the docket: getting the rudder servo tray cut to fit behind the elevator servos, sheeting the canopy hatch, then glueing the front edge of the aileron to the one wing.
 

Attachments

  • image.jpeg
    image.jpeg
    81 KB · Views: 295
  • image.jpeg
    image.jpeg
    45.6 KB · Views: 275
  • image.jpeg
    image.jpeg
    118 KB · Views: 284
  • image.jpeg
    image.jpeg
    46.9 KB · Views: 291
  • image.jpeg
    image.jpeg
    48.4 KB · Views: 296
  • image.jpeg
    image.jpeg
    51.4 KB · Views: 315
  • image.jpeg
    image.jpeg
    44.7 KB · Views: 289
Last edited:

Bluepilot2003

70cc twin V2
Placing the rudder servo was a little tougher than I thought it would be. I cut the plywood piece to the aft area of the fuselage. From there, I needed to decide on the best location for the servo to not interfere with the elevator. So to alleviate any problems, the plywood piece is placed flush with the INSIDE edge of the main stringer. I used the dremel cutting tool again to make the hole for the servo. I glued the basswood pieces to the back for the servo screws. Then I glued the plywood piece into place. With the servo still installed, I went to the other side to do the cross braces around the servo.

The last picture shows the location I decided on for the throttle servo. There is plenty of room for the fuel tank next to it. From that location, there should be a nice straight shot for the pushrod leading to the throttle.
 

Attachments

  • image.jpeg
    image.jpeg
    45.9 KB · Views: 287
  • image.jpeg
    image.jpeg
    27 KB · Views: 273
  • image.jpeg
    image.jpeg
    52.9 KB · Views: 276
  • image.jpeg
    image.jpeg
    52.1 KB · Views: 291
  • image.jpeg
    image.jpeg
    51.8 KB · Views: 308
Last edited:

Bluepilot2003

70cc twin V2
Okay, it sure has been a while since posting in here! I wish I had more time to put towards this project. I am working on it between work trips and it has been very busy at work for me recently. Still hoping to have this plane complete sometime in April.

I decided to almost finish off the canopy hatch. The next step for me was to sheet the hatch starting from the edges and worked toward the center. I glued the edges on then wet the pieces thoroughly to get it to curve without breaking. I used thin CA to glue the sheeting on. Then I cut the middle pieces to size and glued them in place. I wasn't perfect on it so I will be using some wood filler and sanding to make it right.

Then I worked on the latch system that I have seen on someone's Extreme Flight Edge. It looked simple enough to make so I replicated it. I used a 1/4 inch aluminum rod, wheel collars to fit on it, long screws that matched the wheel collar threads, and springs that fit the rod as well. I glued 2 basswood pieces to light ply sheeting for the base of the latch system. You can see the placement on the hatch. I glued 2 more basswood pieces to the backside of the front turtle deck former for the aluminum rods to go into to hold the canopy hatch on. From that point, I epoxied the 2 base pieces into the cockpit area. While that was drying, I cut the aluminum rods to size so that they would stick out the back of the hatch about 1/2 inch. I also dremeled a flat spot on each one for the wheel collar to tighten on to. I placed the canopy hatch into position and tried to get a straight drill through all of the pieces at the same time. This proved harder than thought since my drill had no way to be in a position to get all the holes at the same time to ensure perfect alignment. I ended up drilling the hatch holes first, marking those holes onto the front turtle deck former, and drilling those two holes separate. When I did the last two holes, they were not great for the alignment of the aluminum rod, so I used the dremel drill to bore out the holes to get a good fit. Finally, i placed the aluminum rods into place while getting the springs and wheel collars in place between the basswood pieces. The long screws were placed into the wheel collar set screw locations to be able to move the aluminum rods in and out. Now the canopy hatch is easy on and off without using screws:)

Since I decided to put the elevator servos into the fuselage, I sheeted the bottom sides. I have been sheeting one piece at a time instead of glueing together first, then making the whole piece to size. I will be changing my tactics from now on since that seems to be much easier to do well.

I can see the end in sight for this project... just a few more work trips before I can really spend a lot of time working on it. I have been thinking about the next one already:) Something in 100cc probably if I really enjoy gassers. @Terryscustom's Viper looks awesome!! I have also been offered a ready to cover Dalton Extra 230 which is very tempting as well.
 

Attachments

  • image.jpeg
    image.jpeg
    59 KB · Views: 267
  • image.jpeg
    image.jpeg
    56.9 KB · Views: 277
  • image.jpeg
    image.jpeg
    46.5 KB · Views: 292
  • image.jpeg
    image.jpeg
    39.3 KB · Views: 298
  • image.jpeg
    image.jpeg
    36.8 KB · Views: 289
  • image.jpeg
    image.jpeg
    50.6 KB · Views: 290
  • image.jpeg
    image.jpeg
    71.9 KB · Views: 295
  • image.jpeg
    image.jpeg
    87.6 KB · Views: 289
  • image.jpeg
    image.jpeg
    33.6 KB · Views: 275
  • image.jpeg
    image.jpeg
    35.6 KB · Views: 258
  • image.jpeg
    image.jpeg
    71.6 KB · Views: 266
  • image.jpeg
    image.jpeg
    62.1 KB · Views: 258
Last edited:

Bluepilot2003

70cc twin V2
I had been thinking on getting a large A-10 to build so I never thought of getting a foamy. After doing some research, that isn't a feasible project. So I got MotionRC's Freewing A-10. It has the paint job from the squadron that used to be at Spangdahlem AB, Germany. It actually has the tail number of a jet in my current squadron and have flown that plane:)
image1.JPG
 

Bluepilot2003

70cc twin V2
Thanks for the nice comments, but if anyone sees anything I could be doing better, please do speak up! I am not one to take criticism badly. I like getting better! (Hard to be a fighter pilot and not be able to take some criticism!!!)
 

Bluepilot2003

70cc twin V2
Work on the wing, turtle deck, and horizontal stabs.
 

Attachments

  • image.jpeg
    image.jpeg
    81 KB · Views: 255
  • image.jpeg
    image.jpeg
    86.2 KB · Views: 238
  • image.jpeg
    image.jpeg
    69.5 KB · Views: 265
  • image.jpeg
    image.jpeg
    68.6 KB · Views: 256
  • image.jpeg
    image.jpeg
    67.7 KB · Views: 272
  • image.jpeg
    image.jpeg
    40.3 KB · Views: 269
  • image.jpeg
    image.jpeg
    46 KB · Views: 260
  • image.jpeg
    image.jpeg
    65.7 KB · Views: 241
  • image.jpeg
    image.jpeg
    46.2 KB · Views: 252
  • image.jpeg
    image.jpeg
    76.6 KB · Views: 269
  • image.jpeg
    image.jpeg
    70.7 KB · Views: 274
  • image.jpeg
    image.jpeg
    49.2 KB · Views: 271
  • image.jpeg
    image.jpeg
    58.2 KB · Views: 248
  • image.jpeg
    image.jpeg
    63.4 KB · Views: 233

Bluepilot2003

70cc twin V2
I sheeted the front of the fuselage with 2 layers of 1/16" sheeting. That allowed for easier bending of the sheeting. I cut the holes out of the fuselage where the wing bolts and the wing tube go along with small holes for the servo wires as well. The wing bolts are from Extreme Flight and the blind nuts I got at Ace Hardware.

I decided to go with 2 wing bolts per wing half instead of using a dowel for one of them. So I epoxied the blind nuts with plywood on the inside of the wing. I put a servo between the servo rails to make sure the spacing was perfect when I cut the ribs out. I also added plywood doublers for more strength there as well.

All the sheeting I glued together for these pictures was glued with Tight Bond. I do like working with that much better when I can and have the patience for it. It is awesome to see both wings on the plane:) I feel like I have made some pretty decent progress in the past two weeks.
 

Attachments

  • image.jpeg
    image.jpeg
    39.3 KB · Views: 260
  • image.jpeg
    image.jpeg
    40 KB · Views: 219
  • image.jpeg
    image.jpeg
    49.9 KB · Views: 239
  • image.jpeg
    image.jpeg
    51.8 KB · Views: 211
  • image.jpeg
    image.jpeg
    39.4 KB · Views: 186
  • image.jpeg
    image.jpeg
    44.7 KB · Views: 205
  • image.jpeg
    image.jpeg
    58.8 KB · Views: 189
  • image.jpeg
    image.jpeg
    33.4 KB · Views: 193
  • image.jpeg
    image.jpeg
    49.8 KB · Views: 204
  • image.jpeg
    image.jpeg
    46.7 KB · Views: 195
  • image.jpeg
    image.jpeg
    44.8 KB · Views: 190
  • image.jpeg
    image.jpeg
    46.3 KB · Views: 188
  • image.jpeg
    image.jpeg
    55.7 KB · Views: 222
  • image.jpeg
    image.jpeg
    71.1 KB · Views: 182
  • image.jpeg
    image.jpeg
    41.1 KB · Views: 188
  • image.jpeg
    image.jpeg
    45 KB · Views: 195
  • image.jpeg
    image.jpeg
    93.4 KB · Views: 193
  • image.jpeg
    image.jpeg
    82.4 KB · Views: 198
  • image.jpeg
    image.jpeg
    42.5 KB · Views: 187
  • image.jpeg
    image.jpeg
    51.1 KB · Views: 198
  • image.jpeg
    image.jpeg
    96.9 KB · Views: 227
  • image.jpeg
    image.jpeg
    45.6 KB · Views: 194
Last edited:
Top