• If you are new to GiantScaleNews.com, please register, introduce yourself, and make yourself at home.

    We're 1st in Giant Scale RC because we've got the best membership on the internet! Take a look around and don't forget to register to get all of the benefits of GSN membership!

    Welcome!

Scale 20cc DHC-2 "Beaver" Kit Build from Moustache Model Works

AKNick

640cc Uber Pimp
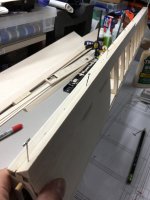
Understand the feeling. The two planes I'm currently designing both will be laser cut and for the most part will not need plans at all to build as everything will just key together.

I think that was the intention of this build, but yet recommends building over the plans. I do believe the goal was to keep the wing strait as possible.
 

AKNick

640cc Uber Pimp
More wing building. Pretty strait forward. Once again use the plans to keep the wing strait, and use the other wing plan as a reference where everything goes.

Couple notes:
Anti rotation pin blocks are square laser cut sheet 2 of 3. I beefed them up with some more balsa integrating the flap hinge block with it.

Flap bay corner near the wig tube needs modification along with the triangle ply block for the hatch. Glue those two together first and grind to fit the wing tube later.

Speaking of wing tube the end cap that is supplied to go inside the tube is too small. I contacted MMW and notified them, David knew about it and corrected it with the later kits. Easy to fabricate but just a heads up.

I’m a little confused about the hinge block locations. Well see how it turns out, I substituted some blocks and materials for some more material. You’ll see in the pics.

D176473A-2659-41BB-A887-63F63D005E68.jpeg

Bevel this edge before you glue it in place.
7A91D852-5FD1-42F2-91AE-0B1BD87AA4CC.jpeg AEDC6A59-589B-4032-9328-30A84EB7D2AB.jpeg B9EF3EF4-8328-4A8B-BFC2-A3CF44253742.jpeg

Short shear web labeled
081489B1-38EC-4CAA-B8EB-4FAD37E51A38.jpeg 450C544A-340D-4FDA-8193-2A7451E29F35.jpeg 65BED77A-5A20-4295-BA4F-9DB0C58C8A8F.jpeg 527D01EB-ED65-4CFB-A1FB-33A63B80B0D4.jpeg 10F5236F-B8D9-4A79-AE54-A3B0FBA1FDB3.jpeg 9D5A9AF8-F1D8-4FAA-BE45-2322F69AEDB1.jpeg D3B65188-E3BC-4CA2-8678-FF2468C860FE.jpeg 032A1664-9788-4B25-ABBA-B523D758BBB3.jpeg 4FE7E1D9-B85E-4A2C-9D8D-9A9AE47C164A.jpeg 7D127501-743B-4D88-B9E5-0C720F5569F4.jpeg BE077BA2-FFEE-4BD2-879D-70384653A4A6.jpeg 807596DD-800B-4B95-8712-E3B6E2B69442.jpeg A06AD765-E6B9-4BFF-9CB1-B86397B711C6.jpeg B87E29CE-5548-4476-B999-6A76524EB4A7.jpeg 49855B8F-8EF3-4374-BA0E-E7364B628A24.jpeg 87D3A6BA-FBBB-44F9-BCA3-89E74B51F448.jpeg 65E39FC3-A896-4F21-BD3C-F214D0BA4FAC.jpeg
 

AKNick

640cc Uber Pimp
Before I glue the tip on, I’m debating wether to paint it first or afterwords. So I’m going to leave that for later and move on to the flap area.

Also, I confirmed the mfgr in China sourced a different blind nut that the prototype. David was surprised that mine was longer. I just taped the area off and dremeled the nut flush - not a big deal.
D223FCD3-D557-4781-9A7D-EF7587A7D643.jpeg

Cutting a hole in the wing sub spar for the flap linkage:
2E84FB7A-48A8-4034-B0F5-5235CCBB8A07.jpeg

Glued the 1/4” tri stock to the TE upper wing for the flaps and removed the material for the linkage

6711CAFD-A123-48CE-9A64-CA1AE58D9166.jpeg FBF63578-3F8F-422B-9589-671213E7BE07.jpeg 3138A85B-7D66-4A8F-B413-041CE6A3093B.jpeg F9B07C88-22EE-4773-B0B1-35117F602984.jpeg 7AE3FAE5-FE70-4F79-8CB5-B6C8FD838CFE.jpeg

Added the servo bay spacers from the 1mm ply.
F9877D5C-B18F-4428-AD3A-5DECED385A2E.jpeg CE441F78-0383-4D77-9B08-FF9B9F967845.jpeg

Next up the flaps!
Pretty easy so far. Laser cut guides for rib spacing.
46DDA243-A655-4DEF-9142-B0CEB7B67509.jpeg 38883D3E-6E25-4645-9943-49197A00285C.jpeg

I decided I did not care for the ply flap linkages and made a carbon G10 arm.

3A619F33-062C-4B82-8513-7A1FE2043BD2.jpeg
 

Attachments

  • 2B368B15-7A09-4891-A531-806FA141C13E.jpeg
    2B368B15-7A09-4891-A531-806FA141C13E.jpeg
    1.3 MB · Views: 368
Top