• If you are new to GiantScaleNews.com, please register, introduce yourself, and make yourself at home.

    We're 1st in Giant Scale RC because we've got the best membership on the internet! Take a look around and don't forget to register to get all of the benefits of GSN membership!

    Welcome!

IMAC Terryscustom 35% MXS-ST Prototype

Terryscustom

640cc Uber Pimp
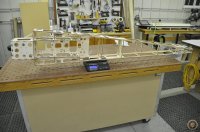
I decided to all it a night, I'll stop counting time now but with little effort and a little planning this fuse goes together in 5-6 hours complete. I completely trust 
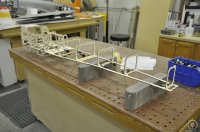
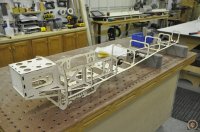
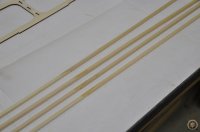
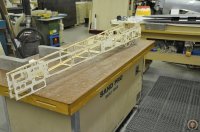
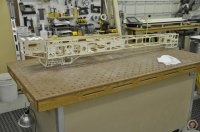
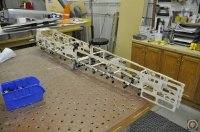
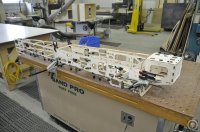
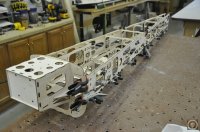
@Flyrcjoe because he is like me and tries lots of things and like to test util destruction before implementing something. So, for this build I am testing Titebond medium CA to install my spruce longerons to the lite ply sides. I will say this, they are much more rigid feeling after removing the clamps than with wood glue. The key is that you let the glue soak in, do not use kicker and follow with a bead of glue and micro-balloons. I'm hugely impressed. Can't wait to install the fuse sides onto the fuse tomorrow.

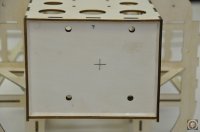
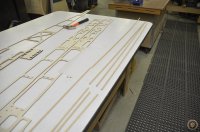
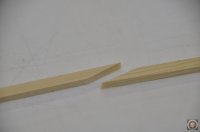
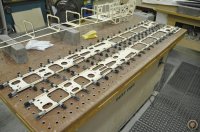
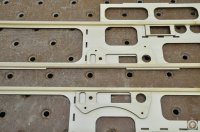
I put a fillet with micro around the firewall outside. I installed all the formers with medium on both sides, let dry, no kicker. I made my scarf joints, glued with medium, let dry, sand all four sides, wick with thin CA. After longeron installation I installed all the birch ply doublers on the inside of the fuse with medium, no kicker.

I'll wrap up the fuse tomorrow afternoon between actual work I need to get done.
 

Attachments

  • _DSC0107.JPG
    _DSC0107.JPG
    51.9 KB · Views: 425
  • _DSC0108.JPG
    _DSC0108.JPG
    35.7 KB · Views: 449
  • _DSC0109.JPG
    _DSC0109.JPG
    104.2 KB · Views: 441
  • _DSC0110.JPG
    _DSC0110.JPG
    118 KB · Views: 462
  • _DSC0111.JPG
    _DSC0111.JPG
    81.1 KB · Views: 434
  • _DSC0112.JPG
    _DSC0112.JPG
    103.1 KB · Views: 460
  • _DSC0113.JPG
    _DSC0113.JPG
    30.9 KB · Views: 438
  • _DSC0114.JPG
    _DSC0114.JPG
    53.7 KB · Views: 509
  • _DSC0116.JPG
    _DSC0116.JPG
    136.8 KB · Views: 445
  • _DSC0117.JPG
    _DSC0117.JPG
    134.5 KB · Views: 428
  • _DSC0118.JPG
    _DSC0118.JPG
    107.4 KB · Views: 508
  • _DSC0119.JPG
    _DSC0119.JPG
    108.5 KB · Views: 423
  • _DSC0120.JPG
    _DSC0120.JPG
    102.2 KB · Views: 474
  • _DSC0121.JPG
    _DSC0121.JPG
    111.5 KB · Views: 469
  • _DSC0122.JPG
    _DSC0122.JPG
    116.9 KB · Views: 493
  • _DSC0123.JPG
    _DSC0123.JPG
    104.4 KB · Views: 449
  • _DSC0124.JPG
    _DSC0124.JPG
    115.3 KB · Views: 397
  • _DSC0125.JPG
    _DSC0125.JPG
    103.2 KB · Views: 392

Terryscustom

640cc Uber Pimp
Thanks everyone for joining in!

I got a little more done this morning but now I need to pay the bills for a few hours before I can get back to it. Fuse sides are installed and fuse top is test fit. I don't think I can say it enough, TEST FITTING is very important before gluing every part! Also want to point out (maybe brag a bit) that I have not used a flat table. When assembled as I show the fuse is perfectly square and straight, or if you are the super engineering type that measures down to the thousandths.......it is more straight than pretty much any ARF.

_DSC0130.JPG
 

Attachments

  • _DSC0127.JPG
    _DSC0127.JPG
    131 KB · Views: 437
  • _DSC0128.JPG
    _DSC0128.JPG
    120.3 KB · Views: 419
  • _DSC0129.JPG
    _DSC0129.JPG
    115.2 KB · Views: 387
Last edited:

ericrs

70cc twin V2
Looks great! It sure makes for easy building when you don't have to have a perfectly flat table, and it still comes out square!
 
Top