You are using an out of date browser. It may not display this or other websites correctly.
You should upgrade or use an alternative browser.
You should upgrade or use an alternative browser.
IMAC Carden Pro 124 Build, My Dream Plane
- Thread starter ROLLERMAN
- Start date
ROLLERMAN
70cc twin V2
So, as I mention before, I’m no master builder and my covering method is from past experiences reading other threads and trying some new things on my own.
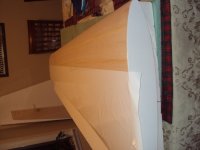
I will start with prep work, and this basically starts as soon as you are gluing balsa sheets together, it makes a huge difference sanding sheets on a flat surface rather than after they are glued on the foam pieces. I’ll start out with 120 if I need to go over the glued edges, then 220. After the 220 and following the steps below I spray hair spray, wait until it completely dries and then go over it with 400.
Some notes
- Do all sanding outside, and if you can’t I would wait a few hours or even over night to let all the dust settle.
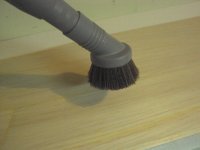
- Use compressed air to blow must of the dust off; in my case I can turn our Kirby vacuum in to a blower. If you do use compressed air DO NOT hold the air gun directly on the balsa.
- After blowing the surface I go back and vacuum the balsa. I highly recommend a soft brush to keep the balsa from getting marked up.
- All this is great but HOW? Do you actually lay it down on the balsa and how to do monokote over monokote without the pesky bubbles.
- Well that’s easy just pay me to do it.
ROLLERMAN
70cc twin V2
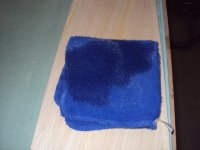
JK, Here is what I've been using for Prep work.
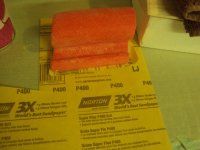
That red sponge you see is from one of those erase all cleaning white pads, I pulled off the pad. I use a small amount of shoe goop for the 400 grit sand paper to stick to it. Works great for the final sanding.
That red sponge you see is from one of those erase all cleaning white pads, I pulled off the pad. I use a small amount of shoe goop for the 400 grit sand paper to stick to it. Works great for the final sanding.
Attachments


ROLLERMAN
70cc twin V2
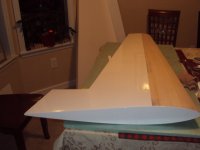
OK, so now on to laying down some covering. I start out by doing the end caps first, I give myself about a 1/8th inch overlap so that I have something to attached the covering and pull on it from the opposite side. Oh!! Right before I put the piece over the wing I again clean it with a rag damped with alcohol, this will pick up any bumps or trash that later my look like Mount Everest, which drives me crazy. Another tip is to pull the clear plastic from the covering while is on top of the wing, but make sure you do it slow and do not allowed the monokote to get wadded up, not sure how to explain that better. It will get creases on it and will show up unless you heated very hot and pull on it.
Attachments

ROLLERMAN
70cc twin V2
It picks up the remainder dust from the balsa. Works great and do not cost a lot.What's the rubbing alcohol for?


Notorious B.E.N.
100cc
It picks up the remainder dust from the balsa. Works great and do not cost a lot.
Very interesting!