You are using an out of date browser. It may not display this or other websites correctly.
You should upgrade or use an alternative browser.
You should upgrade or use an alternative browser.
3D CAP 232-ST design / build / prototype
- Thread starter Terryscustom
- Start date
lakerider8
50cc
I totally agree. The wing location will not throw off the overall looks of the plane,whereas stab location would alter the overall look of the airframe. It will still look exactly like a CAP and not be mistaken for any other plane.Like the way you kept the stab high and ahead of the rudder. It's worth the trade off because thats is one of the things that make a Cap look so unique.
")
Terryscustom
640cc Uber Pimp
Does this wing placement not being at the same height of the stab also create snap tendency problems? I was always under the impression that this is why they fly inverted better? Am I wrong?
The wing vs stab placement has a stronger effect on coupling then it does on snapping. Wing loading combined with tip chord combined with low wing and possibly combined with the dihedral present in the actual CAP wing is where it get's it's nemesis namesake.
On my design:
- Wing loading = not an issue
- Diheral = gone bye bye
- Low wing = raised slightly and will deal with coupling in a couple of other ways such as incidence and the taller rudder will help create some drag above the canopy.
Edit: Looks like Jaybird and I hit the post button at the same time.
Terryscustom
640cc Uber Pimp
Pistolera
HEY!..GET OUTTA MY TREE!
Terry....it can give one extreme elevator authority if done right. The question is does this plane really need that, vs another less scale design.What are the advantages of a flying stab ?
Terryscustom
640cc Uber Pimp
Not doing it, is the simple answer. Trying to design a 3D plane with above average performance characteristics. If someone wants to try to design something from ground up with this mod that sounds like a cool thread.
Terryscustom
640cc Uber Pimp
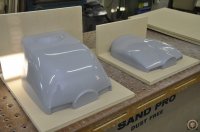
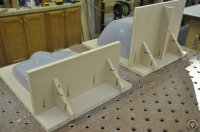
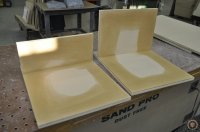
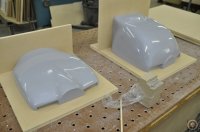
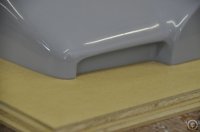
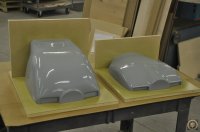
Working on the cowl mold today. Fist I attached the plugs to the parting boards with a little glue so they can be easily removed. Next all seams around the edges need to be completely sealed off flush with non-hardening clay. This will form a nice flush edge for the mold. The clay typically pushes in slightly during the application of the gelcoat layer but can be sanded flush after the plug is removed. Just waiting for PVA to dry right now and ready to start applying some gelcoat and glass to form the mold.
Attachments
Jetpainter
640cc Uber Pimp
Terry,
What weight cloth do you use for the mold? And for the layup of the cowl itself, what weight and how many layers?
Doug
What weight cloth do you use for the mold? And for the layup of the cowl itself, what weight and how many layers?
Doug