• If you are new to GiantScaleNews.com, please register, introduce yourself, and make yourself at home.

    We're 1st in Giant Scale RC because we've got the best membership on the internet! Take a look around and don't forget to register to get all of the benefits of GSN membership!

    Welcome!

Scale 1/3 Scale Extra 330L Build.

Snoopy1

640cc Uber Pimp
Sorry folks, late to this thread, but as you can see from my avatar, I have this exact same aircraft. It took me four years on and off to build it, but it has been flying for about eight years and two motors now. Just thought it might be nice to address some of the issues that have been raised (although I am too late to offer advice on some as you are already past that point).

The quality of the kit is not great, being that it is mostly die cut (and I think I got mine towards the end of the run where there was more compression cutting than actual cutting of some parts). The quality of the sheeting throughout was poor and the matching was even worse. I took the time to match left to right and top to bottom to ensure no twisting of the build. You also need to get the softest sheet for the centre of the top fuselage sheeting otherwise it will split and cause all sorts of issues.

Some things I noted from my build:
- The AUW of mine initially was 11.75kg (25.85lb). I flew it on a Fuji BT-86 Twin magneto setup. Not lots of power but would do all the basic aerobatics bar snaps on the upline. I have since upgraded to a Hobby King 111cc (essentially a DLE-111 V2) and it is much more sprightly, just had to move some batteries forward to get the CG correct.
- I stuck with using the bolts through the joiner tube to keep both the stabs and wings on. I have never had an issue with this. I remove the stabs for transport and storage to avoid hangar rash.
- I chose to add the counterbalance to the rudder and in my opinion it adds the brilliant knife edge that this aircraft is capable of. I can easily go the length of the field on its side with minimal elevator or aileron compensation.
- I noted that you were concerned with the bevels only being on the aileron and not the back of the wing. I stuck with the kit on this and I was able to get plenty of throw and it is quite spritely with the amount of throw you can get.
- I used two aileron servos per aileron to avoid the issue of the aileron flexing. The stock size aileron does allow plenty of authority though, so I would have suggested that you not add the additional 1" to it.
- While I like the modifications that you made to the wing, you don't really need them. I stuck with the kit design and have never had an issue, even after putting quite some stress on them through some of my flying. As I said above, I have been flying mine for about eight years and it has been my go to plane for most of that so has been very well used.
- In regards to the wing tube, it does not go all the way out to the end of the wing tubes. Utilising the bolts through the tubes ensures that it cannot slide around so there is no issue with it moving in flight. As you have chosen an alternative method of keeping your wings on, I would suggest that you update to a tube that does go the full length so you get an even distribution of stress in both wings and the tube does not slide around.
- In regards to the right thrust in the firewall, I built mine with it included and have never had an issue, even across two different motors. I do not have to program a throttle to rudder mix to deal with it which simplifies the set up. Down thrust is a personal choice, but I included it and do not regret it.
- I covered mine entirely in monokote.

Happy to provide some other thoughts as you go through the fuselage build.

My current set up is (noting the age of the aircraft):
Hobby King 111cc (cheap, but runs well and as I am not into IMAC it is plenty to undertake basic 3D, inverted flat spins being a favourite)
Smart-Fly Power Expander with fibre optic ignition kill switch (Has the regulator and servo matching)
2 x 3000mAh 2S LiPo receiver batteries
1 x 1800mAh 2S LiPo ignition through a voltage regulator
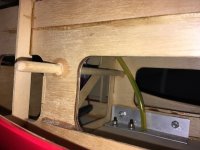
2 x JR DS8611 for the rudder, mounted in the rear of the fuselage
2 x JR DS8611 for each aileron
1 x JR DS8611 for each elevator half
1 x JR DS811 for the throttle

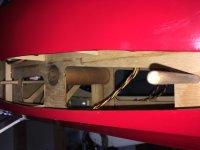
Here is a photo of the completed, but uncovered aircraft with my son in the background.


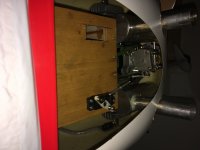
Had a look at the drawings again and yes 2 servos should fit nicely with out any modifications for the rudder.
 
Hi Muttsyflyer, well thanks for taking the time to write all that up. Sorry say as you have said a little late to the show but that does not matter. Can add the counter balance to the rudder is easy but the ailerons are staying as is. The wing Changes i would have done anyway the design is flawed. Have to agree with you not the greatest kit and yes the wood is just plain bad and so is the drawing scale. But as I proceed your help and comments and guidance will be appreciated. Have not decided on all the equipment going into the plane but I do believe the engine will be a Da120.
Does the plane build tail or nose heavy. Depending on your answer it is still possible to move the engine forward or back in the plane to compensate for the CG. Would like to put two servos in the tail for the rudder same as you have done. Did the two servos clear one another or did you need to make some changes to make them fit. Do you like the flying characteristics of the plane generally. The plane will be flown as a 3D machine in general.

I see you have already answered the rudder servo question, but just to follow up, I had no issues getting them in there happily. The short control rods give a very positive control that I have never been able to get from a closed loop cable system. Downside is making servo extensions, but that is relatively easy, if time consuming.

I like the engine choice, being light and powerful. The instructions say nothing over 80cc, but mine has been quite fine on the 111. I did follow the instructions in regards to drilling and dowelling the firewall and think this would be essential given the engine choice. I also added some triangle stock in the corners to give the glue a bit more to grip on as well. I wish I had of known how to split the cowl as it is a little tricky to get on with the engine installed, but otherwise it is not a major issue. I have my throttle servo on the bottom of the motor box, right at the front so I can access it with the cowl on (through the large heat escape I have at the lower rear of the cowl (see photos)). The extra servo hole was for the Fuji as it had its throttle attachment on the other side.

The aircraft builds quite neutral in terms of balance. I had a reasonably heavy Fuji in to start with the correct clearance of spinner to cowl. When I put the 111 in, I made no changes to the firewall mounting and the prop sits a little further out. Adding the ignition battery right up front and moving the receiver packs forward gave me a perfect balance. I also managed to mount the 32 oz fuel tank centred over the main wing tube to avoid CG changes in flight. The radio mounting area is quite large so you can move all the necessary things around to get a good balance.

Not sure if you have completed the leading edges of the wings yet, but I went for the more rounded "3D" shape and it still does precision aerobatics quite well.
 

Attachments

  • Cowl Opening 1.jpg
    Cowl Opening 1.jpg
    1.2 MB · Views: 279
  • Cowl Opening 2.jpg
    Cowl Opening 2.jpg
    1.6 MB · Views: 253

Snoopy1

640cc Uber Pimp
Thanks again. No the wings are built and done except for leading edge and the hinges. Normally do the leading edge just before the plane gets covered. I agree the firewall will be pinned and hardwood triangle gussets front and back. I have split a couple of cowls now and it is the only way to go on twins so easy to install and cut the necessary holes. It also makes engine baffling so much easier.
I was looking at the plane but I think it is out of the question to install canisters into the plane.
The plane was purchased a long time ago and never opened then I tried to sell it and was offered just ridiculous price so kept it. Love to build so about a month ago I started this build been enjoying it a couple of hurdles but nothing to bad. But one thing I did discovere was that the landing gear was missing so that needs to be resolved I do have some gear laying around that I think will do the job.
 

Snoopy1

640cc Uber Pimp
Still working on the fuselage sides, built right hand side first it looks ok but have decided to finish the one side and then build the left side on top of the right side and use as a template so that are identical. This should keep things square and parallel. take some pictures when both are done.
 
@MuttsyFlyer the wood dowels that are used to align the main wing run across the fuselage. Are they in the way and do they obstructing axis into that area.

@Snoopy1 as you have surmised canisters will not fit without major structural changes around the front of the fuselage (unless you wanted to custom design some). Given that the original was designed for an 80cc and you look like putting a 120 up front, other than possibly for noise reasons you will not need canisters.

As for the dowels through the fuselage, there is nothing under the radio area floor that they get in the way of. I have enclosed a photo of the area in question, both front and rear.

As for the landing gear not being in the kit, the original is aluminium and quite weighty. You would be better served purchasing CF 33% size set (although I still use the aluminium gear as I am not conscious of every ounce and I fly for sport, not hard 3D).
 

Attachments

  • Under Floor 1.jpg
    Under Floor 1.jpg
    1.9 MB · Views: 235
  • Under Floor 2.jpg
    Under Floor 2.jpg
    1.8 MB · Views: 253
  • Under Floor 3.jpg
    Under Floor 3.jpg
    1.3 MB · Views: 266
Still working on the fuselage sides, built right hand side first it looks ok but have decided to finish the one side and then build the left side on top of the right side and use as a template so that are identical. This should keep things square and parallel. take some pictures when both are done.

@Snoopy1, this is exactly how I did it as well and for the same reason. You end up with two identical sides (although a mirror image of each if you did it right, I almost found out the hard way :ugh:
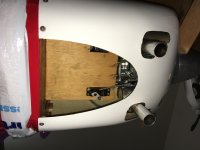
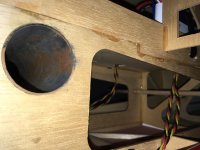
). While initially the fuselage will be quite twisty, take your time as you add the outer parts and you will get a very rigid and strong outcome.
 

Snoopy1

640cc Uber Pimp
It was as if you were reading my mind. While building the sides I kept saying to my self this is got going to work with a 120. The first time I crank on it it will twist in half. Ok will trust you and keep gluing parts to it. And looks like the cross dowels are ok thanks.
 

Snoopy1

640cc Uber Pimp
Looks like I have placed the 4-40 blind nuts that will hold the stabilizer in in the same location as one of the bulk heads, so I have some fixing to do. That is to be expected when you make changes. Will take a picture once it has all been corrected.
 
Top