• If you are new to GiantScaleNews.com, please register, introduce yourself, and make yourself at home.

    We're 1st in Giant Scale RC because we've got the best membership on the internet! Take a look around and don't forget to register to get all of the benefits of GSN membership!

    Welcome!

3D Viper 120cc ARF is HERE!!!!!

Terryscustom

640cc Uber Pimp
Terry, question for you. I plan on running a push-pull rudder on my viper. Can you confirm that I'll mount my rudder servos in the servo slots on the fuse under the stabilizers? Almost under the stab tube.
Thanks,
Jeff
Sent from my iPhone using Tapatalk

Yup, I'll be doing mine soon, maybe not tomorrow but Thursday for sure. If you shine a light down there you'll see that there are plywood doublers behind the cutouts on both sides for the servo(s). You only need one good servo back there though......don't skimp, this rudder is nearly as big as most 40% planes!!!
 
Cool. I will be putting 2 Hitec 7950's back there. I think they should be plenty strong enough.


Sent from my iPhone using Tapatalk
 

Terryscustom

640cc Uber Pimp
Cool. I will be putting 2 Hitec 7950's back there. I think they should be plenty strong enough.
Sent from my iPhone using Tapatalk

Too much weight!!!! A single 7950 on HV is plenty good. ZERO need for two of those on a 35% plane. Two of those in the tail of a 40% plane is perfect but mostly due to the weight of the airframe that it is holding. You are flying 12lbs.+ less airplane.......just use one.
 

Terryscustom

640cc Uber Pimp
Now that the carb arm is flipped, time for some throttle servos!!
Pretty straight forward here. I've found that 7/8" out on a 1" servo arm works extremely well for the travel in the (spektrum) transmitter to be at 100% in both directions.
Pretty simple, lay out geometry, carefully cut a hole, add some "beef" to the inside for servo screws to go into more wood. I make my push-rods from stainless 4-40 rod sleeved with carbon tubes. Install carbon tube with thick CA.
Fuel line run, I drill a hole in the engine box bottom the perfect size for the fuel line and then angle the drill bit towards the carb. Run the line thought. Later I will install some "goop" on this area to eliminate any chafing of the fuel line.
image017.jpg
 

Attachments

  • image008.jpg
    image008.jpg
    82.8 KB · Views: 329
  • image009.jpg
    image009.jpg
    64.8 KB · Views: 325
  • image010.jpg
    image010.jpg
    73.6 KB · Views: 317
  • image011.jpg
    image011.jpg
    60 KB · Views: 331
  • image012.jpg
    image012.jpg
    86.2 KB · Views: 310
  • image013.jpg
    image013.jpg
    50.5 KB · Views: 311
  • image014.jpg
    image014.jpg
    75.5 KB · Views: 375
  • image015.jpg
    image015.jpg
    78.2 KB · Views: 344
  • image016.jpg
    image016.jpg
    77.5 KB · Views: 365
  • image018.jpg
    image018.jpg
    76.3 KB · Views: 327
  • image019.jpg
    image019.jpg
    50.8 KB · Views: 308

Terryscustom

640cc Uber Pimp
Back to work a bit today! I finished installing my fuel system in both planes.

In one Greg decided to use the DA fuel dot and I have been switching to these from B&B specialties. I like the DA one, but some of the China one's either don't want to come out, or end up falling out banging on the outside of your plane during flight.

Fuel system pretty straight forward. Nice thing about the B&B one is there is no line that comes out from the fuse. I installed a half dozen of these in my planes this Fall / Winter so we'll find out through next year how I like them.

The cross member over the tank gets in the way of the vent line so the loop has to go wide. For the vent exit, I like to use a 1.5" piece of 1/8" brass tube. Zip tie the tube in the vent line, exit the plane and then install a 2" section of fuel line on the outside. That keeps the fuel during long downlines and snaps well outside the planehttp://www.GiantScaleNews.com/forums/images/smilies/198.gif
 

Attachments

  • image001.jpg
    image001.jpg
    59.1 KB · Views: 303
  • image002.jpg
    image002.jpg
    84.5 KB · Views: 280
  • image003.jpg
    image003.jpg
    75.4 KB · Views: 303
  • image004.jpg
    image004.jpg
    50.1 KB · Views: 319
  • image005.jpg
    image005.jpg
    74.6 KB · Views: 319
  • image006.jpg
    image006.jpg
    83.2 KB · Views: 326
  • image007.jpg
    image007.jpg
    41.8 KB · Views: 291

Terryscustom

640cc Uber Pimp
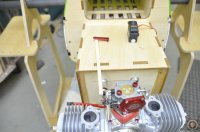
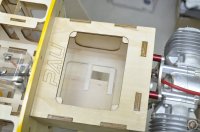
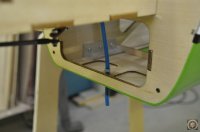
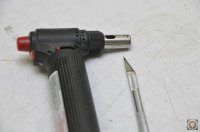
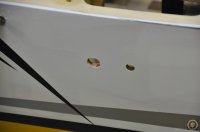
Prepping for some wire installs. I like to cut the openings in the plane with a hobby knife but it's nice to heat the knife with a small torch. This melts the covering, keeps it from ripping and also keeps colors from separating. I used three new blades doing these two planes, best not to skimp.

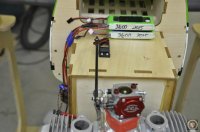
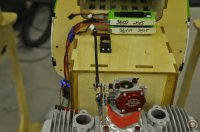
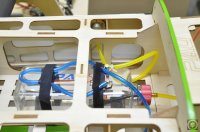
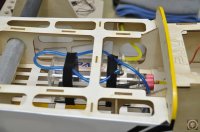
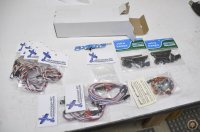
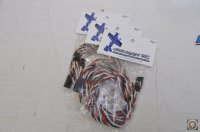
Next I un-boxed the extension kit from flyboysrc. that includes traildragger 20g extensions, Tech Aero IBEC, wire safety keepers, foam wire holders and MPX connectors!!

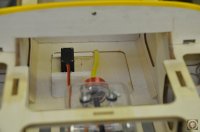
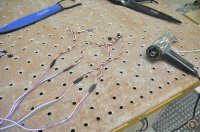
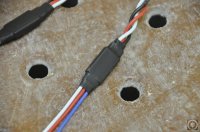
Just by my choice, I like to have the wing wires fairly long to give plenty of slack inside the fuse. I added an extension to allow a little more room. With HV and split ailerons it was not critical to add an extension so I did not solder it in, I just plugged it and used heat shrink as a safety holder.

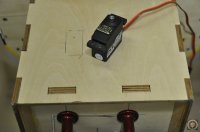
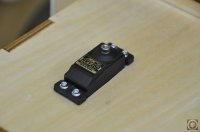
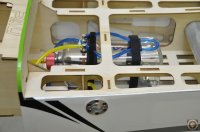
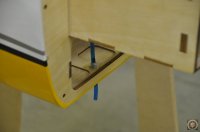
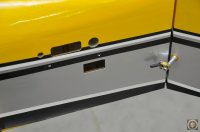
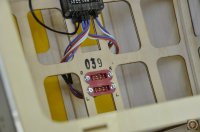
The flange mounted MPX plugs fit perfectly in the Pull-Pull servo holehttp://www.GiantScaleNews.com/forums/images/smilies/197.gifhttp://www.GiantScaleNews.com/forums/images/smilies/197.gifI like to put them there, but label them so when some dude at the field is talking to you while you assemble your plane you have a visual reference!!

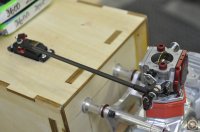
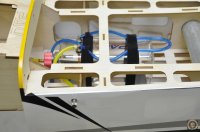
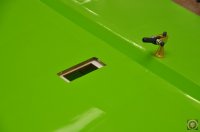
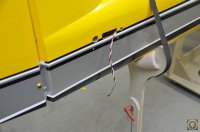
Since I'm using a push-pull configuration I ran the 3x48" extensions to the rear of the plane. As a reference, I like to install the rudder servo on the same side of the fuse as the fuel dot. While you are fueling is a good time to take a quick look to make sure that elevator, rudder and aileron linkages all look good.
 

Attachments

  • image008.jpg
    image008.jpg
    63.7 KB · Views: 287
  • image009.jpg
    image009.jpg
    33.2 KB · Views: 293
  • image010.jpg
    image010.jpg
    38.3 KB · Views: 348
  • image011.jpg
    image011.jpg
    51.5 KB · Views: 317
  • image012.jpg
    image012.jpg
    92.8 KB · Views: 302
  • image013.jpg
    image013.jpg
    142 KB · Views: 304
  • image014.jpg
    image014.jpg
    109.3 KB · Views: 320
  • image015.jpg
    image015.jpg
    69 KB · Views: 330
  • image016.jpg
    image016.jpg
    72.7 KB · Views: 289
  • image017.jpg
    image017.jpg
    77.1 KB · Views: 314
  • image018.jpg
    image018.jpg
    53.9 KB · Views: 343
  • image019.jpg
    image019.jpg
    67.1 KB · Views: 312

Spats

100cc
This is killing me to watch you:devil: That looks so cool. I am in the middle of that big Extra of mine getting re-covered and then I have to put a Yak together for someone. Meanwhile mine just sits in the box starring at me!!!:devil::devil::devil:
 

Alky6

150cc
Terry - where are you sourcing the servo screws from? I noticed the ones you used on the mpx connectors.
Thanks
 
Top