• If you are new to GiantScaleNews.com, please register, introduce yourself, and make yourself at home.

    We're 1st in Giant Scale RC because we've got the best membership on the internet! Take a look around and don't forget to register to get all of the benefits of GSN membership!

    Welcome!
  • Unless you are a paid advertiser NO more posting advertisement in the individual vendor forums. You may post in the Manufacturer's Announcements section only but only ONCE a month unless your a paid advertiser.

Skywing rc 32" epp slick 540 build

3dmike

640cc Uber Pimp
I couldn't help but notice, the 4 short wing stiffeners under the main wing carbon spar, protrudes and does not sit flush with the wing. I'm open to correction but I think the open slot is supposed to face upward and the carbon rod sits in the slot all flush with the wing. I'm sure everything once installed should be completely flush with the wing. (Twisted Hobbies planes stiffeners are a little different in that the carbon rods go through the centre hole and everything sits flush with the wing.)
I know the 'instruction manual' for want of a better word, is somewhat lacking (putting it mildly!) from what I can tell.

I have one on order myself (should be here by end Nov 2014) and will post my build video on my experience with this particular model. $90 including shipping for pnp version with brushless motor, esc, 3 servos, servo extension and 2 props.
http://www.aliexpress.com/store/pro...plane-wingspan-32-inch/602134_2024831150.html
Best price I found! ...... Compared to $200 for a TH's similar setup with shipping to Canada.

I intend flying this model outdoors (little to no wind of course!) with a 2S 450mah battery to keep it as light and floaty as possible. Hoping I can achieve a good CG with a smaller battery without too much trouble.

Any further comments/advice regarding your build, setting up and flying this plane would be greatly appreciated by all interested parties. - Thanks! :)

HA HA you could be right and that would make much more sense!!! DUH Good catch!
 

Stryker48

New to GSN!
Again I'm open to correction, however "I think" the landing gear is installed "incorrectly" from what I can tell. Not sure if it will make a difference or not however "I think" the landing gear (the white angle connector) the open part 'should be facing forward' not backward which would put less stress on the 'angle connector' when landing. If one is going to wrap with thread and Ca for a stronger join, I don't think it will matter much then. ..... just my eagle eye observation ;)
 

Stryker48

New to GSN!
Made some more progress last night.

View attachment 23369
Installed servos and re-centered by plugging in the power system.

View attachment 23367
Built the push rods (couple drops of CA) and used the shrink tubing that came with it

View attachment 23366View attachment 23365
Next I attached the push rods and then glued in the top half of the fuse

View attachment 23368
Glued the LG connectors.

Will continue on the build tonight!

I'm open to correction, however I think you placed the long extension on the aileron servo arm, back to front in your final installation. (it looks correct in your 1st, pic when fitting) I think the arms are supposed to angle towards the front of the plane and not the rear. (not sure how much difference this would actually make, if any .... just my eagle eye again ;)
 
Last edited by a moderator:

3dmike

640cc Uber Pimp
Stryker - so yours must have come with instructions! Lol mine did not so I had to reference pictures and other manufacturers build threads. The servo arm made no difference (to my son and I) and I like the looks of it better swept back.
 

Stryker48

New to GSN!
View attachment 23452
Got the wheel pants on!


View attachment 23454
Checking throws and adjusting my radio

View attachment 23455
View attachment 23456
Installing motor mount was easy and used Cody's blenderm tape method

View attachment 23457
Finished her up yesterday and flew it today! Winds we tough but in the calm sections all i can say is FUN!!! All tricks are easy as this guy can fly fast or extremely slow. My 9 year old hasn't flown in about 9 months and took a turn on the sticks and had no problems at all hovering knife edges pop tops etc. As with most park flying tons of kids and dads came over to investigate so I couldn't shoot any vid as I had to be ready to take the radio back in case he got out of control. Fun times guys!

I will get some vid soon.

Looks GREAT Mike! :)

Looking forward to your video and final thoughts on the build and the flying characteristics & setup.

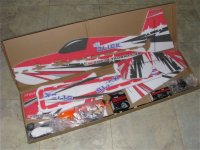
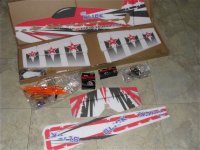
Mine came in the mail today, (pnp version with brushless motor, esc, 3 servos, 2 extension wires and extensive hardware package - through Aliexpress under $100 shipped) arrived in perfect condition (no bends in the foam and all the carbon rods in tact.)
Now looking forward to getting the build started. Not that I'm going to be doing any flying anytime soon as the weather up here in Canada is already sub zero.

I'm very impressed in the quality and completeness of the kit as well as the extensive quality hardware supplied. Printing of graphics is also good.
The power system that came with my kit is plug and play and if the specs are anything to go by, it should be good match for this plane.
If this plane flies as good as it looks, Skywing will definitely get more of my business as the price can't be beat and they have some great models in their lineup.

IMG_3440.jpg

IMG_3441.jpg
 
Last edited by a moderator:

Stryker48

New to GSN!
Like yours, mine came without instructions, however I did find some 'very basic' instructions online. I personally couldn't make out what actual difference it would make if the arm was reversed or even str8 for that matter, other than one would have to have slightly longer/shorter control rods.
That been said, it must be angled for a good reason, I would think!!

I faced mine forward as that's the way it's shown in the 'instruction manual' and also from Twisted Hobbies instruction manuals for their 32" foamies which I used as a good reference point for my entire build.

BTW, where have you placed your battery?

At the moment my battery (2S 450mAh) is Velcro 'd underneath (quite far forward) as I'm still playing around with the CG. I will eventually cut a slot on top of the fuse for the battery, in front of the aileron servo as I only intend using 2S with this plane.
 
Top