GSNadmin
Staff member
When it comes to any model of a Sopwith Camel, (and some WW I German aircraft), there are some plywood panels that give the aeroplane its characteristic look. It was always part of my over all finish scheme to include these side and top panels. Since they are added after the model has been covered and painted, you can add them whenever you like before flying. Yes you could do without them all together and just cover the areas with fabric, but then you are missing a lot of eye candy the plane has to offer.
Getting Started
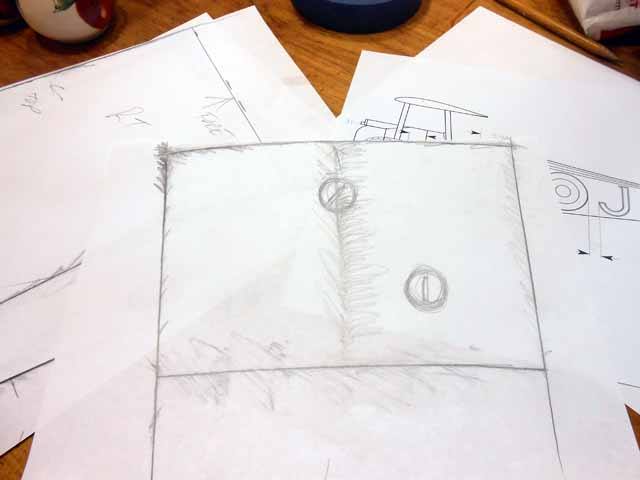
After your model has been covered. Tape a sheet of paper over the area where you will apply a plywood panel. Use a pencil and lightly trace the outer edges as show above. I use tape to define edged that are not as sharp. Here’s the top aft panel that’s just aft of the cockpit opening. It was used to cover the fuel tanks in the full size aeroplane.

Here’s one of the two side panels. it is done in the same way.
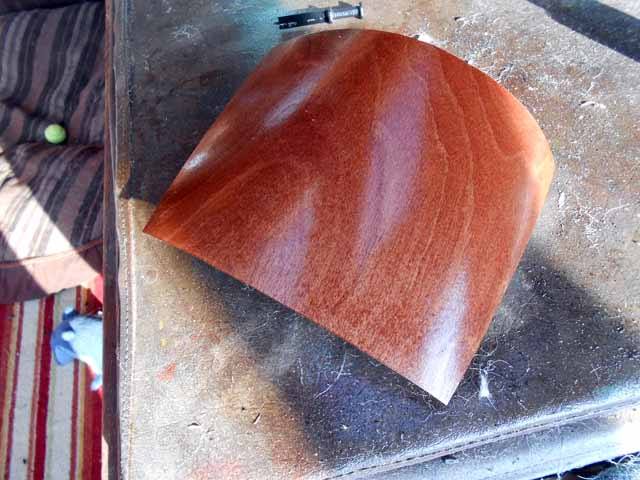
I start with 1/64 inch plywood sheets from the hobby shop and I use a spray adhesive to lightly tack the paper template onto the plywood sheet. You can use a shape pair of scissors to cleanly cut the panel to size. I then rub on some MinWax stain and let it set for a few hours. My panels are stained with Red Maple stain using a cloth to rub on two coats of the stain. After the stain has dried, I spray on 2 to 3 light coats of fast drying MinWax acrylic gloss clear. I use a green Scott pad between coats to smooth the finish.
While the stain and clear coat dry, the plywood panel tend to bend in the desired direction making them easier to apply. Yes, I still have to cut the gas cap openings in this panel. I should have done that before staining.
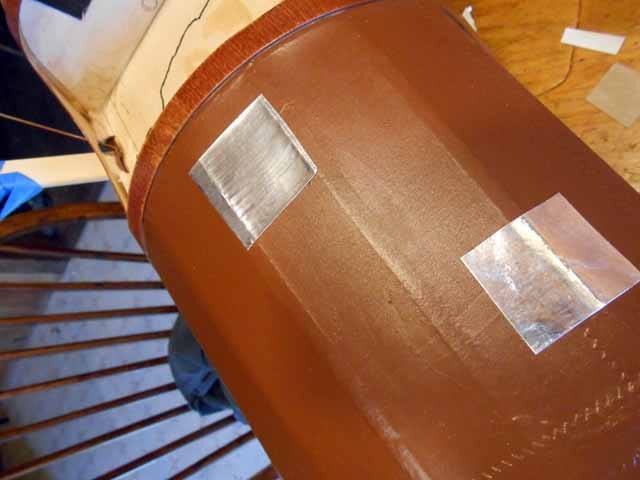
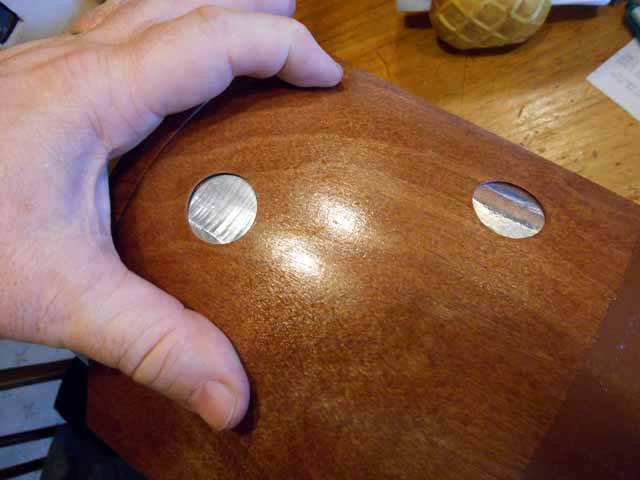
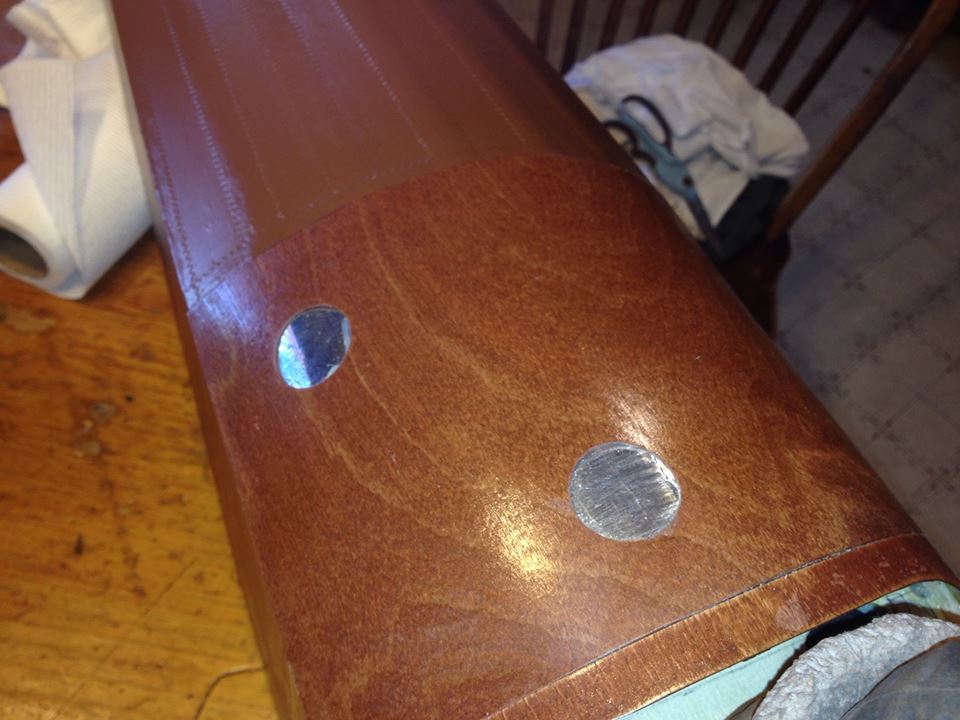
After cutting the two 1 inch diameter openings in the gas tank panel, I applied these bits of aluminum tape to the model.
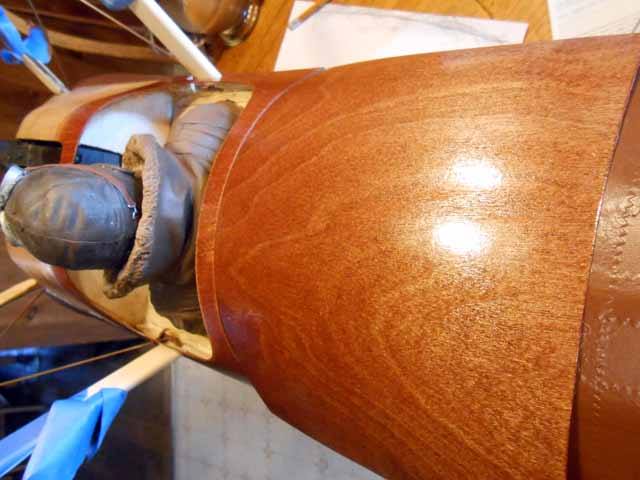
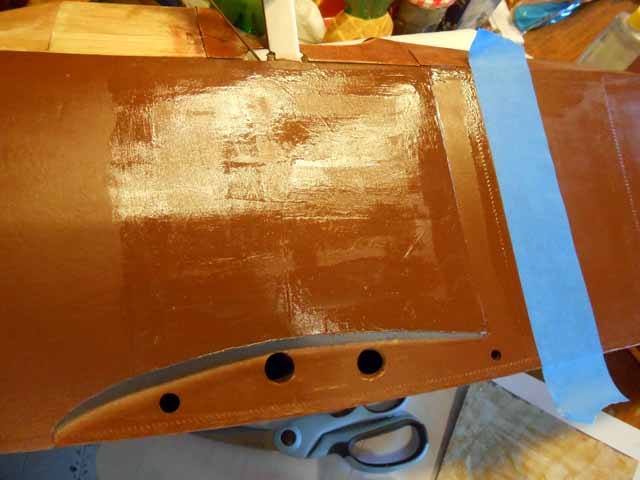
When the panel is glued into place, this is what it will look like. The caps still have to be made.
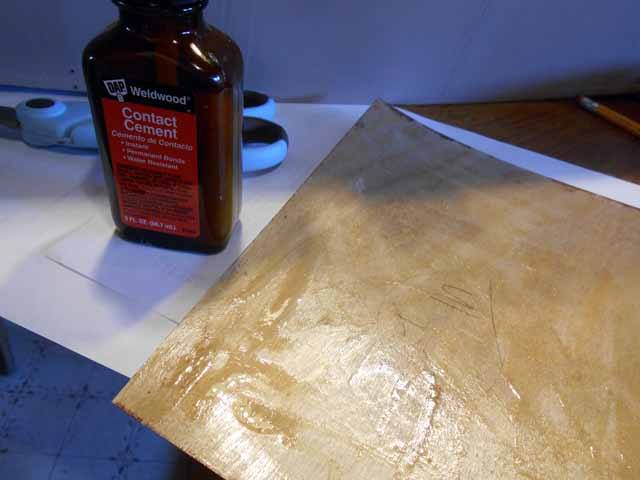
Mark off the area where the panel will be placed and apply a coat of WeldWood contact cement from DAP. Where you want a straight edge, place some tape, apply the cement and remove the tape right away.
Apply a coat to the underside of the panel and allow the cement on the model and the panel to set for 15 minutes. Then carefully align the panel edges and firmly press the panel into place. Be very careful, if you get the placement wrong, removal of the panel is almost impossible. It will be badly damaged if you try to pry it off of the model.
I start with the top aft gas panel and then I do the side panels. This way you can align the top edges of the side panels for straight tight seems. The panel around and over the cockpit, was already glued into place when I was building the cockpit hatch cover. All the other panels butt up against its edges.
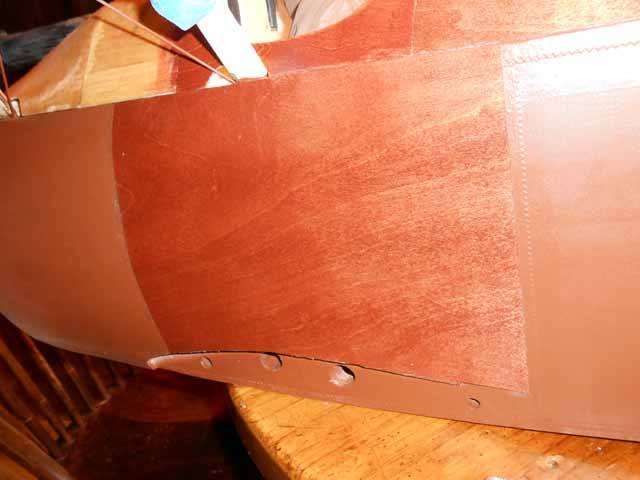
Here’s the top aft gas tank panel is glued into place.

The areas forward of these plywood panels will be covered with metal, (or metal looking), panels which are next in this ongoing project. If you get any contact cement smears you can remove them easily with products like Goo Gone or Crayon remover from the hardware store.
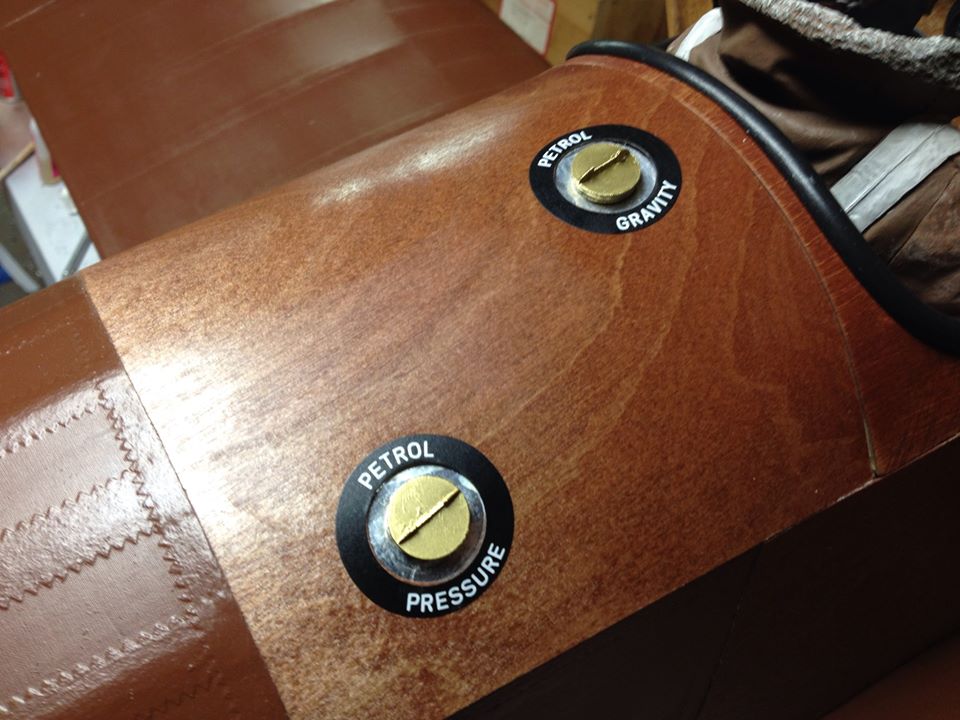
And here is the finished top aft gas tank panel, with some details added like the cockpit combing and the petrol gas caps and decals, the finished Sopwith Camel looks great!
The decals by the way are from Cal-Grafx.com
Part 25: http://www.modelairplanenews.com/bl...uild-along-sopwith-camel-decals-and-graphics/
 http://www.modelairplanenews.com/wp-content/uploads/2016/02/MAN_Button_newsletter_WEB.jpg
Model Airplane News - The #1 resource for RC plane and helicopter enthusiasts featuring news, videos, product releases and tech tips.
Continue reading...
Getting Started
After your model has been covered. Tape a sheet of paper over the area where you will apply a plywood panel. Use a pencil and lightly trace the outer edges as show above. I use tape to define edged that are not as sharp. Here’s the top aft panel that’s just aft of the cockpit opening. It was used to cover the fuel tanks in the full size aeroplane.
Here’s one of the two side panels. it is done in the same way.
I start with 1/64 inch plywood sheets from the hobby shop and I use a spray adhesive to lightly tack the paper template onto the plywood sheet. You can use a shape pair of scissors to cleanly cut the panel to size. I then rub on some MinWax stain and let it set for a few hours. My panels are stained with Red Maple stain using a cloth to rub on two coats of the stain. After the stain has dried, I spray on 2 to 3 light coats of fast drying MinWax acrylic gloss clear. I use a green Scott pad between coats to smooth the finish.
While the stain and clear coat dry, the plywood panel tend to bend in the desired direction making them easier to apply. Yes, I still have to cut the gas cap openings in this panel. I should have done that before staining.
After cutting the two 1 inch diameter openings in the gas tank panel, I applied these bits of aluminum tape to the model.
When the panel is glued into place, this is what it will look like. The caps still have to be made.
Mark off the area where the panel will be placed and apply a coat of WeldWood contact cement from DAP. Where you want a straight edge, place some tape, apply the cement and remove the tape right away.
Apply a coat to the underside of the panel and allow the cement on the model and the panel to set for 15 minutes. Then carefully align the panel edges and firmly press the panel into place. Be very careful, if you get the placement wrong, removal of the panel is almost impossible. It will be badly damaged if you try to pry it off of the model.
I start with the top aft gas panel and then I do the side panels. This way you can align the top edges of the side panels for straight tight seems. The panel around and over the cockpit, was already glued into place when I was building the cockpit hatch cover. All the other panels butt up against its edges.
Here’s the top aft gas tank panel is glued into place.
The areas forward of these plywood panels will be covered with metal, (or metal looking), panels which are next in this ongoing project. If you get any contact cement smears you can remove them easily with products like Goo Gone or Crayon remover from the hardware store.
And here is the finished top aft gas tank panel, with some details added like the cockpit combing and the petrol gas caps and decals, the finished Sopwith Camel looks great!
The decals by the way are from Cal-Grafx.com
Part 25: http://www.modelairplanenews.com/bl...uild-along-sopwith-camel-decals-and-graphics/
http://www.modelairplanenews.com/wp-content/uploads/2016/02/MAN_Button_newsletter_WEB.jpgModel Airplane News - The #1 resource for RC plane and helicopter enthusiasts featuring news, videos, product releases and tech tips.
Continue reading...