You are using an out of date browser. It may not display this or other websites correctly.
You should upgrade or use an alternative browser.
You should upgrade or use an alternative browser.
Scale JTEC 1/3 Scale Taylorcraft
- Thread starter myfivezees
- Start date
myfivezees
50cc
I have a question for everyone who has built this model.
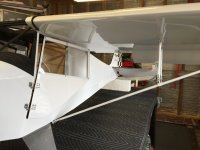
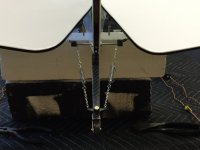
I am getting ready to attach the tail sections to the fuse and I am a little concerned about the strength. Did you epoxy the horizontal stab to the 2 longerons or did you do something else to add strength to this area ? Doesn't seem like much contact area for the glue.
I am getting ready to attach the tail sections to the fuse and I am a little concerned about the strength. Did you epoxy the horizontal stab to the 2 longerons or did you do something else to add strength to this area ? Doesn't seem like much contact area for the glue.
ritchie_rich
New to GSN!
All of mine I have built Were epoxied to the longerons, the added flying wires and more strength and have not had any problems flying them hard.
Rick
Rick
myfivezees
50cc
All of mine I have built Were epoxied to the longerons, the added flying wires and more strength and have not had any problems flying them hard.
Rick
Thanks Rick. That's what I needed to know.
myfivezees
50cc
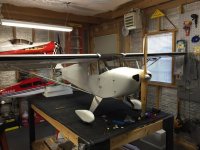
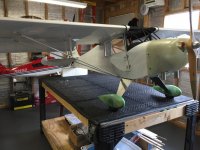
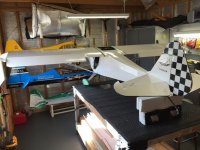
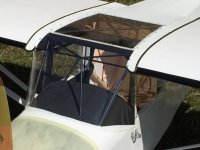
It may not look like much progress but in the past week I have glued the tail pieces, installed tail flying wires, stripped the paint off the wheel pants, filled the wheel pants with expanding foam and trimmed, cut and installed the door windows. I am waiting for another sheet of Lexan to do the windshield.
Attachments

myfivezees
50cc
myfivezees
50cc
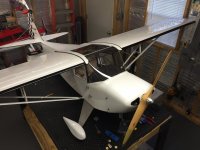
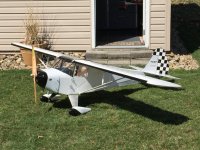
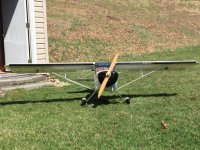
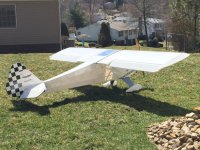
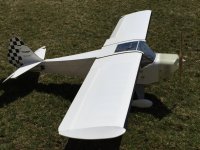
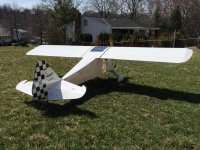
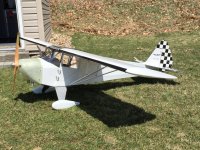
OK this is where I am at since I began construction in late September of 2014.
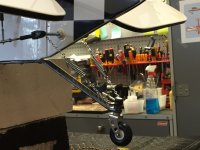
Getting down to the final stages. Most but not all of radio equipment is installed. Still need to finish painting and detailing some parts as well as finishing the fuel and smoke system installation.
Getting down to the final stages. Most but not all of radio equipment is installed. Still need to finish painting and detailing some parts as well as finishing the fuel and smoke system installation.
Attachments
bigblueswope
100cc
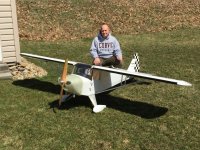
Wow!