• If you are new to GiantScaleNews.com, please register, introduce yourself, and make yourself at home.

    We're 1st in Giant Scale RC because we've got the best membership on the internet! Take a look around and don't forget to register to get all of the benefits of GSN membership!

    Welcome!

Glassing and Painting techniques

Terryscustom

640cc Uber Pimp
Other than a small airbrush I have NO painting equipment. Maybe this should be a separate thread???

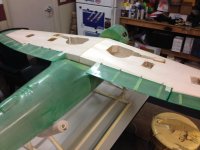
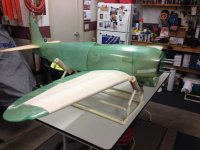
Heck no, this is it!! I'm not a pro by any means, but I love to paint with automotive paints. Base coat is a breeze but clear takes a little practice. The best part though is if you get a little run or sag you can sand it down and buff it out. On a plane though you have to really watch for heat buildup if you buff with any power equipment. The pros can cover that for us I'm sure.

I just use a DeVilbiss starting line HVLP and I have super luck with it. I do have a finex FX100 touch up gun that I absolutely love and normally spray all my basecoat with that.
 

kork

70cc twin V2
Thanks Terry for staring this thread. I do enjoy reading all of the many ways guys are doing things when the 3d planes are put away for the long winter. I started this jug a month back and just glassed the wing last weekend. I am learning about the different ways to add rivots and scale panel lines. This is my second bird with glass and getting better this round. I did thin my resin out also with same part of alcohol and it went on really nice. The wing is a foam/balsa with 6 ounce glass down the middle, then 3 ounce glass past the retracts and finished with 3/4 ounce to the wing tips.
I realize its not a 3d bird but though I would post it for the glassing/covering pictures.
Jason
 

Attachments

  • IMG_1384.JPG
    IMG_1384.JPG
    73.9 KB · Views: 574
  • IMG_1401.JPG
    IMG_1401.JPG
    82.7 KB · Views: 550
  • IMG_1409.JPG
    IMG_1409.JPG
    77.6 KB · Views: 522
  • IMG_1411.JPG
    IMG_1411.JPG
    70.6 KB · Views: 537
  • IMG_1410.JPG
    IMG_1410.JPG
    70.1 KB · Views: 528

Terryscustom

640cc Uber Pimp
This is awesome, can we "sticky" the three individually? Glassing, painting, and covering. Each is really its own topic.
I edited the title and took out covering, I think we should start a thread on that when more of the builds get to that stage!!:yesss:

What resin wher you using? The zpoxy finishing resin is thin and easy to use. Minwax polyurethane is super thin. I used both methods on my thunderbolt. The resin has a more durable finish and more resistant to denying the balsa. The minwax is way quicker and easier to get applied. I am sure it is lighter too. Hangar 9 has a 1/2 ounce cloth that is nice to work with as well.

I use West Systems, same as I used to make my cowls. It is a bit thicker, but on my first couple builds I used Zpoxy and still found it hard to work with on the .5 oz cloth. Maybe now that I've done more of it it would be easier. I did my second scratch build with Zpoxy thinned and it was super easy though.
 
Do you thin your resin at all Bunky? I had a hell of a time on my first couple of builds and then I was told to thin the resin 50:50 or slightly less with alcohol and that made it an absolute dream to glass canopy decks. It goes on so thin, there is literally nothing to blot off and the glass lays down very thin.

This is how we kinda got started on this subject. @Jetpainter is working on a project that will be painted and I am looking at doing a fully sheeted build that will be painted as well. We are experimenting with a few different types of fillers to fill the weave of the fabric to prep for painting with the least amount of weight and work.

Here are a couple pics of mine that I did with drywall compound after glassing. A test patch of primer shows a completely flat surface with no weave ghosting through. Jetpainter is working on some test panels as well. After seeing what we have so far I'm looking more forward to this than ever!!

I use a finishing resin. So it is already thin to start with. I just keep an eye on the drips until it starts tacking up.
 

Jetpainter

640cc Uber Pimp
It's been my thought in the past that where the painted parts really seem to tack on the weight, is in the primer stage. My testing so far confirms to me that the glassing itself can be done very lightly. I've been working on several 4" x 8" balsa test panels. My goal was to test fillers and primers to see what works well and doesn't turn your airplane into a flying anvil.

My results so far on glassing and filling the panels has surprised me. I didn't have any .56oz cloth so I used some 1.5oz that I had. My thinking was the heavier cloth would leave more pinholes and weave to fill, and since I was testing fillers and primers I thought the greater need for filling would make the results even clearer. The surprise was that even with the 1.5oz cloth the panels only gained an average of 2 grams from bare balsa to ready to prime. I was expecting them to be heavier than that.

My best one so far was sprayed with hairspray to cut down on resin soaking in. It has one coat of unthinned Z-Poxy resin over the cloth. I squeegeed that out within an inch of it's life removing as much as I could and let it dry overnight. I then sanded it lightly with 120 then thoroughly with 220. Then I put on a second coat of unthinned resin and squeegeed it removing as much as I could until there was barely any left on the panel. After sitting overnight I sanded again with 120 and 220 then put on a coat of light weight joint compound. I sanded the joint compound with 220 which removed practically all of it. The panel is super smooth with no visible pinholes and no weave telegraphing through and turned out to be one of the lightest ones.
 

kork

70cc twin V2
Interesting,
have you weighed the red body glazing vs the joint compound?I am sure the JC would sand much easier.
 

Terryscustom

640cc Uber Pimp
Interesting,
have you weighed the red body glazing vs the joint compound?I am sure the JC would sand much easier.

I'll be interested to see what the others say but I hate red filler with a passion! As Tyler said, it's a one part filler so not very hard, and it clogs sandpaper really really bad, unless you have very small patches. Covering an entire panel or hatch...:eek:
 
Last edited:

tylerzx9r

100cc
The Red filler is BAD stuff, STAY AWAY, FAR FAR AWAY. The only guarantee it has- is to cause future problems!
 
Top