• If you are new to GiantScaleNews.com, please register, introduce yourself, and make yourself at home.

    We're 1st in Giant Scale RC because we've got the best membership on the internet! Take a look around and don't forget to register to get all of the benefits of GSN membership!

    Welcome!

IMAC Dalton 260 Restoration

stangflyer

I like 'em "BIG"!
I believe your plan is good and it will work.
On the 1st Dalton I built, my stabs had some tip damage from when I landed the airplane in a tree. I had more of a problem than Betsy's wings you have there. What I did was cut out full sickness foam and sheeting, then carefully removed about 3 inches of sheeting all the way around where I removed the foam. Obtained a new piece of foam, shaped it, glued that in with some dowels into the other foam. I used Poly - u glue. Then once that cured, sanded the donor foam flush with the host foam. Then I glued the top and bottom sheeting to it all, allowed it to cure, then sanded it smooth, added a new root cap, sanded that down, prepped it, then covered.
Real PITA. But, I think what you will do will work very well.
I sure hope so. I hate the idea of stripping sheeting from glued on foam. Ugh... We'll see how it works out.
Stainless screws are more brittle than a Grade 9 allen bolt or long set screw. I dont use stainless anything on airplanes. Strictly grade 9 bolts., except for servo mounting screws.

Any screw has the chance to break at any time. Pick your poison on that.
Ya know Chris, as soon as I posted that, I had remembered that stainless is not as durable as a grade 9. But thank you for reminding me. I am sure I will go back with stronger all thread. After the stripping of the left wing panel, it was very clear I have my work cut out on me with that one for sure.
 

stangflyer

I like 'em "BIG"!
Left Wing:
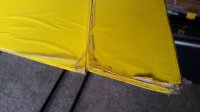
I did get the left wing stripped today. I could tell from the covering that I was going to find sheeting damage underneath. Sure enough. That poor ole wing panel has taken quite a beating.
20160221_130006.jpg 20160221_130021.jpg 20160221_130029.jpg 20160221_130041.jpg 20160221_130051.jpg 20160221_130102.jpg
I wondered why the travel of these two were off so drastically. The mystery would soon unravel itself once I removed the servos and covering.20160221_130124.jpg 20160221_130132.jpg 20160221_130156.jpg 20160221_130205.jpg
It was also apparent there was "skid" damage under the covering due to the huge road rash mark on the bottom of the wing covering.
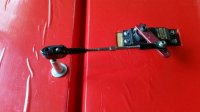
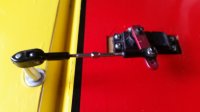
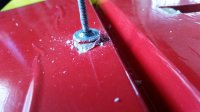
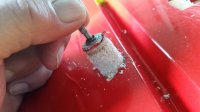
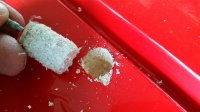
20160221_131102.jpg 20160221_131124.jpg 20160221_131141.jpg This is what I found once the servo was removed and in the process of removing hardware. The inboard control arm/all thread had basically broke free and simply pulled right out of the aileron. Ugh....this one is going to be fun. LOL
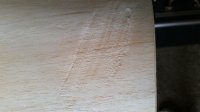
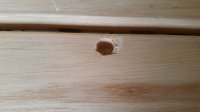
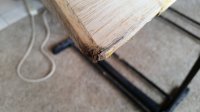
20160221_153010.jpgRoad rash on bottom of wing. 20160221_153017.jpgDetached control arm/all thread from inboard aileron. 20160221_153030.jpgRoot end crush damage. 20160221_153035.jpg 20160221_153041.jpg 20160221_153047.jpg 20160221_153125.jpg 20160221_153133.jpgMultiple previous damage repairs. Now I know why the landing gear plate and the forward fuse belly and sheeting was in such sad shape.
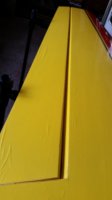
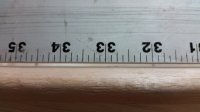
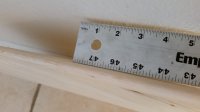
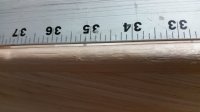
20160221_153429.jpg 20160221_153743.jpg 20160221_153751.jpg 20160221_153815.jpg As for the biggest problem I discovered with the left wing panel, I "sighted" down the leading edge of the wing. Yikes, nasty warp with a huge washout at the wing tip. The photos of my 48" straight edge really doesn't show just how badly the wing is warped. I've straightened warped "built up" wings before. But this will be a new adventure for me.

So now that the stripping is complete and most the damage has been ascertained, I can now start making preparations for building this girl back to flying condition.

As always, I appreciate everyones input, suggestions and advice. Let the repairs begin.
 
Something a wise surgeon would say, and I mention this with all good intentions, but, It is difficult to make any criticism, in that : "I am not there". My question to you: IS there a way for you to assess, the quality of the foam, and reason for me to mention this, is, do you believe it is salvageable? It is very interesting, you post the picture of the control horn being completely free from the foam, and this is what raises my doubt on the foam and whether you should just completely make new wings? I do not know, as a surgeon would state : "I am not there" to make that call.
 

stangflyer

I like 'em "BIG"!
Something a wise surgeon would say, and I mention this with all good intentions, but, It is difficult to make any criticism, in that : "I am not there". My question to you: IS there a way for you to assess, the quality of the foam, and reason for me to mention this, is, do you believe it is salvageable? It is very interesting, you post the picture of the control horn being completely free from the foam, and this is what raises my doubt on the foam and whether you should just completely make new wings? I do not know, as a surgeon would state : "I am not there" to make that call.
I had thought of that aspect. The wings seem very strong and the overall construction of the airframe and sheeted wings, stabs/elevators and rudder was some of the best construction I have ever seen. At least it appeared to be as such when it was built new. But as I mentioned regarding the right wing, the foam under the damaged wing tip seemed soft. But I am certain that was due to the impact it suffered. Hence why I wanted to either do as you suggested or maybe give the wicked in epoxy a try. As for the the ripped out inboard control horn on the left wing aileron, I checked the others on all remaining components. They are strong as an ox. I don't think I could pull them out with a crow bar. My beliefe is this one has been misadjusted and or dropped on it at some point. I considered a complete new set of wings last night. But then my initial thought was, "Where in the world would I even build a set of wings?" I am pretty limited on available space for such building. If that weren't an issue, I would have purchased a @Terryscustom Viper a long time ago. So as you see Ortho, I am really not sure which way to go just yet. I have read a lot of your posts and seen a lot of your work. You do some right fine stuff. I am very honored to have your input and suggestions.
 
I sure hope so. I hate the idea of stripping sheeting from glued on foam. Ugh... We'll see how it works out.

Ya know Chris, as soon as I posted that, I had remembered that stainless is not as durable as a grade 9. But thank you for reminding me. I am sure I will go back with stronger all thread. After the stripping of the left wing panel, it was very clear I have my work cut out on me with that one for sure.

Fastener Express has 2" long set grade 9 set screws. I think I stayed with #8 on my Dalton. And I beat the crap out of it.
 

stangflyer

I like 'em "BIG"!
Fastener Express has 2" long set grade 9 set screws. I think I stayed with #8 on my Dalton. And I beat the crap out of it.
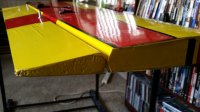
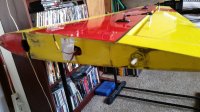
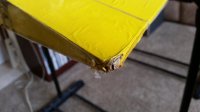
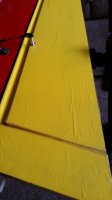
Thanks Chris...I will keep that in mind when I get to the point of installing new hardware. I was going to keep this little tidbit of information a bit of a secret until later this week. However, I felt ya'll may want to know what I have been up to on the Dalton. So as it goes, the wings for the Dalton are pretty rough. As you all probably could see. Sure, they could be straightened out. But to what point is it really worth it? It just so happens I received a surprise message from a top notch and what I like to refer, a top shelf gentleman that could and ultimately would solve my dilemma. It turns out, this gentleman had two "Brand New" Dalton wings he was not using. I was informed that they are just sitting and would eventually end up in the trash. Oh dear lord....no!!! We chatted and did some measurements, checked and re-checked critical features between the two sets of wings. His, and the ones I have here. As it would turn out, the wings he has are going to be a spot on replacement. I asked what he would part with them for. I was quickly informed that I could "HAVE" them. What? Serious? Really? Wow, what a deal. He even told me that he would be more than happy to finish the final touches on the wings. Such as do the final sanding of the leading and trailing edges. Bevel as needed. Both the wings and the ailerons. Including finishing up the servo boxes. He is even going to do all the hinge point drilling. So needless to say, by the time I receive the set of new wings, they will be pretty much done. Other than gluing in hinges, covering and attaching them to the fuse and setting the incidence. The only thing I will have to alter will be adjusting the CG. As the new set of wings will be set back on the fuse 1/2". No big deal. I highly doubt it will change the flight characteristics and flight envelope of the plane. Once the final touches are done, I can start covering the wings. How could I, why would I say anything other than...Oh heck yeah. Lets do this. Thank you so much.

I am very excited and so very grateful to this gentleman. It is going to make my work on this restore sooo much easier. Which in turn will leave me more time for the rest of the airframe that is in of just as much if not more attention than those poor ole' original set of wings.

With all this being said, I would like to ask all of you to give a great big hearty hands clapping and thumbs up thank you to this awesome gentleman that is now going to be a part of this awesome restore project. Cambize Shahrdar in my opinion is one of the most capable and most respected builders in this hobby that we all have. We all know him as Cam or @orthobird. I seriously was not expecting his gracious and unselfish generousity of making these wings available for this restore project.

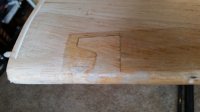
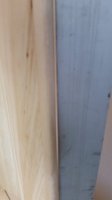
Here is a little sample of what he has for me and this restore project.
IMG_0505.jpg
IMG_0509.jpg
IMG_0510.jpg
IMG_0511.jpg
IMG950504.jpg

untitled.png
untitled1.png


Thank you Cam! Can't really express my gratitude. I know Bruce is going to be ecstatic as well!
:way_to_go:
 

WMcNabb

150cc
With all this being said, I would like to ask all of you to give a great big hearty hands clapping and thumbs up thank you to this awesome gentleman that is now going to be a part of this awesome restore project. Cambize Shahrdar in my opinion is one of the most capable and most respected builders in this hobby that we all have. We all know him as Cam or @orthobird. I seriously was not expecting his gracious and unselfish generousity of making these wings available for this restore project.

Here is a little sample of what he has for me and this restore project.

AWESOME!!!
 

stangflyer

I like 'em "BIG"!
Hey Rob,

Don't you just love the way everyone helps out the "other" guy in the AWESOME hobby? It's people like @orthobird and so many others on this site, like yourself who make it GREAT. . . :yesss:
Without a doubt David. There is another such guy here in my home town that is much like Cam. It's almost like his mission is to help as many people as he can and I think it actually makes him happy inside when he sees someone else smile. Older gent that has been flying for about a million years. But one of the truest enthusiasts and clear to the bone brothers this hobby has ever seen. There are a number of you gentlemen here on this site that are 'zactly the same way. So many of you I have come to know and I feel really proud to be a part of this awesome hobby. Sure glad I chose not to take up hanging out in the bar as a hobby.
happy-nodding-smiley-face-emoticon.gif
 
Top