Steve_B
70cc twin V2
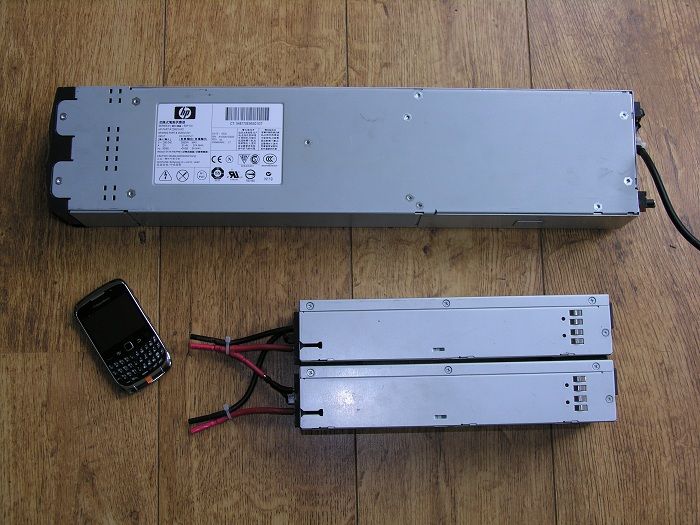
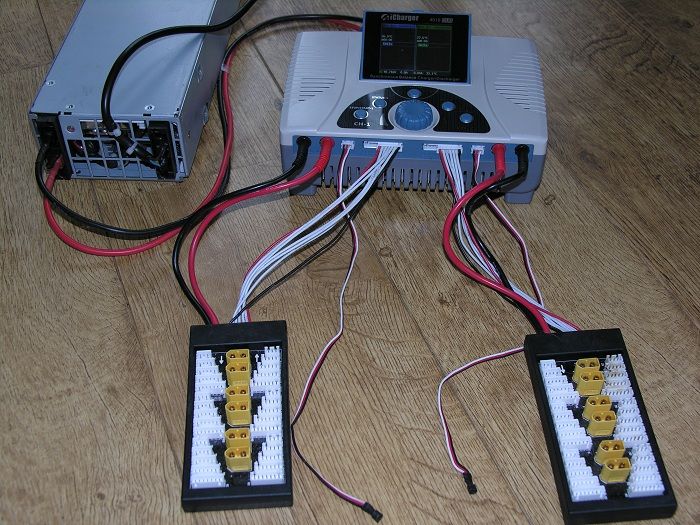
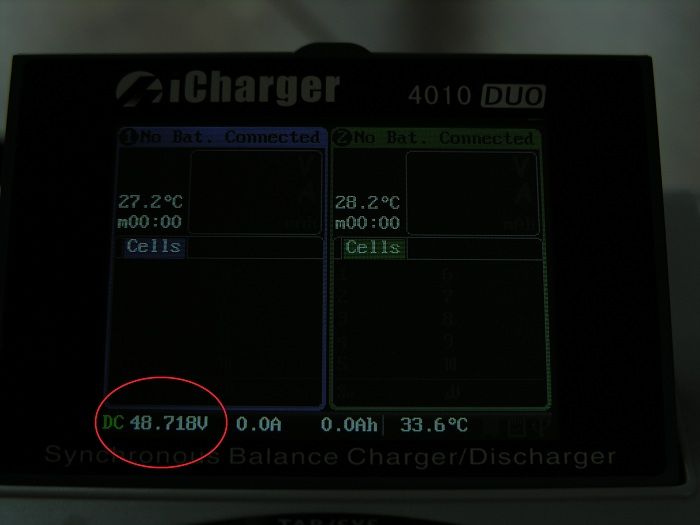
So i've just got myself an iCharger 4010b and would like to have a power supply capable of maxing it's 2000W output. So far I've been running a dual DPS-600PB server based power supply (same units as the Feathermerchant supplies use) which works great but is limited to about 1100W. i could add another two DPS-600PB units and get 48v and 2200W but that would be a pretty massive and clumsy installation. I'd prefer something 'neater' and more compact
I may have found the answer. The HP 'ESP120' is another type of server power supply but one where a single unit will deliver a whopping 50v and 2950W (yeah, that's not a typo.. 2950W ). What's more they can be had for very cheap prices on eBay, a little more than the old trusty DPS-600PB but still a bargain ($40-50 range). Being a computer server power supply they are designed to run reliably for many thousands of hours continuously, so even through they are used there should be plenty of life in them.
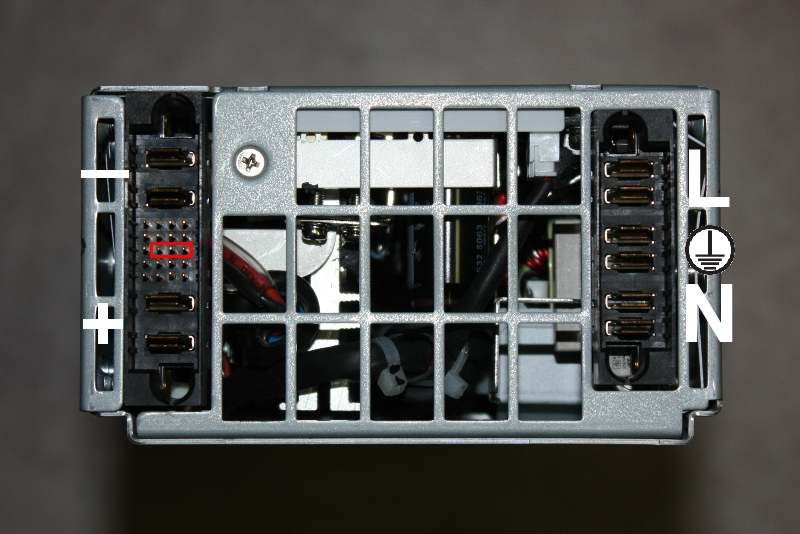
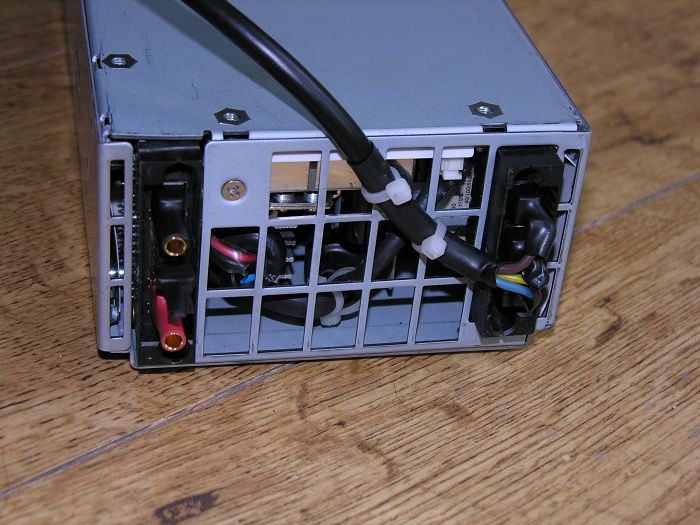
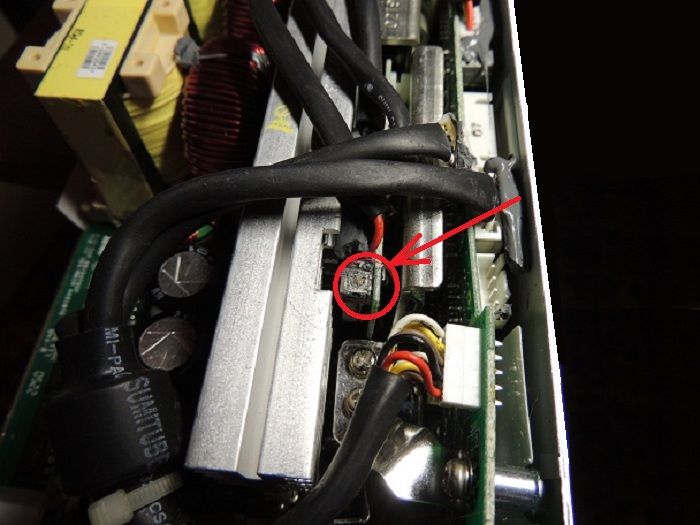
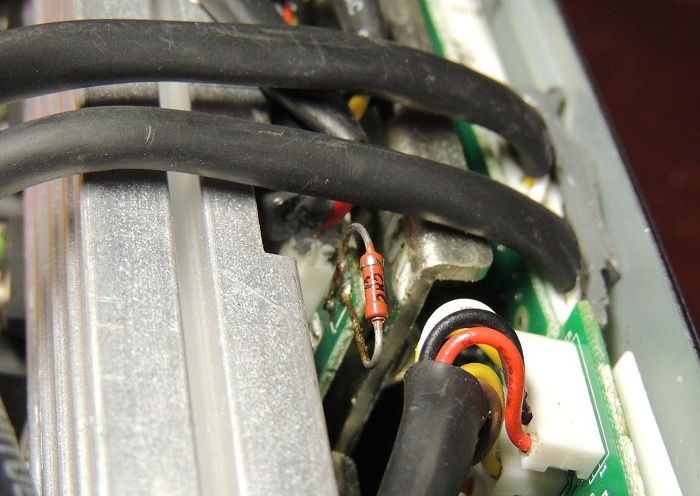
It should arrive tomorrow. I've done a little research and the main tasks in doing the conversion are connecting up the AC power source and limiting voltage to below 50v because that's the top limit of the iCharger. From previous experience I might find the fans a bit noisy so they may have to be dealt with too, we shall see.
If there is any interest I could do a conversion tutorial (assuming it works of course)?

I may have found the answer. The HP 'ESP120' is another type of server power supply but one where a single unit will deliver a whopping 50v and 2950W (yeah, that's not a typo.. 2950W
). What's more they can be had for very cheap prices on eBay, a little more than the old trusty DPS-600PB but still a bargain ($40-50 range). Being a computer server power supply they are designed to run reliably for many thousands of hours continuously, so even through they are used there should be plenty of life in them.It should arrive tomorrow. I've done a little research and the main tasks in doing the conversion are connecting up the AC power source and limiting voltage to below 50v because that's the top limit of the iCharger. From previous experience I might find the fans a bit noisy so they may have to be dealt with too, we shall see.
If there is any interest I could do a conversion tutorial (assuming it works of course)?