njswede
150cc
[h=1]Introduction[/h]
Playful 3D interpretations of classic high-wing models seems to be all the rage this year and the Crack Turbo Beaver is TwistedHobbys' take on the theme. You realize that you're looking at a mix of old and new when you see the classic Cub-style airframe combined with high-tech fins, side force-generators, canards and "antennalizers". A few guys have paid a lot of attention to the aerodynamic details on this plane and those are primarily famed 3d pilot and US IMAC team member Cody Wojcik, and also long time Twisted Designed Chris Jewett. Cody showed us the prototype of this model back in July at the Fly-Low-In at GCA in NJ and we were impressed by the harrier and hovering performance after a couple of minutes at the stick. Since then, we've eager to see what it can do when we're not scared out of our minds not to break one of the few prototypes...
[h=1]Unboxing and first impressions[/h]
Good things come in flat packages, at least when it comes to quality EPP model aircraft. The Beaver contains an impressive number of foam, wood and CF parts. If you've never built a EPP foamy kit before, it may seem a bit overwhelming. But fret not, Chris Jewett's build video provides a perfect step by step guide to building the plane. You can find the build video here:
[video=youtube_share;HaeX-9MK0xc]http://youtu.be/HaeX-9MK0xc[/video]
Everything is precision cut and the materials are the highest quality. All small parts are packed in separate bags to prevent you from losing them when unpacking the plane.
[h=1]Building the plane[/h]
[h=2]Which glue to use?[/h]
The short answer: Welders Adhesive. It can be a little hard to find. Most hardware stores don't carry it and Lowes has reportedly discontinued it. Luckily, TwistedHobbys sells it on their site. The main benefit to Welders its versatility in terms of application methods. It works equally well for wet applications as for dry instant-bond applications.
At one point during the build we ran out of Welders and used Goop instead. While Goop provides a very strong bond, it doesn't work well for dry applications, so we would advise against using it unless you absolutely can't get your hands on Welders.
CA shouldn't be used unless where it's explicitly called for in the build video. CA creates a very hard and brittle bond which isn't compatible with the flexible properties of EPP.
[h=2]Wings and fuselage[/h]
The wing comes in two pieces and needs to be glued together and the wooden wing spar inserted. Make sure you follow Chris' advice and put some tape or plastic under the wing while the glue is drying, or it WILL bond to the workbench and you'll probably end up with paint stripped off or pieces of foam ripped out of the wing.
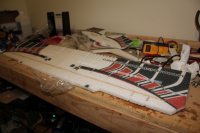
(Yes, its a messy workbench)
The fuselage is designed as four interlocking pieces that form and X-profile when glued together. Building the fuselage is very easy, thanks to the interlocking tabs. There's simply no way of getting it wrong. The fuselage comes together very quickly and very sturdy and stable thanks to the X-design. The CF rods for the landing gear are installed during the fuselage assembly, so make sure to watch the build video so you don't miss any steps!
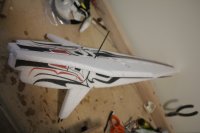
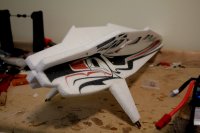
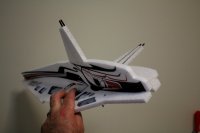
The landing gear requires a bit of attention when building. First of all, when you glue together the the wheels, make sure you get the three discs perfectly aligned or you'll have problems installing the wheel axle. Also, bad alignment will make for a wobbly wheel and your model will have a slight limp when taxiing.
You also need to make sure the holes in the wheel hubs at the end of the struts are free of any CF drops or other obstructions. Even the smallest debris will affect the wheel axle angle resulting in badly aligned wheels.
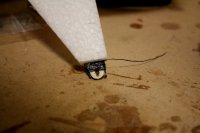
When installing the servos, the best results are achieved by hooking all the servos up to the receiver on the bench (before installing it in the aircraft), powering up and installing the servo arms to make sure they are aligned perfectly perpendicular to the servos. Remember to make sure your sub trims are at zero on the radio! Install the pushrods and secure the servo with some Welders.
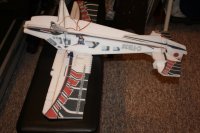
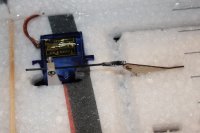
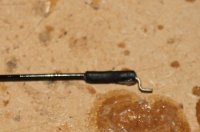
In our opinion, one of the more challenging parts of any TwistedHobbys foamy build is making and installing the pushrods. The build video suggests hitting the shrink tube and glue with a torch to push out and burn excessive glue. Make sure you only let the flame burn for about a second or less! Carbon fiber is combustible and will weaken if you let the flame burn too long. We had that happen on one of the pushrods but strengthened it by wrapping the affected area with thread and hitting it with thin CA and kicker.
Also, make sure you are very careful with the glue when you install the elevator and rudder pushrod guides. A tiny drop of CA near the hole where the pushrod passes through, and you'll spend the next hour with de-bonder trying to make the pushrod slide through the guide again.
There are a lot of very tiny parts involved when building and installing the pushrods, and the kit doesn't include any spares, so make sure you're working over a clean work area where it's easy to find the pieces you will inevitably drop!
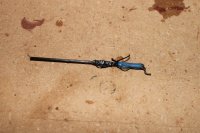
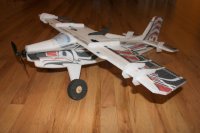
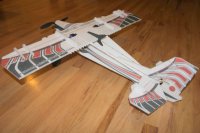
Finally done! Although the Beaver has more pieces than your average flat foamy, the level of difficulty is about the same. Make sure you watch TwistedHobbys' excellent build video in its entirety before you start!
[h=1]Setup and Flight Performance[/h]
[h=2]Setup[/h]
Since the Beaver is a bit of a different animal than your typical 3D bird, it requires some additional programming to take advantage of the full flight envelope. We set it up with the throws at the mechanical limits and added about 60% expo to all channels. We also set up basic flaperons and spoilerons. Our initial settings were about +/-30% for the flaperons and spoilerons and a 10% elevator mix (down for flaperons and up for spoilerons). This made it fly more or less hands off on all flap settings. To take advantage of the more advanced mixing modes, we strongly suggest you watch Chris Jewett's instructional video:
[video=youtube;Mji7p3MddNc]http://www.youtube.com/watch?v=Mji7p3MddNc&feature=share&list=UUMglwOJwgmWGbHukotknTzw[/video]
[h=2]Maiden Flight[/h]
We wanted to do the maiden on a reasonably calm day, which doesn't happen too often this time of the year on the East Coast. We finally had a gorgeous November weekend with winds around 5mph and we left for our beloved GCA field. This field is great for maidens, thanks to its legendary GCA weeds covering the flyover area that are responsible for saving more than its fair share of planes.
The first takeoff was performed without flaps to get a feel for the plane and trim it out while it was as neutral as possible. Our 3s power system delivered more than enough power for a short takeoff even with the flaps up.
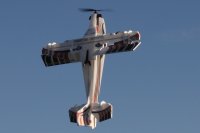
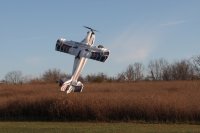
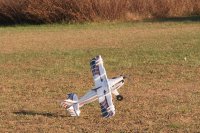
Once in the air we discovered how easy this plane is to fly! Harriers and hovers are super easy, even with a light breeze trying to grab the plane. The Beaver flies knife edge virtually hands off with no or little rudder input. It looks like all those fancy high-tech looking fins and doohickeys aren't just for looks!
After harriering around for a while we tried some rolling harriers. Now, the rolling harrier is a move the test pilot has had some issues with, but the Beaver must be the easiest plane to fly this maneuver. If we were to guess, it's thanks to the great slow speed performance and rudder authority.
Speaking of rudder, the Beaver has the typical "Cub-like" behavior when turning and requires a generous amount of rudder to turn. Bank and yank won't work and it will force you into good behavior and coordinated turns. That's not to say that the Beaver is difficult to fly. Quite the contrary! The is pretty much a textbook example of how a high-wing aircraft is supposed to behave.
It's also worth noting that the Beaver has extreme rudder authority, which means that it can essentially turn on a dime. While this makes for absolutely amazing hammerheads, you have to remember that you're slowing down one wing to virtually zero airspeed, meaning that it WILL stall. This is nothing specific to the Beaver, but a property of basic aerodynamics and if you learn to handle it, you can use it to do amazing snap rolls.
We played a little with the flaperons and spoilerons and found that you could use it for things like backwards flying even in light winds or waterfalls and parachutes that looked downright unrealistic! This is an area where the Beaver offers virtually unlimited possibilities to experiment and show off 3D tricks that haven't been invented yet!
[h=1]Power System and Servos[/h]
[h=1]Conclusion[/h]
With the Beaver, Cody Wojcik and Chris Jewett have created a truly unique experience. What they've created is package of absolutely uncompromising fun! Every detail on the plane is there to produce awesomeness! The plane is surprisingly easy to fly, but offers possibilities that are well beyond what you find in any other 3D plane. Knife edges, rolling harriers and hammerheads are nothing short of spectacular and any low and slow maneuver is relaxing and fun. We handed the transmitter to a couple of people at the field and they were ready to go and buy the plane right away. It's really that fun to fly.
The build is about what you'd expect from any EPP kit. Make sure you watch the build video FIRST and you will be just fine.
TwistedHobbys recommend a 2s power system, but we felt it flew better on 3s. It could be because our 2s batteries are a bit on the older side, but we will probably keep it on 3s. The weight difference doesn't seem to be noticeable.
The only minor complaint we have is that the kit doesn't come with any spare Z-bends and other tiny parts that are easy to drop and lose. We would gladly pay a couple of dollars more for the peace of mind to have some spares!
Pluses:
Minuses:
Playful 3D interpretations of classic high-wing models seems to be all the rage this year and the Crack Turbo Beaver is TwistedHobbys' take on the theme. You realize that you're looking at a mix of old and new when you see the classic Cub-style airframe combined with high-tech fins, side force-generators, canards and "antennalizers". A few guys have paid a lot of attention to the aerodynamic details on this plane and those are primarily famed 3d pilot and US IMAC team member Cody Wojcik, and also long time Twisted Designed Chris Jewett. Cody showed us the prototype of this model back in July at the Fly-Low-In at GCA in NJ and we were impressed by the harrier and hovering performance after a couple of minutes at the stick. Since then, we've eager to see what it can do when we're not scared out of our minds not to break one of the few prototypes...
[h=1]Unboxing and first impressions[/h]
Good things come in flat packages, at least when it comes to quality EPP model aircraft. The Beaver contains an impressive number of foam, wood and CF parts. If you've never built a EPP foamy kit before, it may seem a bit overwhelming. But fret not, Chris Jewett's build video provides a perfect step by step guide to building the plane. You can find the build video here:
[video=youtube_share;HaeX-9MK0xc]http://youtu.be/HaeX-9MK0xc[/video]
Everything is precision cut and the materials are the highest quality. All small parts are packed in separate bags to prevent you from losing them when unpacking the plane.
[h=1]Building the plane[/h]
[h=2]Which glue to use?[/h]
The short answer: Welders Adhesive. It can be a little hard to find. Most hardware stores don't carry it and Lowes has reportedly discontinued it. Luckily, TwistedHobbys sells it on their site. The main benefit to Welders its versatility in terms of application methods. It works equally well for wet applications as for dry instant-bond applications.
At one point during the build we ran out of Welders and used Goop instead. While Goop provides a very strong bond, it doesn't work well for dry applications, so we would advise against using it unless you absolutely can't get your hands on Welders.
CA shouldn't be used unless where it's explicitly called for in the build video. CA creates a very hard and brittle bond which isn't compatible with the flexible properties of EPP.
[h=2]Wings and fuselage[/h]
The wing comes in two pieces and needs to be glued together and the wooden wing spar inserted. Make sure you follow Chris' advice and put some tape or plastic under the wing while the glue is drying, or it WILL bond to the workbench and you'll probably end up with paint stripped off or pieces of foam ripped out of the wing.

(Yes, its a messy workbench)
The fuselage is designed as four interlocking pieces that form and X-profile when glued together. Building the fuselage is very easy, thanks to the interlocking tabs. There's simply no way of getting it wrong. The fuselage comes together very quickly and very sturdy and stable thanks to the X-design. The CF rods for the landing gear are installed during the fuselage assembly, so make sure to watch the build video so you don't miss any steps!


The landing gear requires a bit of attention when building. First of all, when you glue together the the wheels, make sure you get the three discs perfectly aligned or you'll have problems installing the wheel axle. Also, bad alignment will make for a wobbly wheel and your model will have a slight limp when taxiing.
You also need to make sure the holes in the wheel hubs at the end of the struts are free of any CF drops or other obstructions. Even the smallest debris will affect the wheel axle angle resulting in badly aligned wheels.

When installing the servos, the best results are achieved by hooking all the servos up to the receiver on the bench (before installing it in the aircraft), powering up and installing the servo arms to make sure they are aligned perfectly perpendicular to the servos. Remember to make sure your sub trims are at zero on the radio! Install the pushrods and secure the servo with some Welders.


In our opinion, one of the more challenging parts of any TwistedHobbys foamy build is making and installing the pushrods. The build video suggests hitting the shrink tube and glue with a torch to push out and burn excessive glue. Make sure you only let the flame burn for about a second or less! Carbon fiber is combustible and will weaken if you let the flame burn too long. We had that happen on one of the pushrods but strengthened it by wrapping the affected area with thread and hitting it with thin CA and kicker.
Also, make sure you are very careful with the glue when you install the elevator and rudder pushrod guides. A tiny drop of CA near the hole where the pushrod passes through, and you'll spend the next hour with de-bonder trying to make the pushrod slide through the guide again.
There are a lot of very tiny parts involved when building and installing the pushrods, and the kit doesn't include any spares, so make sure you're working over a clean work area where it's easy to find the pieces you will inevitably drop!


Finally done! Although the Beaver has more pieces than your average flat foamy, the level of difficulty is about the same. Make sure you watch TwistedHobbys' excellent build video in its entirety before you start!


[h=1]Setup and Flight Performance[/h]
[h=2]Setup[/h]
Since the Beaver is a bit of a different animal than your typical 3D bird, it requires some additional programming to take advantage of the full flight envelope. We set it up with the throws at the mechanical limits and added about 60% expo to all channels. We also set up basic flaperons and spoilerons. Our initial settings were about +/-30% for the flaperons and spoilerons and a 10% elevator mix (down for flaperons and up for spoilerons). This made it fly more or less hands off on all flap settings. To take advantage of the more advanced mixing modes, we strongly suggest you watch Chris Jewett's instructional video:
[video=youtube;Mji7p3MddNc]http://www.youtube.com/watch?v=Mji7p3MddNc&feature=share&list=UUMglwOJwgmWGbHukotknTzw[/video]
[h=2]Maiden Flight[/h]
We wanted to do the maiden on a reasonably calm day, which doesn't happen too often this time of the year on the East Coast. We finally had a gorgeous November weekend with winds around 5mph and we left for our beloved GCA field. This field is great for maidens, thanks to its legendary GCA weeds covering the flyover area that are responsible for saving more than its fair share of planes.
The first takeoff was performed without flaps to get a feel for the plane and trim it out while it was as neutral as possible. Our 3s power system delivered more than enough power for a short takeoff even with the flaps up.
Once in the air we discovered how easy this plane is to fly! Harriers and hovers are super easy, even with a light breeze trying to grab the plane. The Beaver flies knife edge virtually hands off with no or little rudder input. It looks like all those fancy high-tech looking fins and doohickeys aren't just for looks!
After harriering around for a while we tried some rolling harriers. Now, the rolling harrier is a move the test pilot has had some issues with, but the Beaver must be the easiest plane to fly this maneuver. If we were to guess, it's thanks to the great slow speed performance and rudder authority.
Speaking of rudder, the Beaver has the typical "Cub-like" behavior when turning and requires a generous amount of rudder to turn. Bank and yank won't work and it will force you into good behavior and coordinated turns. That's not to say that the Beaver is difficult to fly. Quite the contrary! The is pretty much a textbook example of how a high-wing aircraft is supposed to behave.
It's also worth noting that the Beaver has extreme rudder authority, which means that it can essentially turn on a dime. While this makes for absolutely amazing hammerheads, you have to remember that you're slowing down one wing to virtually zero airspeed, meaning that it WILL stall. This is nothing specific to the Beaver, but a property of basic aerodynamics and if you learn to handle it, you can use it to do amazing snap rolls.
We played a little with the flaperons and spoilerons and found that you could use it for things like backwards flying even in light winds or waterfalls and parachutes that looked downright unrealistic! This is an area where the Beaver offers virtually unlimited possibilities to experiment and show off 3D tricks that haven't been invented yet!


[h=1]Power System and Servos[/h]
- Motor: TwistedHobbys 2206
- ESC: TwistedHobbys 10A
- TowerPro 9g servos. Pretty much any 5-9g generic servos will work. We will try it with some more expensive servos to see if we can notice any difference.
- Battery: TwistedHobbys 3s 450mAh
[h=1]Conclusion[/h]
With the Beaver, Cody Wojcik and Chris Jewett have created a truly unique experience. What they've created is package of absolutely uncompromising fun! Every detail on the plane is there to produce awesomeness! The plane is surprisingly easy to fly, but offers possibilities that are well beyond what you find in any other 3D plane. Knife edges, rolling harriers and hammerheads are nothing short of spectacular and any low and slow maneuver is relaxing and fun. We handed the transmitter to a couple of people at the field and they were ready to go and buy the plane right away. It's really that fun to fly.
The build is about what you'd expect from any EPP kit. Make sure you watch the build video FIRST and you will be just fine.
TwistedHobbys recommend a 2s power system, but we felt it flew better on 3s. It could be because our 2s batteries are a bit on the older side, but we will probably keep it on 3s. The weight difference doesn't seem to be noticeable.
The only minor complaint we have is that the kit doesn't come with any spare Z-bends and other tiny parts that are easy to drop and lose. We would gladly pay a couple of dollars more for the peace of mind to have some spares!
Pluses:
- Easy to fly!
- Awesome hammerheads
- Easy breezy rolling harriers
- Crisp harriers and hovers
- The cleanest KE flight we have ever experienced
- Handles wind surprisingly well for an EPP foamie
Minuses:
- Pushrod installation can be tricky
- We would have liked to see some spare parts included for the Z-bends and other very small parts
Last edited by a moderator:
