Ok guys I am finally getting around to working on this plane. Once we got the balance about right I wanted to start hucking it. I soon found out that while it excels at high energy flying the low and slow has a bit to be desired.
The wing rock in harrier is quite scary. I asked Pete about it and he mentioned that the wing rock subsides quite a bit with a little higher angle of attack. I have not had a chance to try that yet but I will on my next outing for sure.
Brigg and I discussed some things that may be contributing to the instability in harrier and I also got some input from Gary. The consensus is that it could be a combination of the rounded wing tips, short wing chord at the tips (which also makes it roll super fast), and just the fact that it is a yak. All of us agree that these issues could be addressed with some sfg's. The kit comes with some that are supposed to be installed on the top of the wing. The only problem is that they do not come with any instructions and there Is no intuitively marked location for them such as pre-lasered slots. Another issue is that the only come into play for the top of the wing. In an ipright harrier it doesn't seem like they would do much. Brigg and I came up with a plan to make some new sfg's for the wingtips.
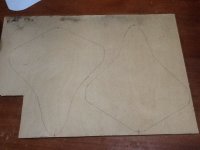
First we designed them in corel draw. Brigg did all the real work there as I have about zero cad skills... but I looked over his shoulder and made a few meaningful conceptual contributions that were probably totally obvious to Brigg already lol. The items created included the wing chord shape at the tip from the aileron hinge line to the leading edge and the actual sfg shape. These items had corresponding locations for blind nuts to line up.
Once the drawings were completed we sent them to the laser. So far we are into the project maybe two hours.
Here is a link to a video of laser cutting with a littke dialogue.
https://www.youtube.com/watch?v=ChVpxpkm4og&feature=youtube_gdata_player
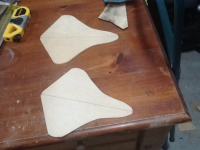
The blocks the sfg attaches to is just basswood but we also marked a piece of plywood. The idea was to install the blind nuts in the basswood and then cover them with the ply so they weren't in the way when it was time to glue the blocks on. We made recesses in the ply with a forsner bit to recieve the back side of the blind nuts. Then we glued the basswood pieces to the ply.
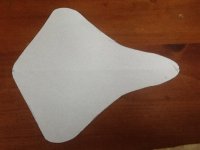
Now that the blocks were made it was time to actually cut the wing tips. We wanted to cut them so that when we glued on the blocks there would be a small gap for the ailerons to have clearance from the sfg's. We made a template of the angle of the hinge line and the wing tip. We printed it on 11x14 paper... bigger is better
")
the template was just a quick drawing in corel from a picture I took of the wing. We taped the template on the wing and made the cut on a scroll saw.


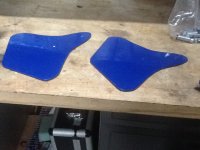
The stock wingtip is a decent sized balsa block so there was still plenty of meat to glue to. To give it more strength we used wood glue and a couple of 1/4" dowels. We marked drilled for the dowels on the blocks being careful not to catch the flange of the blind nuts. Then we moved the drilled blocks to the wingtip to drill it. Drilling through the blocks ensured the holes would match up perfectly. We then applied glue and inserted the dowels.


The sfg's attach to the blocks with small nylon bolts.


Now it is time to try them out!