GSNadmin
Staff member
Like many scale modelers, I simply can’t leave well enough alone and I often find myself thinking of ways to improve a scale project. With the ESM / VQ Warbirds ARF Corsair as a base model, I thought I would give it a complete makeover and add lots of details and special features. The sliding canopy is one of the several sub projects I added to the stock airplane and this is how I did it! The VQ Warbirds ARF comes finished as the famous ride of WW2 Ace Ira Kepford.
Article and photos by Sean McHale
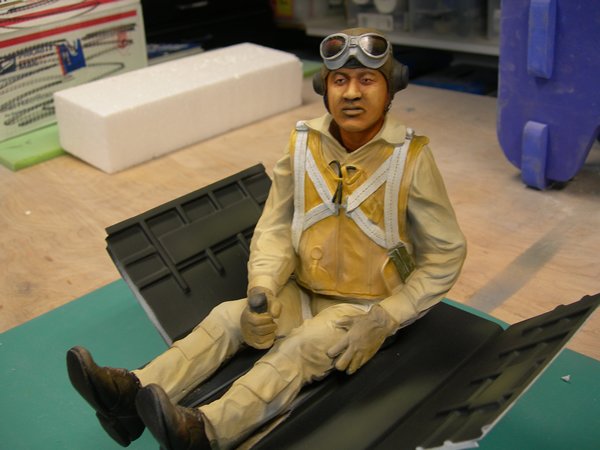
However, I had always been interested in the exploits of USMC aviator Gregory ‘Pappy’ Boyington, and decided to finish the plane in his markings. Nothing can ruin the appearance of a scale model faster than a cockpit void of a pilot, especially when it’s in the air. Fortunately for me Lyle Vasser of Best Pilots offer a very realistic 1/5-scale Pappy Boyington figure and he fits in place nicely.

Here’s the Starting Point of the ARF Corsair
The Corsair comes with a molded-in floor allowing for only a pilot bust but I cut it away to installed a full-depth depth cockpit. I used the parts from a Ty’s Models cockpit kit, available from VQ Warbirds, to add a little extra detail to Pappy’s “office.” With all that taken care of, it was time to work on the canopy.
SLIDING CANOPY
I felt it was a shame to hide my scale Pappy under a full canopy so for this project I wanted the canopy to be functional. In the past I have only ever made canopies open manually, but for the Corsair, I went the extra mile and make the canopy open with my transmitter.
The canopy alone is very flimsy and brittle and running it under warm water before cutting helps ease trimming. I wasn’t confident that it would hold up so I ordered a replacement from VQ Warbirds which is identical in size and shape. I needed to stiffen the canopy frame so it would hold its shape while opening and closing. Using the original, un-cut ESM canopy, I taped it to the fuselage and made a simple external balsa frame to keep the canopy’s shape once I removed it from the fuselage.

External Bracing in place
I then removed the balsa cradle and canopy from the fuselage and sprayed the inside with some universal mold release. I then laid in two layers of carbon fiber cloth and allowed the epoxy to cure overnight. After popping it out of the canopy, it was trimmed to shape and became the perfect internal frame for my sliding canopy.
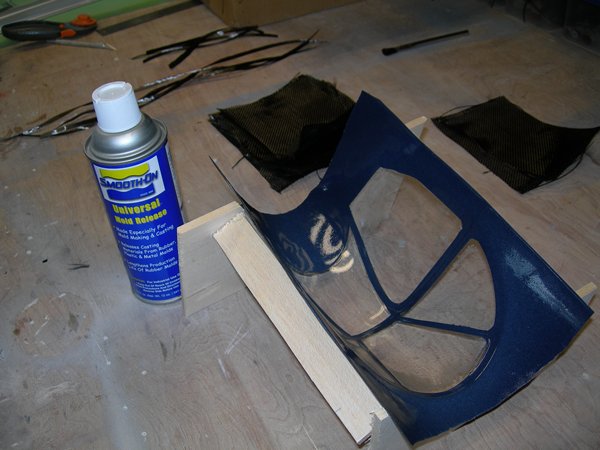
A little spray of mold release inside the canopy prevents the layup from sticking in place.
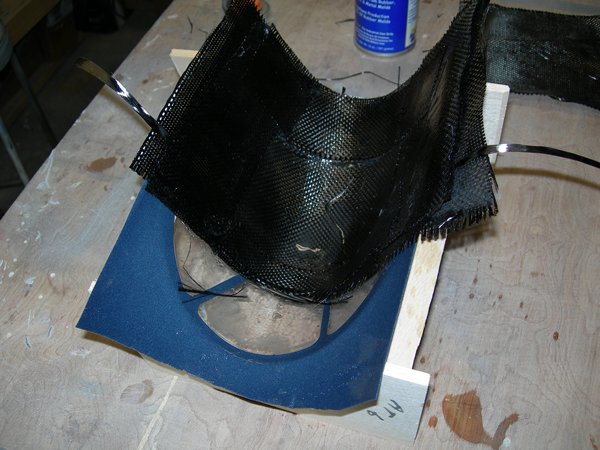
After the resin cures, the carbon fiber molding pops right out.
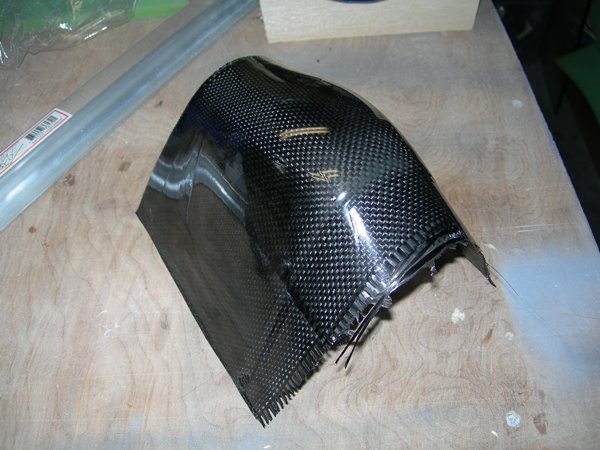
Nice and smooth and it fits the canopy shape perfectly.
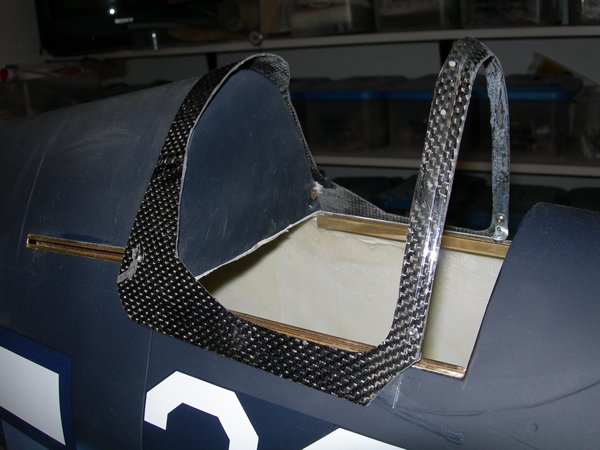
Carbon fiber framework cut to shape.
For the guide rails, I used some slotted square brass rails and carefully installed them in the fuselage sides and along the inside edge of the cockpit opening. Ball links are used to capture canopy inside the rail and allows it to move with the use of a single, long-stroke air cylinder located forward of the instrument panel.

Guide Rails made from K&S Square Brass Tubes slotted with a Moto-Tool and Cutoff disk.

Guide Rails in position.
This arrangement gives a “push to open” and a “pull to close” operation. I cut the carbon fiber frame to shape with a Moto-Tool and a cut-off disc and then I glued the clear canopy to the inside of the frame. The canopy be removed from the rails by unscrewing the ball links which pass through the frames.
Operation
If I had more channels on my transmitter I’d put the canopy function on its own switch. At the time I built the model, I only had an 8-channel radio so I slaved the canopy function off the flap channel with a Y-harness.

Internal Drive setup to open and close Canopy.
I set it up so canopy does not open during landings (with one notch of flaps dialed in.) The model doesn’t need full flap to land. After landing I add another notch of flaps and the canopy sides open. The flaps do move down a little bit more but it only on the ground and does not affect anything else. With a 10-channel radio, it would be simple to assign the canopy function to its own channel and open it on command.

Which way to the front!?
Having this bit of animation added to any scale plane greatly increases it realism and sends the “Wow Factor” right off the charts. For a little bit of work, you get a lot of attention. Give it a try, you’re buddies will be amazed!

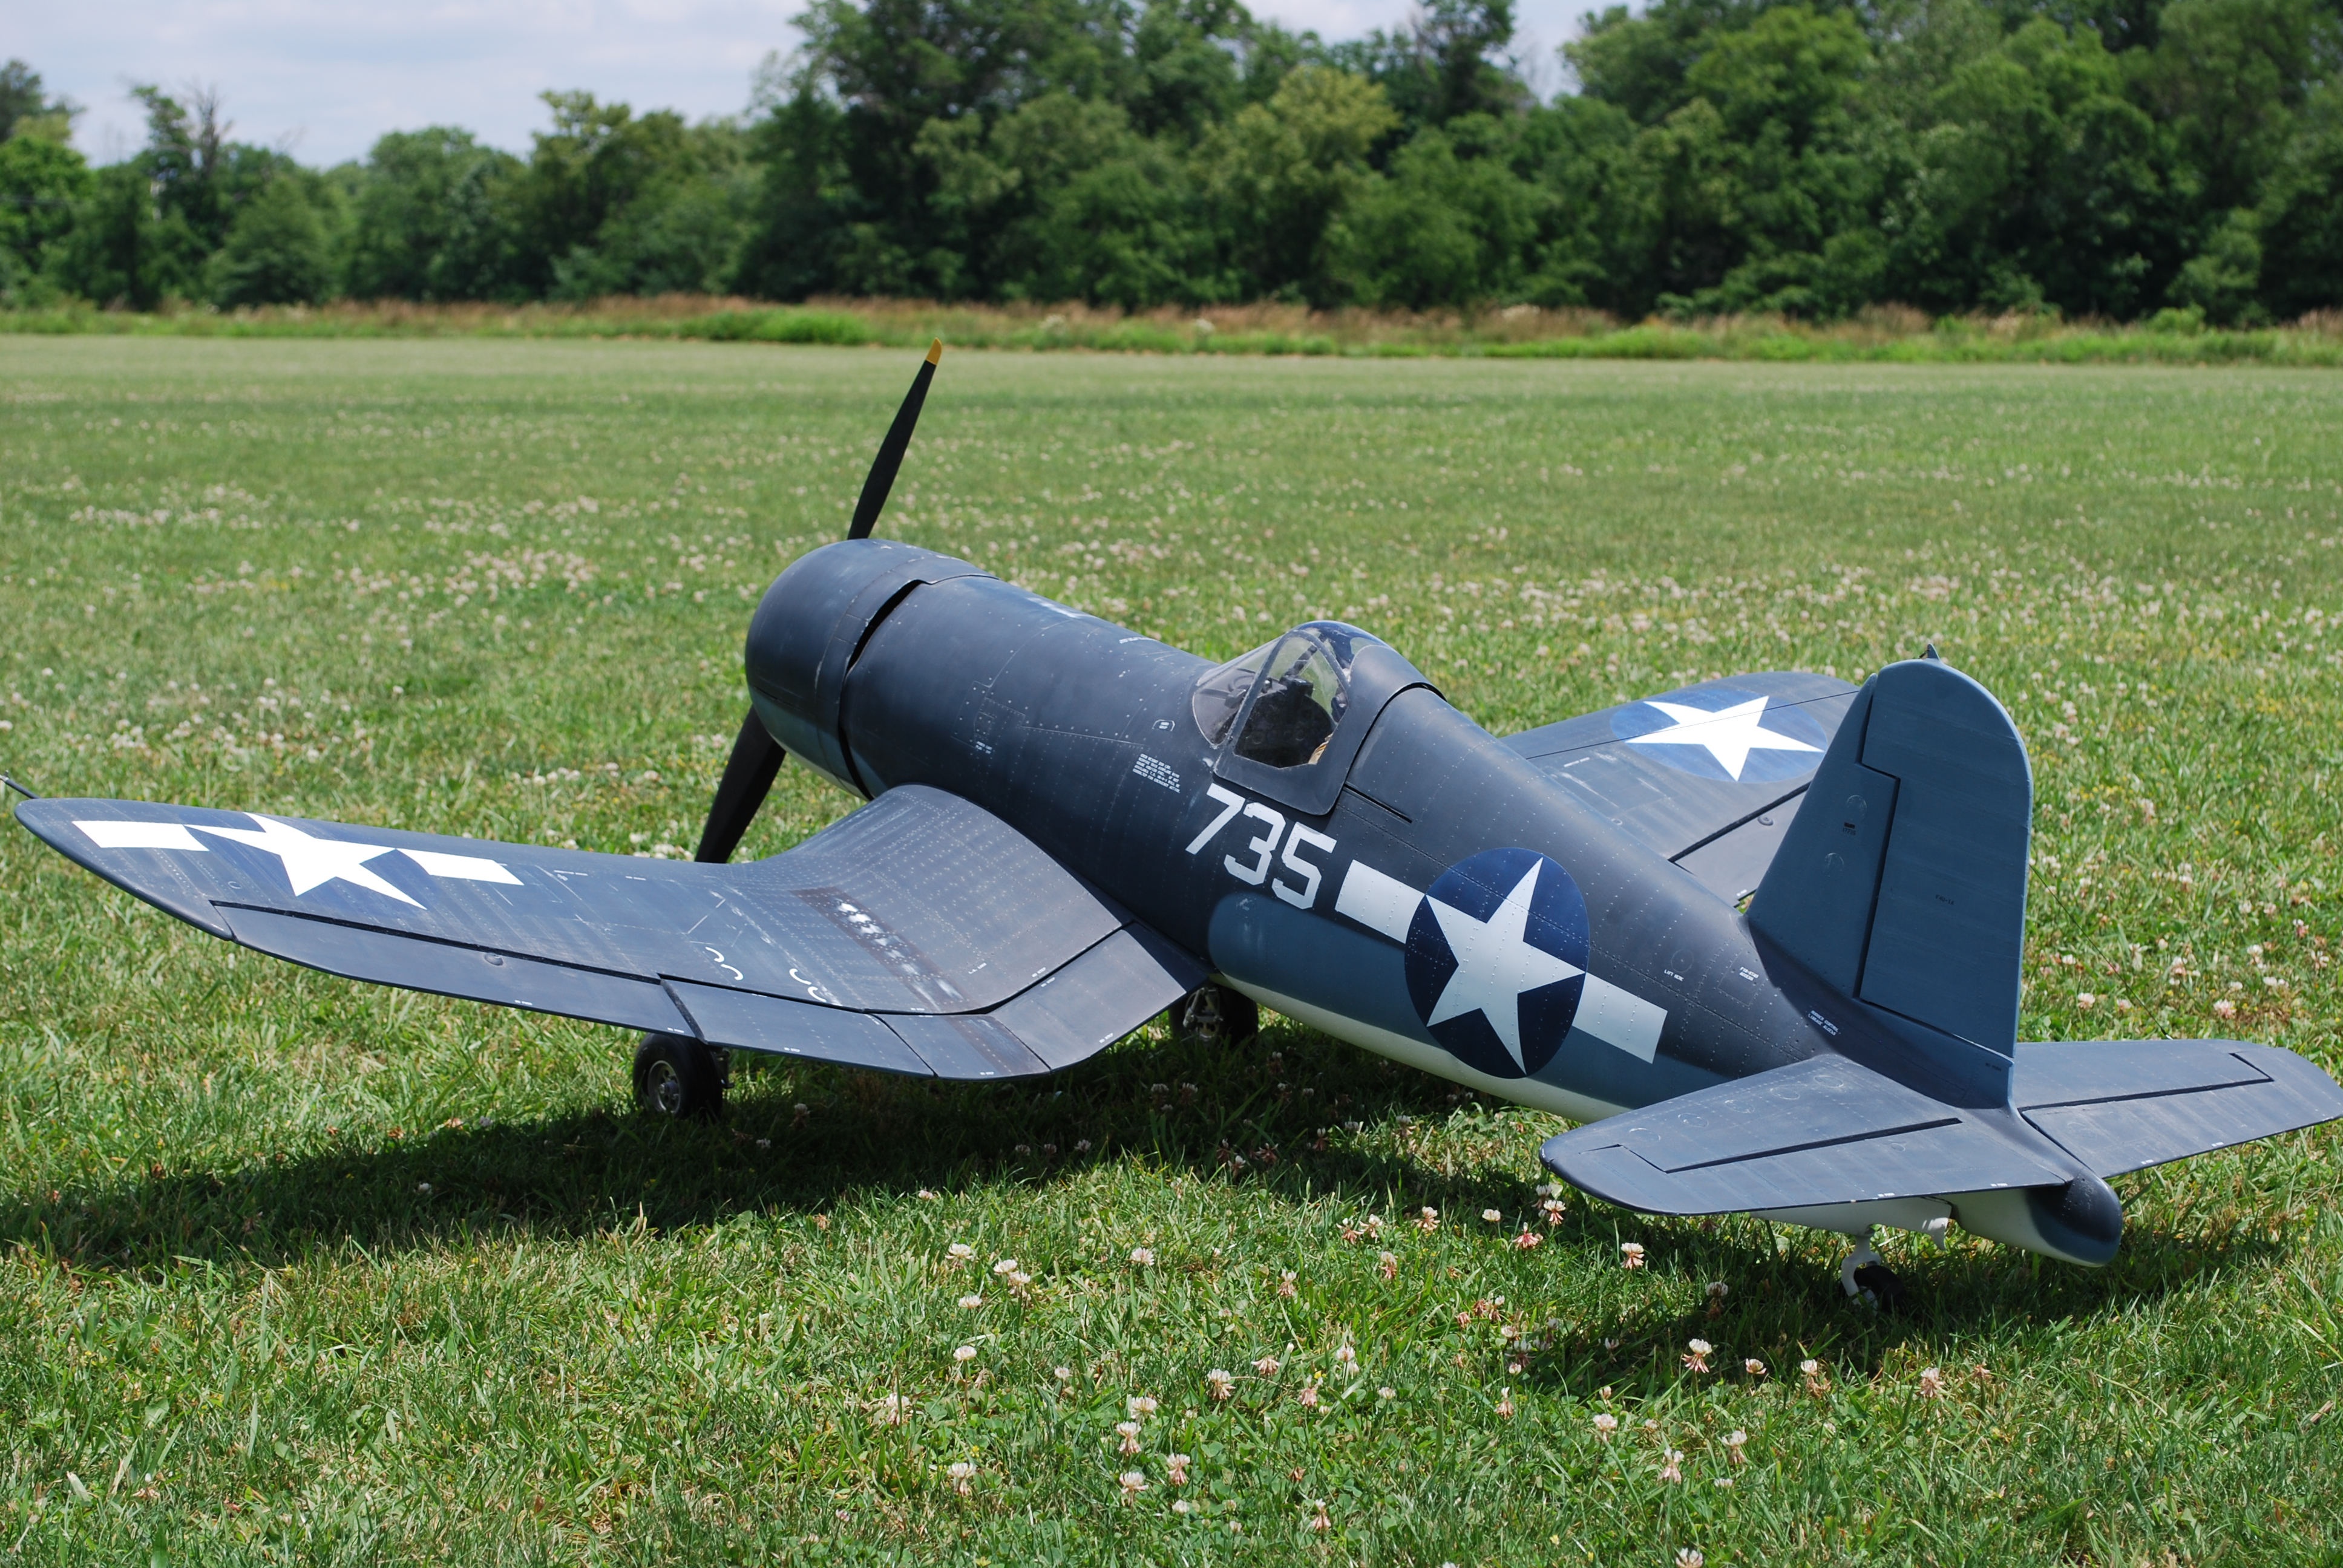
Canopy all buttoned up, ready for takeoff.
Doesn’t look like an ARF anymore! Weathering helps a lot too!
Sources:
Best Pilots: http://bestpilots.typepad.com
VQ Warbirds: www.vqwarbirds.com
Model Airplane News - The #1 resource for RC plane and helicopter enthusiasts featuring news, videos, product releases and tech tips.
Continue reading...
Article and photos by Sean McHale
However, I had always been interested in the exploits of USMC aviator Gregory ‘Pappy’ Boyington, and decided to finish the plane in his markings. Nothing can ruin the appearance of a scale model faster than a cockpit void of a pilot, especially when it’s in the air. Fortunately for me Lyle Vasser of Best Pilots offer a very realistic 1/5-scale Pappy Boyington figure and he fits in place nicely.
Here’s the Starting Point of the ARF Corsair
The Corsair comes with a molded-in floor allowing for only a pilot bust but I cut it away to installed a full-depth depth cockpit. I used the parts from a Ty’s Models cockpit kit, available from VQ Warbirds, to add a little extra detail to Pappy’s “office.” With all that taken care of, it was time to work on the canopy.
SLIDING CANOPY
I felt it was a shame to hide my scale Pappy under a full canopy so for this project I wanted the canopy to be functional. In the past I have only ever made canopies open manually, but for the Corsair, I went the extra mile and make the canopy open with my transmitter.
The canopy alone is very flimsy and brittle and running it under warm water before cutting helps ease trimming. I wasn’t confident that it would hold up so I ordered a replacement from VQ Warbirds which is identical in size and shape. I needed to stiffen the canopy frame so it would hold its shape while opening and closing. Using the original, un-cut ESM canopy, I taped it to the fuselage and made a simple external balsa frame to keep the canopy’s shape once I removed it from the fuselage.
External Bracing in place
I then removed the balsa cradle and canopy from the fuselage and sprayed the inside with some universal mold release. I then laid in two layers of carbon fiber cloth and allowed the epoxy to cure overnight. After popping it out of the canopy, it was trimmed to shape and became the perfect internal frame for my sliding canopy.
A little spray of mold release inside the canopy prevents the layup from sticking in place.
After the resin cures, the carbon fiber molding pops right out.
Nice and smooth and it fits the canopy shape perfectly.
Carbon fiber framework cut to shape.
For the guide rails, I used some slotted square brass rails and carefully installed them in the fuselage sides and along the inside edge of the cockpit opening. Ball links are used to capture canopy inside the rail and allows it to move with the use of a single, long-stroke air cylinder located forward of the instrument panel.
Guide Rails made from K&S Square Brass Tubes slotted with a Moto-Tool and Cutoff disk.
Guide Rails in position.
This arrangement gives a “push to open” and a “pull to close” operation. I cut the carbon fiber frame to shape with a Moto-Tool and a cut-off disc and then I glued the clear canopy to the inside of the frame. The canopy be removed from the rails by unscrewing the ball links which pass through the frames.
Operation
If I had more channels on my transmitter I’d put the canopy function on its own switch. At the time I built the model, I only had an 8-channel radio so I slaved the canopy function off the flap channel with a Y-harness.
Internal Drive setup to open and close Canopy.
I set it up so canopy does not open during landings (with one notch of flaps dialed in.) The model doesn’t need full flap to land. After landing I add another notch of flaps and the canopy sides open. The flaps do move down a little bit more but it only on the ground and does not affect anything else. With a 10-channel radio, it would be simple to assign the canopy function to its own channel and open it on command.
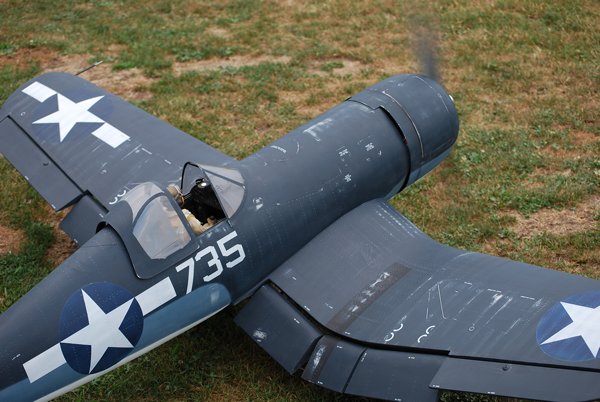
Which way to the front!?
Having this bit of animation added to any scale plane greatly increases it realism and sends the “Wow Factor” right off the charts. For a little bit of work, you get a lot of attention. Give it a try, you’re buddies will be amazed!
Canopy all buttoned up, ready for takeoff.
Doesn’t look like an ARF anymore! Weathering helps a lot too!
Sources:
Best Pilots: http://bestpilots.typepad.com
VQ Warbirds: www.vqwarbirds.com
Model Airplane News - The #1 resource for RC plane and helicopter enthusiasts featuring news, videos, product releases and tech tips.
Continue reading...