econpatric
70cc twin V2
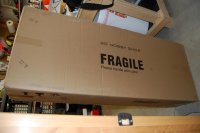
Ohh the excitement of this ugly brown box! :veryshocked:
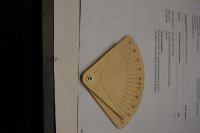
Although I have a digital throw meter, I opted to go with the 3DHS throw meter just to have a reference tool that I didn't need to calibrate each time while checking the throws during hinge glueing. I was really impressed with 3DHS as they sold out of the red version the night before I ordered. I ordered the grey version, but requested the red (even with minor box damage) in my order. Somehow they pulled it off and without any issues with the box!
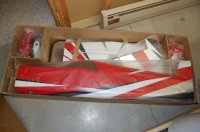
Upon opening the box the beauty shined through! It was of course well packaged and protected.
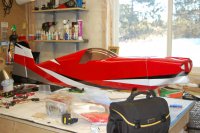
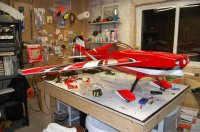
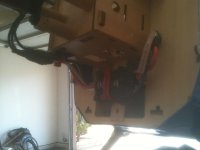
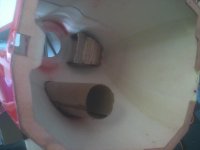
Here are a couple of photos of the dry fit. Everything lined up and went together perfect. I had some trouble with the wing tube being a bit tough to get in and out, but DJMoose suggested some silicon spray. It worked Great!
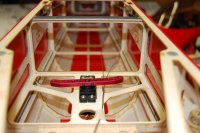
It's not needed, but I decided to go with the SWB 3" offset arm for the rudder. This is pre tapped for 4-40. Unfortunately, 3DHS uses a smaller type hardware for their controls so I had to supply my own 4-40 ball links and pull-pull links for this end of the control. The stock cables will of course work just fine. I am running Hitec HS-7954sh's on all surfaces for this airplane.

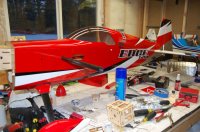
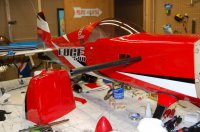
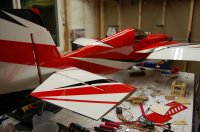
If the mess on my bench was any indication of the completion of the build I'd be flying by now!
UPDATE 2/5/13:
I always tend to over do things when it comes to my airplanes. What I mean is if their is a way to make it less likely to fail in the air, I'm all about it. I also enjoy having components that make life a little easier.
Today I decided to upgrade the standard--already bulletproof--hardware on the 25% EDGE to H9 titanium 4-40 turnbuckles and Dubro ball links also. The turnbuckles are 2x 3.5" on the Ailerons and 4" on the elevator. One end of the turnbuckle is fitted with a standard 4-40 Dubro ball link and the other end is fitted with a 4-40 ball link that is designed to support 2-56 hardware (the metal ball insert is 2-56) Dubro #2139. On top of that, I decided to go with 1.5" SWB aluminum arms on all surfaces. In addition to being sturdy, many these parts will also transfer nicely into a larger application in the future.
I did this exact same conversion (with the exception of the SWB arms) on my 3DHS 59" Slick. Even though there aren't many--if any--reports of the standard CA links failing, the turnbuckles made it easier to setup control throws using the Joe Smith method and added some security. For the Slick I used 2x 1.5" on the ailerons and 1x 5" on the elevator. All turnbuckles were 4-40 H9 titanium and the ball links were Dubro 4-40 w/2-56 hardware.
** I should note here that you do have to slightly enlarge the standard control horns for the 2-56 screw. This is really a very minor enlargement.
I have to admit the red links were a color mistake :facepalm:. Ohh well nice to have extras, I may pick some more black up next order and swap them out..
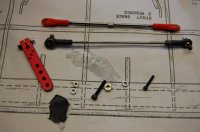
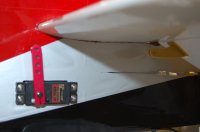
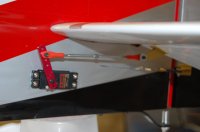
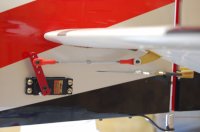
All parts went together without any issues, the only snag I ran into was installing the rudder control horns where the middle wood chipped out while dry fitting. I was advised to collect any pieces of wood and glue them back into place using a liberal amount of epoxy, all seems to have turned out fine as they are sturdy and tight.
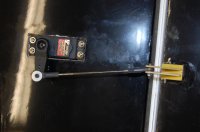
Because I am new to airplanes this size I also ran into an issue (turned non-issue) with the ball link alignment in relation to the control horn the large angle made me fear the worst, but others who have built a few of these explained that this is normal and that it is actually a good thing. When the throw is at its maximum, the angle is eliminated making it more strong at its full throw.
The rest of the build went by quick. Since many of us have built 3DHS or Extreme Flight planes I decided not to go into details about the straight-forward parts of build, as it is just the same as the 47" Extra or the 59" Slick, use a soldering iron to cut out the holes in the covering, take your measurements on the elevator, glue, attach components, re-CA the motor box area etc... However, one area that was a little different for me was the motor mount. To convert to electric the 74" Edge requires a extension box (included with the kit) this box bolted on really easy, I just drilled the four holes and used the included bolts, washers and blind nuts with a little loctite to tighten. I then proceeded to fill in the pre-drilled holes with doweling and epoxy. **One side note, the motor box extension uses directions from the pilots view so left and right are inverted.
I went with the A60-5s for my Edge and plan to run it on 8s with a 20x10 Xoar gas prop and a 21x10 electric prop. Power data coming soon.
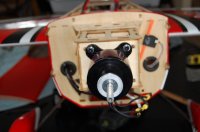
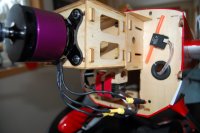
This motor mount only fits on the motor box one direction and can not be rotated except for 180 degrees, so one must fill in the pre-drilled holes and drill new ones for the mount.
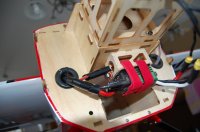
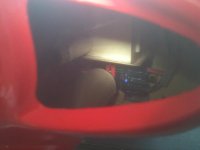
As you can see the Castle Ice 100 fits nicely under the cowling and I used one of the servo mounts as an ESC mount to line up with the lower center vent hole of the cowling and achieve the most air flow over it. For this I simply C.A.'d it into place and then used two smaller screws turned in from the top to add security to the mount.
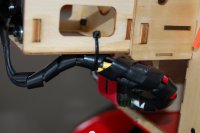
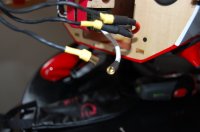
I also used 6.5mm Castle Creations bullet connectors they are rated for 200 amps, although it might be a bit of overkill, no worries of "garden hose into fire hose" issues. Once motor rotation was determined I spiral wrapped them and secured the wires with a zip tie. When working with my gasser I really enjoyed the way spiral wrap tidies things up and protects everything so it has become common place on all of my RC gadgets. I have found one of the best places to get spiral wrap at a reasonable price is at automotive stores (this also holds true for those pesky NGK CM6 spark plugs).
As you can see in several photos above, I also drilled two larger holes to allow for wires and used larger grommets to spruce them up.
Next up is the spinner. For this build I started out with a Red Extreme Flight 3" Spinner. The spinner was fine, except that it was hardly a match for the color on the plane. (Similar to the red Dubro links)I couldn't handle it, so I ordered a black one. I was hoping to make an exchange, but did not receive a reply from my email to Extreme Flight. It was my error in thinking the reds would be a match, so it probably wouldn't have worked anyways.
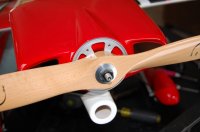
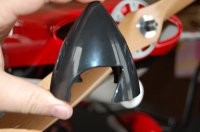
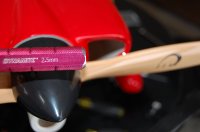
Most know how a spinner attaches, and that the propellor shouldn't touch spinner if you can help it, so I will spare the details. If anything I want to point out the high quality for the money in these spinners. As you can see above the spinner comes with a aluminum back plate and uses 4 2.5mm screws to attach. I am really impressed that the cutouts are large enough to accommodate, both a 10 pitch gas prop and electric prop with room to spare. Every other spinner I have needs to be trimmed to fit. Once seated, be sure you don't over tighten as metal screws into that metal backplate can create a lot of compression... (don't ask me how I know).
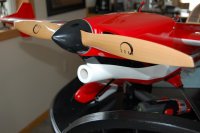
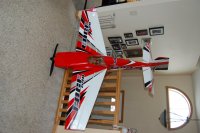
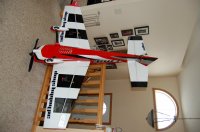
Here are a few pictures of the completed aircraft she weighed in at 10lb 14.9 oz RTF:
More to come...


Although I have a digital throw meter, I opted to go with the 3DHS throw meter just to have a reference tool that I didn't need to calibrate each time while checking the throws during hinge glueing. I was really impressed with 3DHS as they sold out of the red version the night before I ordered. I ordered the grey version, but requested the red (even with minor box damage) in my order. Somehow they pulled it off and without any issues with the box!

Upon opening the box the beauty shined through! It was of course well packaged and protected.


Here are a couple of photos of the dry fit. Everything lined up and went together perfect. I had some trouble with the wing tube being a bit tough to get in and out, but DJMoose suggested some silicon spray. It worked Great!

It's not needed, but I decided to go with the SWB 3" offset arm for the rudder. This is pre tapped for 4-40. Unfortunately, 3DHS uses a smaller type hardware for their controls so I had to supply my own 4-40 ball links and pull-pull links for this end of the control. The stock cables will of course work just fine. I am running Hitec HS-7954sh's on all surfaces for this airplane.


If the mess on my bench was any indication of the completion of the build I'd be flying by now!
UPDATE 2/5/13:
I always tend to over do things when it comes to my airplanes. What I mean is if their is a way to make it less likely to fail in the air, I'm all about it. I also enjoy having components that make life a little easier.
Today I decided to upgrade the standard--already bulletproof--hardware on the 25% EDGE to H9 titanium 4-40 turnbuckles and Dubro ball links also. The turnbuckles are 2x 3.5" on the Ailerons and 4" on the elevator. One end of the turnbuckle is fitted with a standard 4-40 Dubro ball link and the other end is fitted with a 4-40 ball link that is designed to support 2-56 hardware (the metal ball insert is 2-56) Dubro #2139. On top of that, I decided to go with 1.5" SWB aluminum arms on all surfaces. In addition to being sturdy, many these parts will also transfer nicely into a larger application in the future.
I did this exact same conversion (with the exception of the SWB arms) on my 3DHS 59" Slick. Even though there aren't many--if any--reports of the standard CA links failing, the turnbuckles made it easier to setup control throws using the Joe Smith method and added some security. For the Slick I used 2x 1.5" on the ailerons and 1x 5" on the elevator. All turnbuckles were 4-40 H9 titanium and the ball links were Dubro 4-40 w/2-56 hardware.
** I should note here that you do have to slightly enlarge the standard control horns for the 2-56 screw. This is really a very minor enlargement.
I have to admit the red links were a color mistake :facepalm:. Ohh well nice to have extras, I may pick some more black up next order and swap them out..


All parts went together without any issues, the only snag I ran into was installing the rudder control horns where the middle wood chipped out while dry fitting. I was advised to collect any pieces of wood and glue them back into place using a liberal amount of epoxy, all seems to have turned out fine as they are sturdy and tight.

Because I am new to airplanes this size I also ran into an issue (turned non-issue) with the ball link alignment in relation to the control horn the large angle made me fear the worst, but others who have built a few of these explained that this is normal and that it is actually a good thing. When the throw is at its maximum, the angle is eliminated making it more strong at its full throw.
The rest of the build went by quick. Since many of us have built 3DHS or Extreme Flight planes I decided not to go into details about the straight-forward parts of build, as it is just the same as the 47" Extra or the 59" Slick, use a soldering iron to cut out the holes in the covering, take your measurements on the elevator, glue, attach components, re-CA the motor box area etc... However, one area that was a little different for me was the motor mount. To convert to electric the 74" Edge requires a extension box (included with the kit) this box bolted on really easy, I just drilled the four holes and used the included bolts, washers and blind nuts with a little loctite to tighten. I then proceeded to fill in the pre-drilled holes with doweling and epoxy. **One side note, the motor box extension uses directions from the pilots view so left and right are inverted.
I went with the A60-5s for my Edge and plan to run it on 8s with a 20x10 Xoar gas prop and a 21x10 electric prop. Power data coming soon.


This motor mount only fits on the motor box one direction and can not be rotated except for 180 degrees, so one must fill in the pre-drilled holes and drill new ones for the mount.


As you can see the Castle Ice 100 fits nicely under the cowling and I used one of the servo mounts as an ESC mount to line up with the lower center vent hole of the cowling and achieve the most air flow over it. For this I simply C.A.'d it into place and then used two smaller screws turned in from the top to add security to the mount.


I also used 6.5mm Castle Creations bullet connectors they are rated for 200 amps, although it might be a bit of overkill, no worries of "garden hose into fire hose" issues. Once motor rotation was determined I spiral wrapped them and secured the wires with a zip tie. When working with my gasser I really enjoyed the way spiral wrap tidies things up and protects everything so it has become common place on all of my RC gadgets. I have found one of the best places to get spiral wrap at a reasonable price is at automotive stores (this also holds true for those pesky NGK CM6 spark plugs).
As you can see in several photos above, I also drilled two larger holes to allow for wires and used larger grommets to spruce them up.
Next up is the spinner. For this build I started out with a Red Extreme Flight 3" Spinner. The spinner was fine, except that it was hardly a match for the color on the plane. (Similar to the red Dubro links)I couldn't handle it, so I ordered a black one. I was hoping to make an exchange, but did not receive a reply from my email to Extreme Flight. It was my error in thinking the reds would be a match, so it probably wouldn't have worked anyways.


Most know how a spinner attaches, and that the propellor shouldn't touch spinner if you can help it, so I will spare the details. If anything I want to point out the high quality for the money in these spinners. As you can see above the spinner comes with a aluminum back plate and uses 4 2.5mm screws to attach. I am really impressed that the cutouts are large enough to accommodate, both a 10 pitch gas prop and electric prop with room to spare. Every other spinner I have needs to be trimmed to fit. Once seated, be sure you don't over tighten as metal screws into that metal backplate can create a lot of compression... (don't ask me how I know).
Here are a few pictures of the completed aircraft she weighed in at 10lb 14.9 oz RTF:


More to come...
Last edited by a moderator:

