dskuro95
100cc
Hey 3DRC Forums its Dan Skuropacki(dskuro95) here again with another build log. This one is going to be on the 3D Hobby Shop 87" Extra 300 SHP (red). I picked it up at the WRAM Show February 22nd. That was a nice way to save $200 on shipping!
So my first impressions:
Very big for a 50CC
High quality
Packaged Greatly
Joe Smith signature
Very light
Looks like a very simple build
Liked:
Carbon gear
rear mounted cowl
prehinged and glued Ailerons and elevators
Aluminum inflatable tires and rims
Joe Smith's signature
Landing gear Skirts
Fortitude Gas Tank
DA Drill guide for motor box
Disliked:
2 boxes
No decal sheet
Pull Pull Wire fell out of slot
Nylon Pushrod ends did not want to thread with the pushrod(lots of trimming, messing with, gluing)
Things you will/may need:
30-minute epoxy
Hobby knife
soldering iron
adjustable wrench
metric allen key set
Phillips-head screwdriver
Zip Ties
Thin CA
Mixing Cups
Popsicle sticks
Vice Grips
Drill
Dremel Tool
Needlenose Pliers
And anything thing else you can think of!
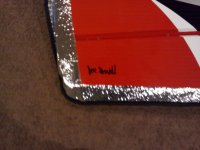
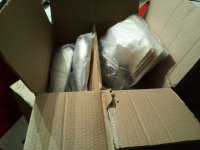
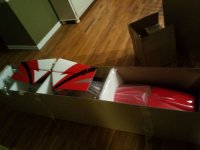
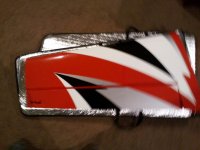
As you can see it is packaged very well, no damage anywhere to the box or the plane.
So the first thing you will be doing once you get it out of the box(and stop smiling), is you will want to take all of the rudder hinges out of the rudder, put vasoline(or in my case white lithium grease) and put it all around the metal pin at the middle of hinge. This will stop the 30-minute epoxy you are about to mix from seeping into the hinge and gluing it shut!
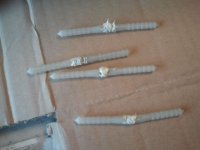
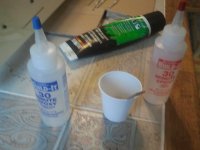
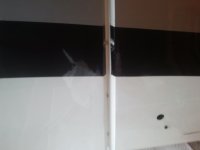
So after you dry fit your rudder onto your plane, and you see it will fit go ahead and grab your mixing cups and Popsicle stick(or whatever you use) and mix your epoxy. Now take a zip tie and dip it in the glue. Rub the zip tie around the inside of the hinge holes on both the plane and the rudder. Next take a little bit of epoxy and put around the tip of the hinge. NOTE: You only want to put it around the tip so that this way it does not ooze out all over the plane. After this, you will go ahead and attach your rudder and making sure it is on far enough that it looks right, and so that this way you still get the full turn radius.
Next we will cut out all of the control horn holes, on both the wings, stabs, and rudder. Go ahead and take your hobby knife(or soldering iron) and cut out the appropriate hole. Next check and see if the horn will fit. It most likely will not and you will need to trim both the hole, and the piece that both of the horns go into. Take your Dremel and find a tool that can trim its width. Be careful not to go too wide as it will cause play in the horn.
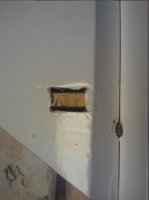
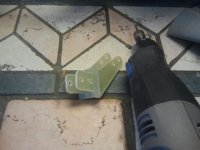
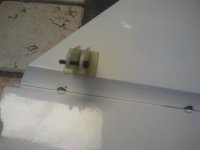
After you do your trimming, dry fit it again. If you know it works go ahead and epoxy it in. NOTE: Do not rush to use the same epoxy you did on the rudder. You may mess up and damage the aircraft or make it more difficult to complete. In my case I had to mix more. Once you have it mixed apply a generous amount to both inside the horn holes and on the horns. A Popsicle stick fits perfectly into the holes and that is what I used. Keep doing this step until all of the horns are done on all of the surfaces except for the rudder.
Now that all of these are done, it has been at least 30-60 minutes. This is plenty of time to go work on the rudder horn and not have to worry about puling the rudder hinges out. Locate the correct place for the holes and cut the area out. Remember to cut out both sides for the pull-pull horn. Go ahead and glue it in once you know it dry fits and you trimmed it out.
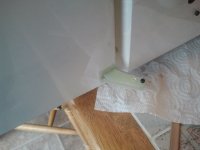
Once you get it in you will have to make sure that it is equal on both sides. It is okay to move around since you are using 30-minute epoxy. What you will do is take a ruler or tape measure, and measure from the back corner of the rudder to the front hole in the horn. Once it is equal leave it alone to dry.
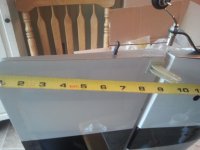
While that is drying, locate your tires, axles, landing gear, wheel pants, landing gear skirts, and wheel collars. Go ahead and mount them together. NOTE: Make sure you put the landing gear skirt on first or else you will have to take it off to mount the skirts.
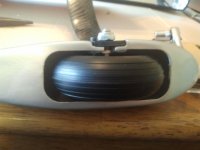
Once I tighten it all down, I go over the wheel collars with a hint of thin CA to assure they will not come loose.
By the time this is done it is okay to touch the plane again. Locate the landing gear bolts and lock nuts. Align the gear up, take pliers or a socket wrench and hole the lock nuts inside the canister slot. Take your other hand and tighten the bolts down on top.
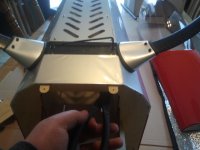
Now that the landing gear is mounted, you can go ahead and put the landing gear cover on. All you have to do is loosen up the skirts, and dribble some thin CA onto the landing gear cover and place it down. Then tighten the skirts back up.
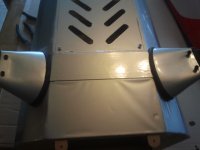
Next, since I do not have my servos yet or my DA-50r back from Desert Aircraft yet I just installed the fuel tank. It is very easy. You can either use Velcro straps provided or zip ties. I went overkill on the Velcro straps but I like it that way. It is very easy to do. All you have to do is remove the canister cover, and feed the Velcro straps or zip ties through the little holes. Make sure to tighten them up but do not go too tight because it can damage the fuel tank.
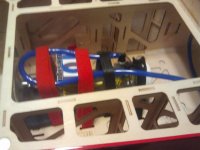
The last thing I did for the day was I made all of push rods I disliked this step. The nylon ball link type ends did not want to mount onto the aluminum push rod's. I had to do a lot of trimming, gluing, etc to get it to work. I will be updating as I progress with the build. Hopefully I will have my servos by the end of next week. And I will have my DA-50r on Monday(dang UPS doesn't ship on Saturday!!!:cursing: :banghead
Okay, so I got my motor back from DA and it is running perfectly now(bench test). First thing I did was cut out the firewall. Just line up the lines on the template and tape it down. Then, drill out all of the holes. NOTE: make sure you use a sharp drill bit or else you may splinter your firewall a hair on the inside(I did that and had to epoxy it just to be safe!).
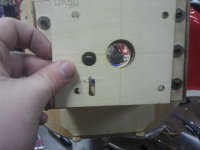
For my bolts I used a 1/4 inch drill bit. A 15/64 was a direct fit into the template hole but a 1/4 inch was the perfect fit for the bolt without any play.
Next you will need to mount the engine so you can cut the cowl.
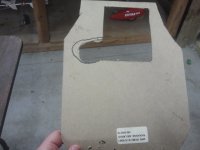
Next, I went and cut out the cowl using a piece of cardboard as my template. To do this, locate the alignment tabs for the bottom of the cowling and screw your cardboard piece to it. This is so that this way you no you will be in the right area to cut the cowl. Next, take a sharpie and and outline your muffler and head of the engine. You will want to go a little bit bigger so that this way you will be able to fit it on okay and for cooling. After you have the template made hold the template to the cowl and trace it on using the top left corner of the hole already in the cowl as a starting point. Take a dremel and cut it out with a fine blade. After it is close take a rounded tool and make the cut look neat.(sorry I forgot to take a picture but I will take one soon to show what I mean by a rounded corner).
Thanks for reading and if you have any questions feel free to PM me for more information.
So my first impressions:
Very big for a 50CC
High quality
Packaged Greatly
Joe Smith signature
Very light
Looks like a very simple build
Liked:
Carbon gear
rear mounted cowl
prehinged and glued Ailerons and elevators
Aluminum inflatable tires and rims
Joe Smith's signature
Landing gear Skirts
Fortitude Gas Tank
DA Drill guide for motor box
Disliked:
2 boxes
No decal sheet
Pull Pull Wire fell out of slot
Nylon Pushrod ends did not want to thread with the pushrod(lots of trimming, messing with, gluing)
Things you will/may need:
30-minute epoxy
Hobby knife
soldering iron
adjustable wrench
metric allen key set
Phillips-head screwdriver
Zip Ties
Thin CA
Mixing Cups
Popsicle sticks
Vice Grips
Drill
Dremel Tool
Needlenose Pliers
And anything thing else you can think of!


As you can see it is packaged very well, no damage anywhere to the box or the plane.
So the first thing you will be doing once you get it out of the box(and stop smiling), is you will want to take all of the rudder hinges out of the rudder, put vasoline(or in my case white lithium grease) and put it all around the metal pin at the middle of hinge. This will stop the 30-minute epoxy you are about to mix from seeping into the hinge and gluing it shut!


So after you dry fit your rudder onto your plane, and you see it will fit go ahead and grab your mixing cups and Popsicle stick(or whatever you use) and mix your epoxy. Now take a zip tie and dip it in the glue. Rub the zip tie around the inside of the hinge holes on both the plane and the rudder. Next take a little bit of epoxy and put around the tip of the hinge. NOTE: You only want to put it around the tip so that this way it does not ooze out all over the plane. After this, you will go ahead and attach your rudder and making sure it is on far enough that it looks right, and so that this way you still get the full turn radius.
Next we will cut out all of the control horn holes, on both the wings, stabs, and rudder. Go ahead and take your hobby knife(or soldering iron) and cut out the appropriate hole. Next check and see if the horn will fit. It most likely will not and you will need to trim both the hole, and the piece that both of the horns go into. Take your Dremel and find a tool that can trim its width. Be careful not to go too wide as it will cause play in the horn.


After you do your trimming, dry fit it again. If you know it works go ahead and epoxy it in. NOTE: Do not rush to use the same epoxy you did on the rudder. You may mess up and damage the aircraft or make it more difficult to complete. In my case I had to mix more. Once you have it mixed apply a generous amount to both inside the horn holes and on the horns. A Popsicle stick fits perfectly into the holes and that is what I used. Keep doing this step until all of the horns are done on all of the surfaces except for the rudder.
Now that all of these are done, it has been at least 30-60 minutes. This is plenty of time to go work on the rudder horn and not have to worry about puling the rudder hinges out. Locate the correct place for the holes and cut the area out. Remember to cut out both sides for the pull-pull horn. Go ahead and glue it in once you know it dry fits and you trimmed it out.

Once you get it in you will have to make sure that it is equal on both sides. It is okay to move around since you are using 30-minute epoxy. What you will do is take a ruler or tape measure, and measure from the back corner of the rudder to the front hole in the horn. Once it is equal leave it alone to dry.

While that is drying, locate your tires, axles, landing gear, wheel pants, landing gear skirts, and wheel collars. Go ahead and mount them together. NOTE: Make sure you put the landing gear skirt on first or else you will have to take it off to mount the skirts.

Once I tighten it all down, I go over the wheel collars with a hint of thin CA to assure they will not come loose.
By the time this is done it is okay to touch the plane again. Locate the landing gear bolts and lock nuts. Align the gear up, take pliers or a socket wrench and hole the lock nuts inside the canister slot. Take your other hand and tighten the bolts down on top.

Now that the landing gear is mounted, you can go ahead and put the landing gear cover on. All you have to do is loosen up the skirts, and dribble some thin CA onto the landing gear cover and place it down. Then tighten the skirts back up.

Next, since I do not have my servos yet or my DA-50r back from Desert Aircraft yet I just installed the fuel tank. It is very easy. You can either use Velcro straps provided or zip ties. I went overkill on the Velcro straps but I like it that way. It is very easy to do. All you have to do is remove the canister cover, and feed the Velcro straps or zip ties through the little holes. Make sure to tighten them up but do not go too tight because it can damage the fuel tank.


The last thing I did for the day was I made all of push rods I disliked this step. The nylon ball link type ends did not want to mount onto the aluminum push rod's. I had to do a lot of trimming, gluing, etc to get it to work. I will be updating as I progress with the build. Hopefully I will have my servos by the end of next week. And I will have my DA-50r on Monday(dang UPS doesn't ship on Saturday!!!:cursing:
 :banghead
Okay, so I got my motor back from DA and it is running perfectly now(bench test). First thing I did was cut out the firewall. Just line up the lines on the template and tape it down. Then, drill out all of the holes. NOTE: make sure you use a sharp drill bit or else you may splinter your firewall a hair on the inside(I did that and had to epoxy it just to be safe!).

For my bolts I used a 1/4 inch drill bit. A 15/64 was a direct fit into the template hole but a 1/4 inch was the perfect fit for the bolt without any play.
Next you will need to mount the engine so you can cut the cowl.
Next, I went and cut out the cowl using a piece of cardboard as my template. To do this, locate the alignment tabs for the bottom of the cowling and screw your cardboard piece to it. This is so that this way you no you will be in the right area to cut the cowl. Next, take a sharpie and and outline your muffler and head of the engine. You will want to go a little bit bigger so that this way you will be able to fit it on okay and for cooling. After you have the template made hold the template to the cowl and trace it on using the top left corner of the hole already in the cowl as a starting point. Take a dremel and cut it out with a fine blade. After it is close take a rounded tool and make the cut look neat.(sorry I forgot to take a picture but I will take one soon to show what I mean by a rounded corner).

Thanks for reading and if you have any questions feel free to PM me for more information.
Last edited by a moderator:
