Jetpainter
640cc Uber Pimp
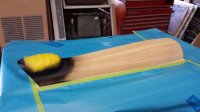
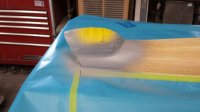
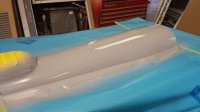
Tonight I filled in the seam between the canopy and the hatch. I used canopy glue to install the canopy, and since it stays flexible, I was afraid just to go directly over it with polyester glaze/filler, so I tried something new. I mixed up a small amount of the Z-Poxy finishing resin and added milled fiberglass to it until it was a paste. I had tested this out the night before on a scrap of canopy and it really stuck well. I masked both sides and smeared the mix on with my finger. I left the tape on when sanding so I wouldn't sand anything that didn't need it. Once I got close to done I remasked it a tad farther away and sanded again to clean up the edge. After that I went over it with a polyester filler/glaze and then sanded that. I remasked again ans sanded to clean up the edge. I may spray some primer on it tomorrow if I have time.