• If you are new to GiantScaleNews.com, please register, introduce yourself, and make yourself at home.

    We're 1st in Giant Scale RC because we've got the best membership on the internet! Take a look around and don't forget to register to get all of the benefits of GSN membership!

    Welcome!

Sport 30% Edge 540 Pete Marshall Plans with Laser Cut Short Kit

Bluepilot2003

70cc twin V2
Last night and this morning I finished the diagonal braces and put all the bottom formers on. Medium CA on the balsa and wood glue on the plywood. I also used a 3/8 balsa piece on the bottom of F-2 right behind where the landing gear plate goes.

I will glue in the bottom stringers next before taking the fuselage off the table. Hopefully everything comes out perfectly true.
 

Attachments

  • image.jpg
    image.jpg
    47.6 KB · Views: 269
  • image.jpg
    image.jpg
    53.7 KB · Views: 266
  • image.jpg
    image.jpg
    34.6 KB · Views: 261
  • image.jpg
    image.jpg
    33.7 KB · Views: 261
  • image.jpg
    image.jpg
    57.6 KB · Views: 246
  • image.jpg
    image.jpg
    48.8 KB · Views: 234

Bluepilot2003

70cc twin V2
With the lower stringers all glued into place, I prayed and took the pins out that were holding it in place. It didn't budge with all the pins out:)

I then placed f-9, f-10, and the vertical stab base plate. I only glued in the base plate at this time. This should be the last aligning piece of the fuselage.

I moved onto the turtle deck. I used my old navigational tool to measure the angle on the plans for the first former. It is 20 degrees. I sanded the edge to that angle, put the piece on the fuselage, measured the angle of the piece and glued it into place with the top stringer holding it there with f-9 in place as well.

Using 2 other stringers, all the rest of the turtle deck formers were put into place and glued.
 

Attachments

  • image.jpg
    image.jpg
    65.3 KB · Views: 258
  • image.jpg
    image.jpg
    50.4 KB · Views: 265
  • image.jpg
    image.jpg
    56.6 KB · Views: 249
  • image.jpg
    image.jpg
    65 KB · Views: 240
  • image.jpg
    image.jpg
    67.4 KB · Views: 269

Bluepilot2003

70cc twin V2
Yesterday, I glued in the tail wheel plate, F-9, and F-10. Not a whole lot done but also prepped for putting on F-0 and the turtle deck stringers.
 

Attachments

  • image.jpg
    image.jpg
    59.8 KB · Views: 252
  • image.jpg
    image.jpg
    47.5 KB · Views: 222
  • image.jpg
    image.jpg
    42 KB · Views: 240

Bluepilot2003

70cc twin V2
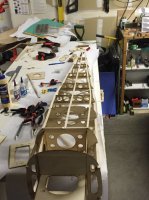
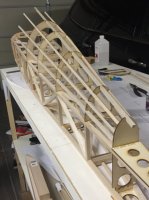
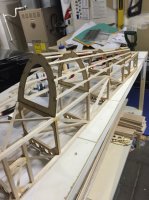
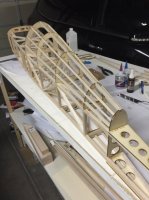
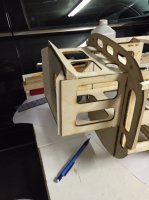
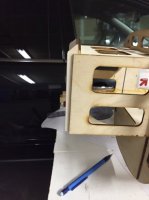
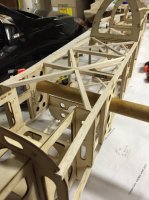
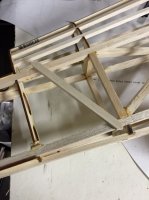
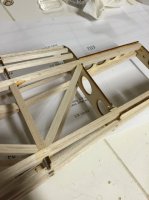
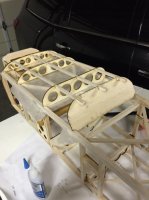
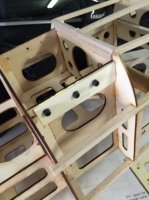
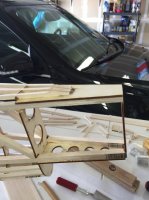
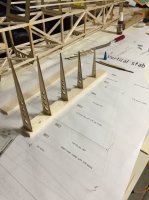
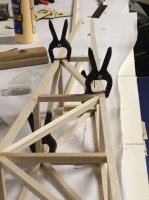
The turtle deck stringers were glued in, sawed off, and sanded to the finished shape. Before they were glued to the front former, I verified the fit with the hatch back former. When the fit looked good, then it was finally glued.

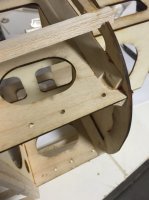
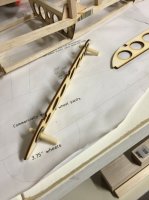
The bottom stringers were in the way for the tail wheel assembly, so I cut them shorter than the plans say so the tail wheel can be mounted to the plywood. I will shape the stringers to make it look pretty-ish.

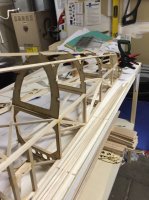
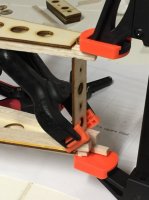
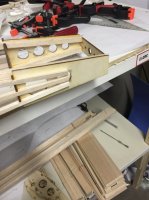
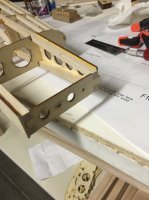
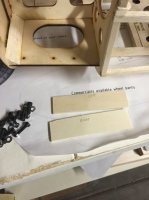
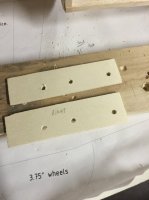
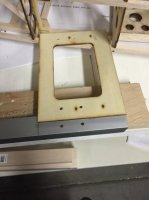
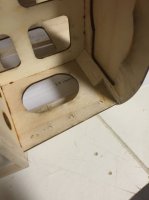
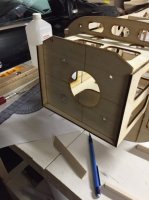
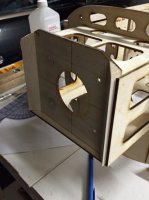
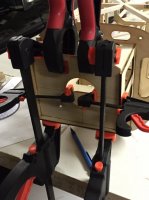
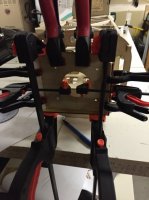
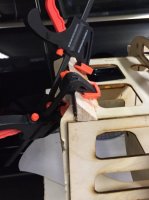
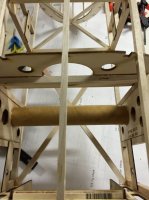
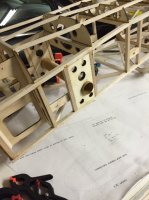
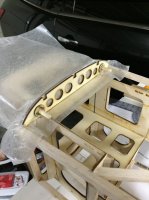
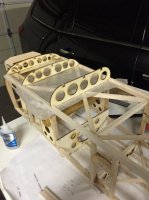
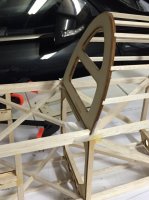
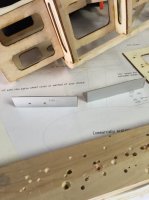
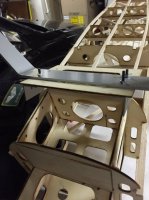
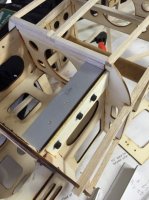
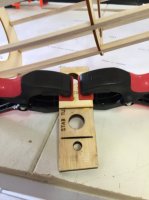
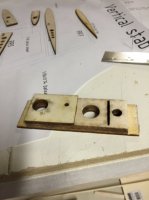
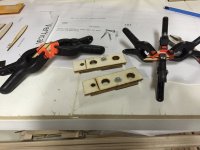
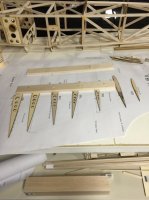
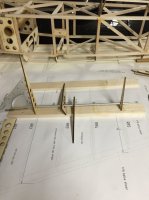
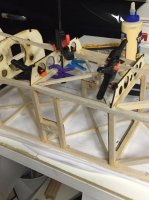
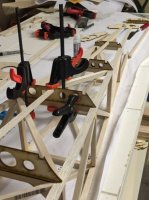
I worked with the landing gear plate and reinforcements next. I cut the plywood doublers to shape, marked and drilled the holes, and expanded the holes already on the formers. Then I place the landing gear plate into place and marked on the inside where it met the vertical pieces. That allowed me to place the 1"X 1" x 1/8" angle aluminum into the correct spot to drill the holes and mark where I need to cut it. The triangle stock I had already glued in needed to be modified for the reinforcement pieces to fit.

I will need to go to a neighbor's house to use his saw to cut the aluminum to shape. Hopefully, I will get that done in the next couple days.

I am waiting for the phenolic tubes before I do too much more. I am also debating on using angle aluminum for firewall reinforcements or the triangle stock that is on the plans...
 

Attachments

  • image.jpg
    image.jpg
    55 KB · Views: 255
  • image.jpg
    image.jpg
    65.9 KB · Views: 246
  • image.jpg
    image.jpg
    57.4 KB · Views: 250
  • image.jpg
    image.jpg
    57.4 KB · Views: 265
  • image.jpg
    image.jpg
    49.7 KB · Views: 273
  • image.jpg
    image.jpg
    44 KB · Views: 230
  • image.jpg
    image.jpg
    38.1 KB · Views: 233
  • image.jpg
    image.jpg
    45.2 KB · Views: 218
  • image.jpg
    image.jpg
    38.2 KB · Views: 230
  • image.jpg
    image.jpg
    32.7 KB · Views: 222
Last edited:

Bluepilot2003

70cc twin V2
I decided to go with the plans on the firewall. So I fit the firewall into place, put the 1/2" triangle stock into place, and sawed them to shape. The triangle stock actually helped to show the slight down thrust the plans call for.

i drew lines around the firewall so I could easily place it again after the glue was on it. Then I put the glue on and put it back into place and clamped her in.

I came back about 50 minutes later and glued in the two side triangle stock pieces. I will glue in a 3/4" triangle stock tomorrow on to the the motor mount top behind the firewall as shown in the 3rd picture.
 

Attachments

  • image.jpg
    image.jpg
    48.3 KB · Views: 230
  • image.jpg
    image.jpg
    45.8 KB · Views: 222
  • image.jpg
    image.jpg
    44.7 KB · Views: 210
  • image.jpg
    image.jpg
    35.6 KB · Views: 220
  • image.jpg
    image.jpg
    48.9 KB · Views: 257
  • image.jpg
    image.jpg
    48.8 KB · Views: 251

Bluepilot2003

70cc twin V2
I did quite a bit on Friday night. I will get more done today as well. For Friday's work...

I used a piece of 3/4" triangle stock for support on the top of the motor box behind the firewall.

Finally, my phenolic tubes came! So that tube was epoxied into the fuselage and cut to slightly larger size to also make it through the sheeting.

Then I glued the horizontal stabilizer braces together to get ready to put them in the fuselage. Also, the braces between F-8 and F-9 were cut to shape and glued in.

To finish off the evening, I made the hatch. I started off by increasing the size of the holes to use 1/4" dowels on the front. Then I glued them into the F-1a former and placed it on the fuselage with wax paper to separate them. I cut the 1/4" stringers for the sides and glued them to f-1a. Then I just worked the wax paper back to glue in the rest of the formers and put in the top 1/4" stringers. The plans call for 3/16" stringers but they are cut for the 1/4". The back former for the canopy was placed on the fuselage where I wanted it, the side stringers were cut to length and the correct angle, and lastly, the former was glued into place. I stayed up slightly later than I meant to to get the hatch complete!
 

Attachments

  • image.jpg
    image.jpg
    40.9 KB · Views: 240
  • image.jpg
    image.jpg
    60.4 KB · Views: 245
  • image.jpg
    image.jpg
    55.4 KB · Views: 282
  • image.jpg
    image.jpg
    58.5 KB · Views: 255
  • image.jpg
    image.jpg
    45.1 KB · Views: 246
  • image.jpg
    image.jpg
    52.7 KB · Views: 235
  • image.jpg
    image.jpg
    48 KB · Views: 223
  • image.jpg
    image.jpg
    47 KB · Views: 236
  • image.jpg
    image.jpg
    53.1 KB · Views: 236
  • image.jpg
    image.jpg
    50.1 KB · Views: 222
  • image.jpg
    image.jpg
    49 KB · Views: 271
  • image.jpg
    image.jpg
    52.7 KB · Views: 196
  • image.jpg
    image.jpg
    62.2 KB · Views: 218

Bluepilot2003

70cc twin V2
I didn't get as much done as I was hoping today. Just a few things were done...

I cut the plywood for the pilot to sit on and glued it in.

Then I worked in the landing gear mounting. I used my neighbor's good band saw to cut the aluminum for the mount. Then I mounted the piece I had holes in already to the landing gear plate. Then I placed it on the fuse and marked the three holes for the sides. I drilled those holes and repeated the process on the other side.

Once the holes were all drilled, I mounted the aluminum pieces to the sides with thread lock. Then I glued on the landing gear plate.
 

Attachments

  • image.jpg
    image.jpg
    37.1 KB · Views: 379
  • image.jpg
    image.jpg
    51.9 KB · Views: 182
  • image.jpg
    image.jpg
    44.3 KB · Views: 202
  • image.jpg
    image.jpg
    56.7 KB · Views: 193
  • image.jpg
    image.jpg
    60.2 KB · Views: 225

Bluepilot2003

70cc twin V2
So I haven't worked on the plane for a few nights cause I actually got to fly the A-10 again:) Now, back to the real work;)

I started by gluing the stab tube supports to the other pieces I glued together earlier. That allowed me to cut out the balsa and make it fit properly.

I shaped the 3 bottom stringers using the little hand saw.

Then I went back and forth on rudder and the stab tube support structure.

I pinned the vertical stabilizer plans to my table. The 1/2" base was also pinned to the plans to make the rudder perpendicular to the plans. I drew a line on the center of the piece to make sure all the pieces were true when gluing. I was constantly looking at the tips and lining them up as well.

I did more work, but pics aren't uploading correctly at the moment... More to come.
 

Attachments

  • image.jpg
    image.jpg
    39.4 KB · Views: 186
  • image.jpg
    image.jpg
    55.4 KB · Views: 190
  • image.jpg
    image.jpg
    36 KB · Views: 193
  • image.jpg
    image.jpg
    74.6 KB · Views: 211
  • image.jpg
    image.jpg
    53.5 KB · Views: 184
  • image.jpg
    image.jpg
    50.4 KB · Views: 225
  • image.jpg
    image.jpg
    52.9 KB · Views: 176
  • image.jpg
    image.jpg
    55.8 KB · Views: 180
Last edited:
Top