• If you are new to GiantScaleNews.com, please register, introduce yourself, and make yourself at home.

    We're 1st in Giant Scale RC because we've got the best membership on the internet! Take a look around and don't forget to register to get all of the benefits of GSN membership!

    Welcome!

IMAC JTEC Radiowave 3.1m MX2 Build

Kevin-Young

70cc twin V2
I meant to post this yesterday but did not get a chance

So after laminating the doubler for the fuse joint I then moved onto the doubler for the tail. The tail doubler has the same steps involved and to help align everything you can use the F8 former. The tail doubler has the obvious job of supporting the horizontal stabs and for those of you that have ever popped out a blind nut in the tail or dropped your elevator extention into the tail we do have a nice hatch on each side that you can use to get back there.
 

Attachments

  • 20150129_190159_resized.jpg
    20150129_190159_resized.jpg
    41 KB · Views: 383

Kevin-Young

70cc twin V2
After the doublers are all laminated I moved on to the longerons. The longerons are pretty simple to do, for the fuselage you need 4 longerons which are made of 3/8" square balsa. To make the longerons you need to take 2 pieces of the 3/8" square balsa and scarf them together. After you have done that for all four longerons you want to run a bead of titebond down the longeron so you can glue it to the inside of the fuselage sides. When I do this I a square and some thin CA to tack the longeron in the position so I can keep on moving and dont have to wait for it to dry fully.

Also when you are doing the scarf joint for the longerons you can also make the stringers for the bottom of the fuse at the same time so get it done with.
 

Attachments

  • 20150129_190213_resized.jpg
    20150129_190213_resized.jpg
    108.8 KB · Views: 396
  • 20150129_190225_resized.jpg
    20150129_190225_resized.jpg
    119 KB · Views: 407
  • 20150129_190109_resized_1.jpg
    20150129_190109_resized_1.jpg
    33.8 KB · Views: 409

Kevin-Young

70cc twin V2
Now that the fuse sides are all done it pretty much means you are read to join everything and give some structure to the fuse. There are a couple of steps here that I did not take pictures of because I was excited to see everything come together.

The first thing I did was to glue the motorbox onto the top plate and then each former to it as well. The top plate slides into the F1 former and then has tabs to help keep everything aligns properly. This is one of the steps that I find it is easier to use the hysol glue because you can make a fillet just like you did with the motorbox and continue one. Also, each former is tabbed on the top as well so as with everything else it makes it really easy to deal with. For the rest of the formers I just use titebond

Once I have the formers glued to the top plate (sorry no pictures) I then dry fit the fuse side just to make sure everything comes together like it should. This also lets you see the sequence you want to do to join everything and where to clamp if needed. When I was dry fitting everything I noticed that I need to pay attention to the rudder tray areas. On the MX the 2 rudder trays sit right on top of the bottom longerons so you want to make sure they are sitting properly when you do so. The nice thing about the trays being there is you do not need to add any additional support on the side for the tray to help make it strong for down the road when you are installing equipment.

After, figuring the sequence I wanted to do for the sides I went ahead and glued one side on at a time. I did one side at a time because I did not have enough large clamps (I am sorry to disappoint some of you about my clamps). When I glued the side on I ran a bead down the top longeron where it interlocks with the fuselage top plate and then down the sides of each former where it will contact the fuse sides. I tend to make a mess during this step so make sure you have some damp paper towels around to clean up the excess titebond.

Again, I allow that all to dry for a little bit (probably about an hour) and did the same for the second side. In addition to gluing on the fuselage side I also glued on the tail wheel plate and rear former to help align everything and make sure everything is square.
 

Attachments

  • 20150129_190147_resized_1.jpg
    20150129_190147_resized_1.jpg
    118.5 KB · Views: 368
  • 20150130_002148_resized.jpg
    20150130_002148_resized.jpg
    102 KB · Views: 388
  • 20150130_001812_resized_1.jpg
    20150130_001812_resized_1.jpg
    33.1 KB · Views: 363
  • 20150130_001909_resized.jpg
    20150130_001909_resized.jpg
    109.3 KB · Views: 413

Kevin-Young

70cc twin V2
Once the fuse sides where all dry then went back and added the 1/4" bass wood stringers that go on the bottom of the fuselage.

One note on that, the kit is designed so if you would like you can fully sheet the bottom of the fuselage with 1/16" balsa sheeting (that sheeting is not included since it is optional). Traditionally the kit will come with enough sheeting to sheet from the F1 former to the F3 former like the extra's have. I have decided I am going to do it how the kit will come (just like the extra) and only sheet from the F1-F3 formers. To me it is just added weight but I understand the argument for fully sheeting it as it will make the finished product look a little smoother on the bottom.
 

Attachments

  • 20150130_001843_resized_1.jpg
    20150130_001843_resized_1.jpg
    87.7 KB · Views: 375

IMAC FANATIC

40% happier than most folks.
Wheres all the beautiful clamps," not enough clamps"
I may have to un-sub to this build kevin. LOL.
Loving it !
 

Kevin-Young

70cc twin V2
And just to throw this out there again, JTEC has graciously donated two airplanes to the U.S. F3A team's raffle so two people will have there choice of any JTEC airplane we currently manufacture. There are also some other pretty kick ass prizes in there and you can buy your raffle tickets online so it is nice an convenient. http://www.teamusaf3a.com/index.php/giant-raffle

Or if you want you can just donate to the team :yesss:
 

Kevin-Young

70cc twin V2
Wheres all the beautiful clamps," not enough clamps"
I may have to un-sub to this build kevin. LOL.
Loving it !
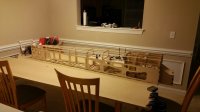
I promise I will take some pictures just for you. My supply may be inadequate for you though.

I was trying to make it look like I was somewhat organized when I build, it is a lie though.
 

jtec/radiowave

70cc twin V2
Brian,

The clamps are at 3 locations. My home, Kevin's house and the shop. I would have to use my pickup truck and a full day just to get them all in one place!!!
 
Top