GSNadmin
Staff member
So, after getting the Skyraider up onto its landing gear last time out, I thought I would tackle finishing up the plug-in wing panels. This of course was started before the wings were sheeted by installing the hardware which included the aluminum wing tube and socket sets which are available from Nick Ziroli Plans.

Here the 1 inch diameter wing tube and the socket have been slide into place along with some of the alignment rings I made to center the tubes in the opening already cut into the ribs. The holes were cut for 1.25 inch tubes and was just too big for this reduced size 85 inch span Skyraider.
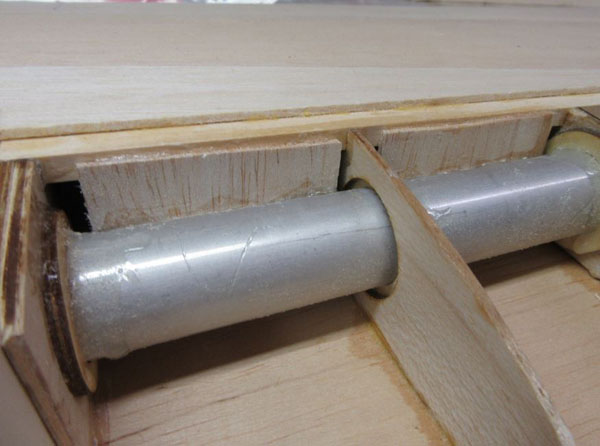
Once the wing has been sheeted from the main spar back to the trailing edge, I used thick Zap CA and 15 minute Z-Poxy to securely glue the fixed end of the wing tube in place. Also the shear webbing has been glued in place.

Also, the rib-bay that will house the hard-point for the wing tip attachment screw is filled in with basswood as shown. I used a lead weight to hold the blocks in place as the epoxy cured. The weight also held then blocks in place so they would be flush with the bottom of the ribs so the sheeting when applied would fit smoothly over them.
Not, the bolt holes won’t be drilled into the wing and tubes until after the wing has been finished. This because the ends of the wing panels will be finished and sanded smooth and that would throw off the alignment if the holes were drilled now.
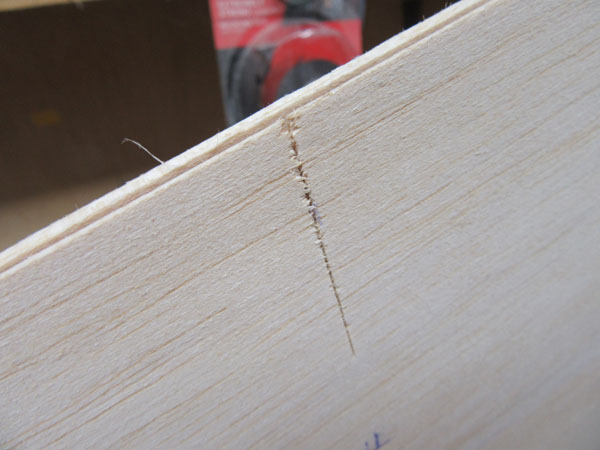
To help guide the future cuts that would separate the inboard and outboard wing panels, I made a few razor saw cuts between the two W10 ribs in the wing. I made short cuts at the trailing edges and and the leading edges before gluing the top sheeting into place.

I place the Skyraider inverted in the maintenance stand and started the wing chopping on the bottom by drawing a guide line.

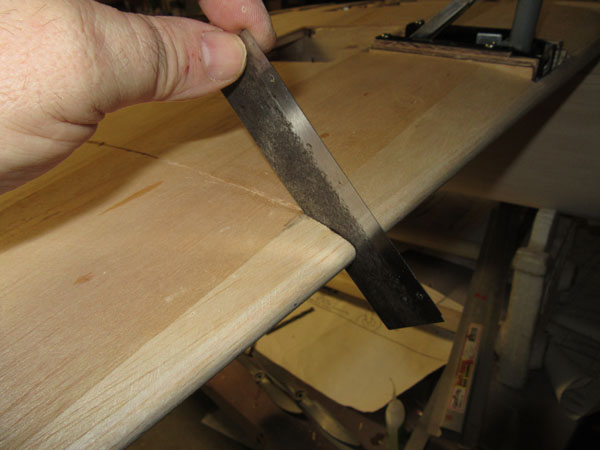
This is the scary part. I removed the blade from my razor saw and slowly and carefully cut into the wing at the trailing edge and the leading edge using the previous guide cuts for position.
Again I made the cuts slowly and carefully being sure to be in between the two W10 ribs. I stopped the cut through shy of the front and back alignment dowels already installed in the ribs. If I do this again, I will wait till the wing panels are cut apart before gluing the dowels in place.

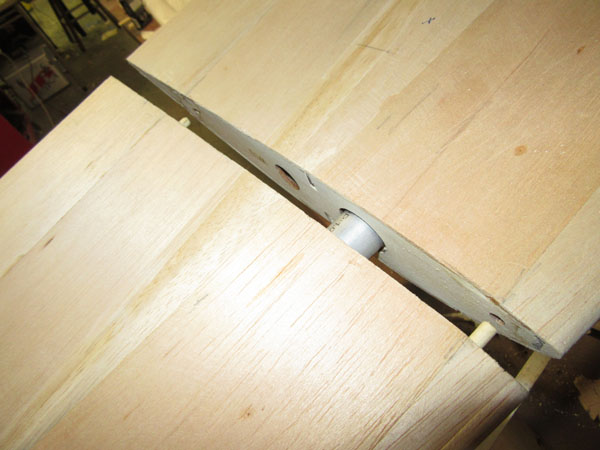
I then used a flexible steel ruler and made cuts joining the leading and trailing edge cuts using a sharp X-Acto knife. I made several light cuts until I cut into the space between the two ribs. Here I am using the Razor saw blade to cut through the top and bottom main spars.
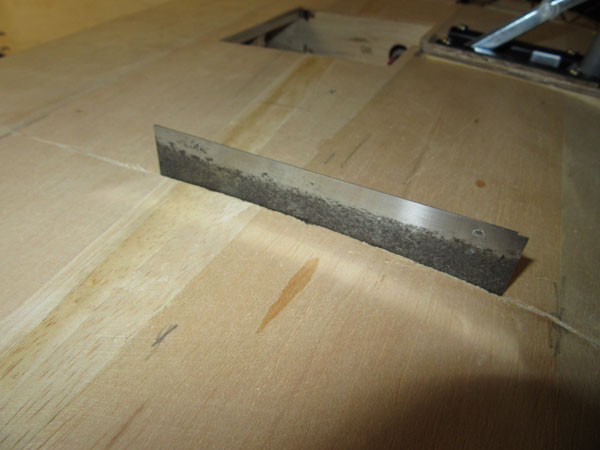
I continued to make razor saw cuts horizontally to completely separate the wing panels. Next do the same thing in the top side of the wing.

I a few places some of the glued used to apply the sheeting seeped in between the plywood ribs so I used thin-bladded APC electric propellers as wedges to help pry the panels apart.

There was a small pop as the wing panels finally separated cleanly apart. The whole process of doing it this way is to ensure that the ends of the two separated wing panels match each other perfectly.
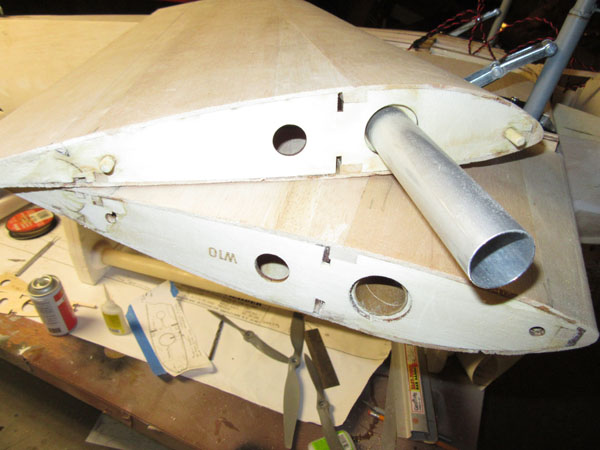
I slowly pulled and wiggled the out wing panel until the wing tube and the alignment dowels slid out of the inner wing panel.

Ah! there it is, the wing tube slid cleanly out of the socket tube.
There were a few small sections where the ribs delaminated, but they were easily glued back together with thin Zap CA.

Now all you have to do is repeat the process on the other wing panel. Pheww! This is a bit nerve racking but well worth the effort when you want to transport the Skyraider to the flying field.
The next task will be separating the ailerons and flaps from the wing and hinging them into place. Stay tuned!
For the previous post, Click Here.
Model Airplane News - The #1 resource for RC plane and helicopter enthusiasts featuring news, videos, product releases and tech tips.
Continue reading...
Here the 1 inch diameter wing tube and the socket have been slide into place along with some of the alignment rings I made to center the tubes in the opening already cut into the ribs. The holes were cut for 1.25 inch tubes and was just too big for this reduced size 85 inch span Skyraider.
Once the wing has been sheeted from the main spar back to the trailing edge, I used thick Zap CA and 15 minute Z-Poxy to securely glue the fixed end of the wing tube in place. Also the shear webbing has been glued in place.
Also, the rib-bay that will house the hard-point for the wing tip attachment screw is filled in with basswood as shown. I used a lead weight to hold the blocks in place as the epoxy cured. The weight also held then blocks in place so they would be flush with the bottom of the ribs so the sheeting when applied would fit smoothly over them.
Not, the bolt holes won’t be drilled into the wing and tubes until after the wing has been finished. This because the ends of the wing panels will be finished and sanded smooth and that would throw off the alignment if the holes were drilled now.
To help guide the future cuts that would separate the inboard and outboard wing panels, I made a few razor saw cuts between the two W10 ribs in the wing. I made short cuts at the trailing edges and and the leading edges before gluing the top sheeting into place.
I place the Skyraider inverted in the maintenance stand and started the wing chopping on the bottom by drawing a guide line.
This is the scary part. I removed the blade from my razor saw and slowly and carefully cut into the wing at the trailing edge and the leading edge using the previous guide cuts for position.
Again I made the cuts slowly and carefully being sure to be in between the two W10 ribs. I stopped the cut through shy of the front and back alignment dowels already installed in the ribs. If I do this again, I will wait till the wing panels are cut apart before gluing the dowels in place.
I then used a flexible steel ruler and made cuts joining the leading and trailing edge cuts using a sharp X-Acto knife. I made several light cuts until I cut into the space between the two ribs. Here I am using the Razor saw blade to cut through the top and bottom main spars.
I continued to make razor saw cuts horizontally to completely separate the wing panels. Next do the same thing in the top side of the wing.
I a few places some of the glued used to apply the sheeting seeped in between the plywood ribs so I used thin-bladded APC electric propellers as wedges to help pry the panels apart.
There was a small pop as the wing panels finally separated cleanly apart. The whole process of doing it this way is to ensure that the ends of the two separated wing panels match each other perfectly.
I slowly pulled and wiggled the out wing panel until the wing tube and the alignment dowels slid out of the inner wing panel.
Ah! there it is, the wing tube slid cleanly out of the socket tube.
There were a few small sections where the ribs delaminated, but they were easily glued back together with thin Zap CA.
Now all you have to do is repeat the process on the other wing panel. Pheww! This is a bit nerve racking but well worth the effort when you want to transport the Skyraider to the flying field.
The next task will be separating the ailerons and flaps from the wing and hinging them into place. Stay tuned!
For the previous post, Click Here.
Model Airplane News - The #1 resource for RC plane and helicopter enthusiasts featuring news, videos, product releases and tech tips.
Continue reading...