GSNadmin
Staff member
Part of the Model Airplane News “Classic Article” Archive, Greg Hahn, explains the proper way to enlarge scale model airplane plans. His techniques are as timely today as it was when it was first written.
— By Greg Hahn
I am often asked for information about blowing up plans. I guess my big competition B-25J Mitchell, which I built from enlarged plans of Nick Ziroli’s 101-inch Mitchell, worked well enough to raise some interest.
I’ll usually reply with two questions: what type of model and how big? Before you get all excited about enlarging a favorite model, you must first consider the realities of the size you desire and the new logistics involved. Designers don’t just flip a coin to arrive at a size for a model. They draw a set of plans to a certain size for a reason—usually because of things such as complexity, structural integrity, or the ability for the model to be broken down for transportation purposes. Do realize that the reasons why the plans weren’t drawn larger in the first place will grow in the same proportion as the enlargement. The logistics of building a model bigger can become quite a headache if not thoroughly thought out before you begin. Is your building shop large enough to handle a plane of this size? An 8-foot span can be quite cumbersome; anything over that, look out! When the fuselage and wing have to be joined together for the incidence check or tail-group mounting, space can become a big problem.
Can you get the model out of your shop after it’s finished without using a chainsaw? When a model’s weight gets up over 35 to 40 pounds, it’s usually too awkward to safely carry by yourself. Is someone close by to help? Getting it into a vehicle on your own can be a nightmare, if not impossible. Door jambs and elevators have a mysterious “magnetic” attraction. The biggest aggravation I have with my big Mitchell is the fact that I can’t do anything with it by myself. I practically need help just to look at it! Static judging alone is a three-man job.
MOVIN’ IT
Will it fit into your vehicle? Anything over 8 feet long won’t fit into a pickup truck, so a trailer may be in order. Actually, a trailer is really quite handy but can also become an added expense. As you can see, there are many things to consider before you even open the glue bottle or head out to the copy shop. I just don’t want you to be faced with a “big” disappointment.
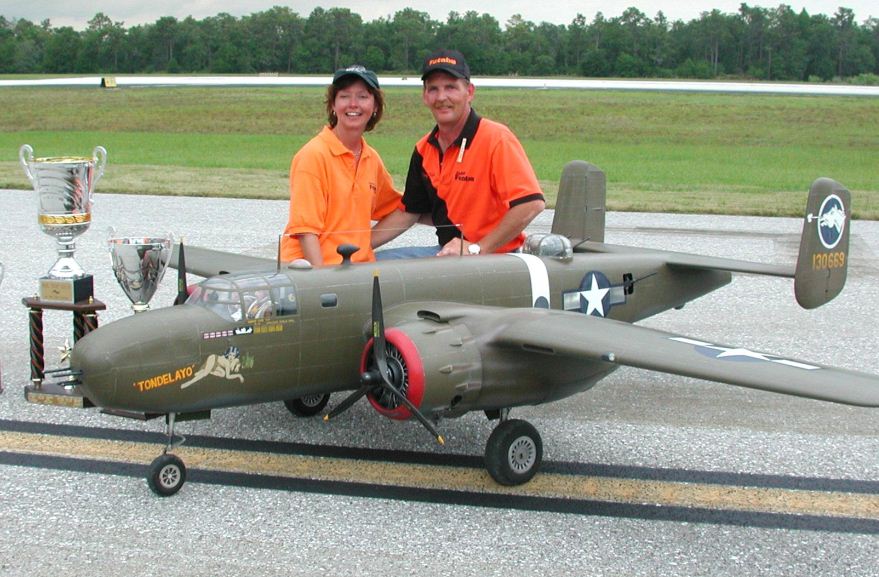
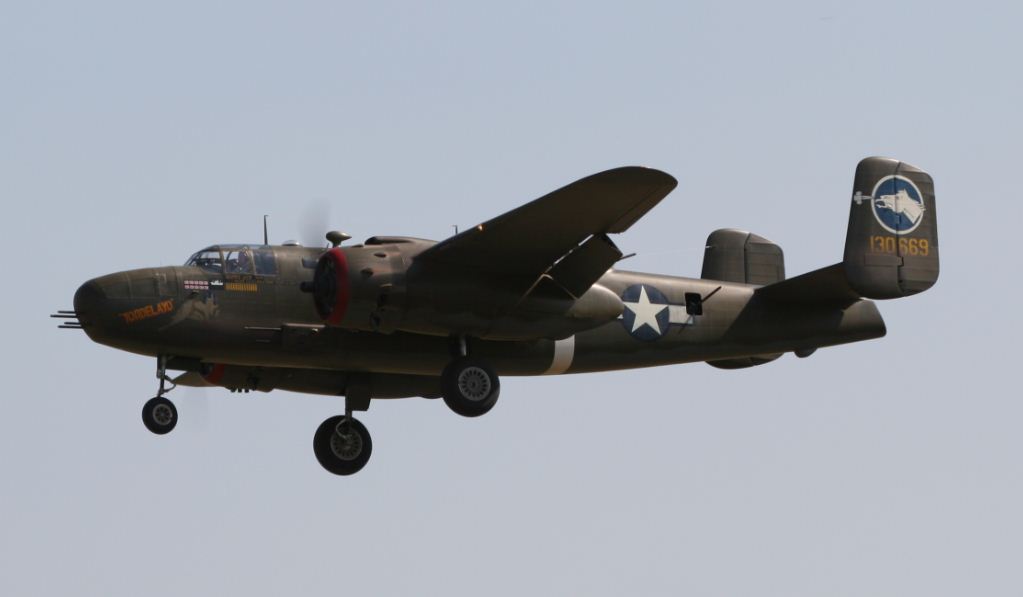
(Above) Greg’s enlarged Ziroli B-25 earned him the title Mr. Top Gun in 2005.
If you’re still with me, then you’ve made it through the early weeding out process, and we can get down to the next step. Making a decision on just how much to enlarge the plans requires you to consider a lot of things all at once. Expense and legality are the two considerations that are most important to me. When you enlarge a plan, most if not all of the hardware pieces, such as landing gear, cowls, canopies and other bumps and appendages, are not available.
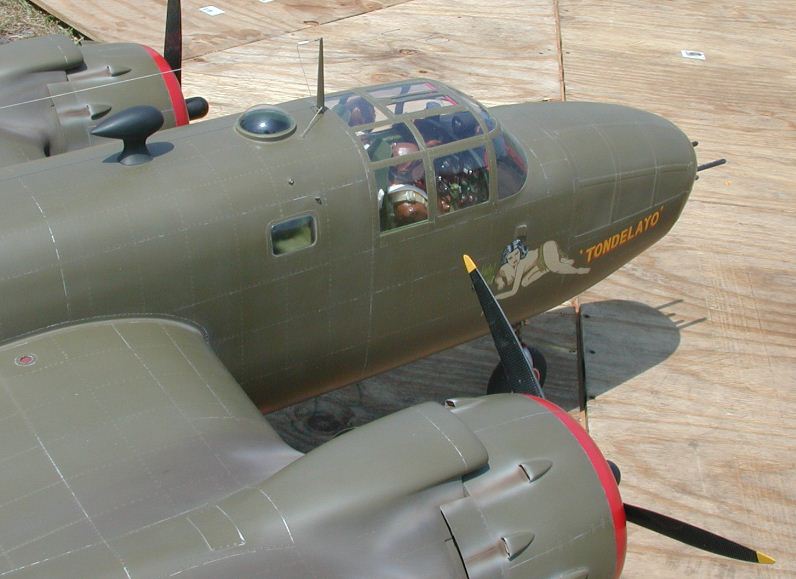
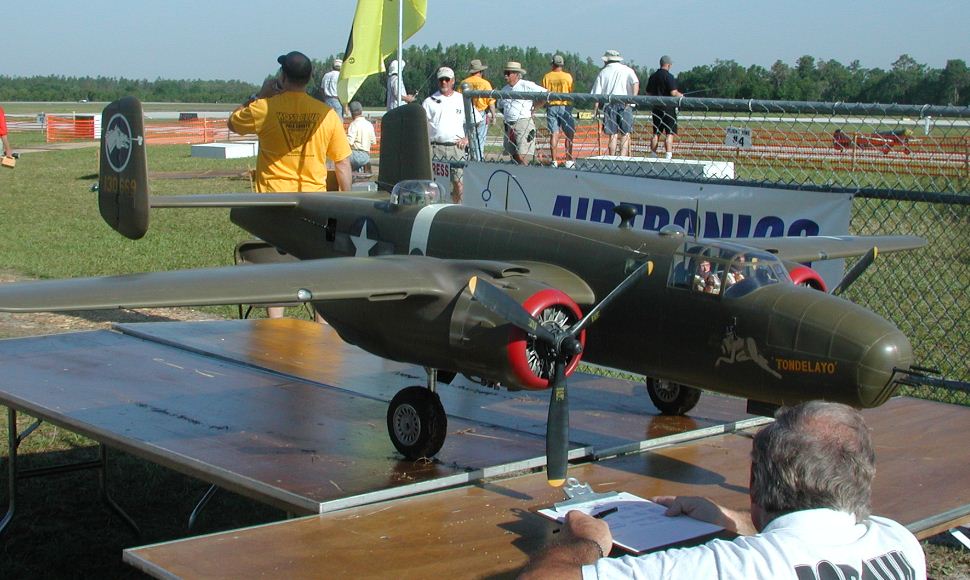
(Above) When you enlarge a scale airplane, you have to get the details right. Smaller planes can get by with a minimum of eye-candy, but the bigger you build them, the more important surface details become.
You either have to make them yourself or pay to have them made and believe me, low-volume mold-making can be quite expensive. If the plane you’re building happens to have retractable landing gear, these also will need to be custom made. Of course, increasing size does increase cost, but the hardware factor may compound the cost more than you might have thought.
IS IT LEGAL?
When I talk about legality, I’m talking about weight. Under AMA rules, the limit for competition or sport flying is 55 pounds; there are no dimensional limitations. Personally, if I’m going to go through all the time, trouble and expense of enlarging a plan and building a model, you can bet it will be legal for competition. If the plan you’re looking at is for a model that weighs 40 pounds, you’d better leave it alone unless you want it to be in the AMA Experimental class. If you have considered all that I’ve said, then I believe you are ready to “blow one up.” The rest isn’t too difficult as long as you’ve had some success in scratch-building.
SIZING THINGS UP

Getting the paper plan enlarged will take some mathematical figuring on your part. When you go to the print shop, they will want to know by what percentage you want the plans enlarged. You can’t just walk in and say, “I want to enlarge the span from 101 inches to 118 inches.” You’ll have to say you want to enlarge the plan 17.5 percent. The wingspan is the easiest dimension to use when figuring out the percentage. Everything else grows proportionally, including the lines in the drawings. Since the lines are so much bigger, you’ll have to decide to which side of the line you’ll cut your parts. Also, the plan itself will have to be physically cut down in width. Since most plans are printed on 36-inch-wide paper, you’ll have to cut and scrunch the drawing together so that when enlarged, it will still fit on 36-inch-wide paper. Once you have your big plans in hand, you’ll need to study them carefully and make some wood-size decisions. The wood or lumber dimensions that were originally called for by the designer have grown along with everything else.
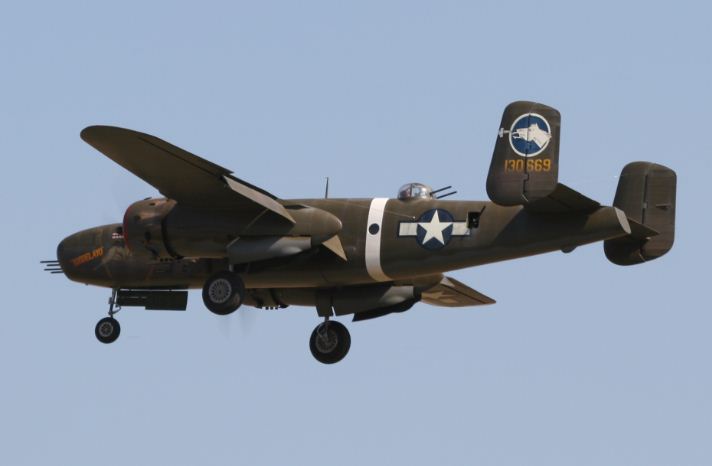
(Above) It’s true, Bigger does fly Better!
Usually, you won’t find these new sizes and shapes down at the ole’ hobby hut. When figuring out new wood sizes, I usually revert to the original sizes for non-load-bearing stringers, formers, and ribs (most profile pieces). Then, on load-bearing items like spars, landing gear-mount blocks and engine mounts, I bump them up 1/8 inch on both sides. There’s no need to use anything over 1/8 inch thick for planking to cover a model weighing less than 55 pounds; 1/8-inch balsa has plenty of strength, especially when 1-ounce fiberglass cloth is applied over it. The only other structural areas to be concerned with are the wing mounts. The mount blocks for the wing bolts in both the wing and fuselage should be beefed up. When I use plug-in aluminum wing tubes, I increase them by 1/4 inch in outside diameter.
CUSTOM HARDWARE

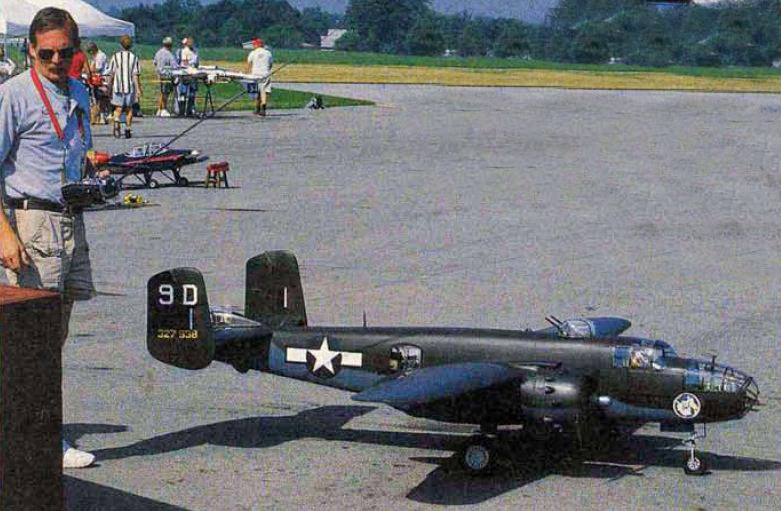
(Above) Remember, when you change the size of a set of plans, you’re on your own when it comes to cowls, canopies and other hardware items like retracts. Plan accordingly.
The hardware pieces and parts are going to be the toughest hill to climb in this project. Whether you attempt to build them yourself or have them custom made, good planning will keep stress to a minimum. If you’re buying them, get your order in early; you can’t expect custom anything to be on your doorstep in a couple of weeks. The only place I go for retractable landing gear is Robart.* They can make custom gear to your specifications and will even help you with the engineering if you run into a kink. For “scale looks,” strength, and ease of operation, they are, without a doubt, the very best! When it comes to mold-making and vacuumforming, I go to Nick Ziroli Jr. His company, Nick Ziroli Plans*, makes canopies and cowls for their plans, and on occasion, Nick makes custom parts. You do need to make the plug, usually from hardwood or aluminum. If you need parts that require more strength, like large cowls, then fiberglass is the only way to go. Lenny Stanko of Take Flight Model & Mold*, is called “Mister Smooooth” in the glass business, and I get my glass from him. He can be hard to catch, however, so keep trying if you don’t get an answer. Radio gear will also need more attention. To give you an idea, my B-25, uses 19 servos of various sizes and power output, all connected with over 125 feet of wire. Also included are six Y-harnesses and three switch units. I power this mess with two 2500mAh Ni-Cd packs. Servo leads are quite long in the wings, so I strongly recommend the use of larger diameter wire for aileron and flap servos. I also recommend using a servo on each control surface. This seems to spread out control pressure and keep the rod lengths as short as possible.
Another question I’m often asked is whether or not I use “chokes” on the longer leads to suppress noise. A couple of years ago, I converted to JR* radios. At the time, Team JR manager, Mike Stokes, told me that the “chokes” that came on factory servo extensions and “Y” harnesses were a precautionary measure. They have since found them to be unnecessary. So to answer the question: no, I don’t use them.
POWER AND WEIGHT
Power requirements for your larger bird are almost a given. Unless it’s going to turn more than two propellers, gasoline engines are the only offerings that produce enough power to get your 40- to 50-pound plane off the ground. Since I love simplicity and reliability, I use Zenoah* 2-stroke, gas engines. They use simple but ultra-reliable ignition systems, are well-balanced and produce minimal vibration for their size and displacement. Normal building techniques will work just fine, and you shouldn’t need any special adhesives; the regular stuff will do. Weight and balance should never be a problem as size goes up. Even though the plane has grown in size, it’s still built from the same materials, and the parts count usually doesn’t go up; physical weight doesn’t seem to grow proportionally. Since the wing area increases, more weight is needed to keep the model from becoming a “floater.” I learned this the hard way by trying to keep my 140-inch span Ziroli twin-engine Beechcraft C-17 under 35 pounds. I did accomplish this goal, but I ended up with a plane with so much wing area and such a low stall speed that it was virtually uncontrollable in a crosswind. To make a long story short, as the size goes up, the weight should, too!
FLYING BIG
The standard size Ziroli B-25 flew and handled great and is truly a vice-less twin. But in choppy air, it seemed to get bounced around quite a bit and looked too fast. For me, the only way to solve these shortcomings was to increase its size. With a 118-inch span, the plane looks slower, and the increased weight softens and mellows out the ride. With the enlargement, crosswind handling during takeoffs and landings improved; the CG range became wider; the reaction time to control inputs slowed and made the plane seem to be flying “heavy.” And, of course, the “wow” factor was greatly increased. I ‘m a firm believer in building models as large as possible because everything is so much easier to see and control. If your budget, transportation and scratch-building techniques are up to snuff, and you truly have the desire for a one-of-a-kind model, then bigger is the way to go—especially for competition.
See you at briefing!
Model Airplane News - The #1 resource for RC plane and helicopter enthusiasts featuring news, videos, product releases and tech tips.
Continue reading...
— By Greg Hahn
I am often asked for information about blowing up plans. I guess my big competition B-25J Mitchell, which I built from enlarged plans of Nick Ziroli’s 101-inch Mitchell, worked well enough to raise some interest.
I’ll usually reply with two questions: what type of model and how big? Before you get all excited about enlarging a favorite model, you must first consider the realities of the size you desire and the new logistics involved. Designers don’t just flip a coin to arrive at a size for a model. They draw a set of plans to a certain size for a reason—usually because of things such as complexity, structural integrity, or the ability for the model to be broken down for transportation purposes. Do realize that the reasons why the plans weren’t drawn larger in the first place will grow in the same proportion as the enlargement. The logistics of building a model bigger can become quite a headache if not thoroughly thought out before you begin. Is your building shop large enough to handle a plane of this size? An 8-foot span can be quite cumbersome; anything over that, look out! When the fuselage and wing have to be joined together for the incidence check or tail-group mounting, space can become a big problem.
Can you get the model out of your shop after it’s finished without using a chainsaw? When a model’s weight gets up over 35 to 40 pounds, it’s usually too awkward to safely carry by yourself. Is someone close by to help? Getting it into a vehicle on your own can be a nightmare, if not impossible. Door jambs and elevators have a mysterious “magnetic” attraction. The biggest aggravation I have with my big Mitchell is the fact that I can’t do anything with it by myself. I practically need help just to look at it! Static judging alone is a three-man job.
MOVIN’ IT
Will it fit into your vehicle? Anything over 8 feet long won’t fit into a pickup truck, so a trailer may be in order. Actually, a trailer is really quite handy but can also become an added expense. As you can see, there are many things to consider before you even open the glue bottle or head out to the copy shop. I just don’t want you to be faced with a “big” disappointment.
(Above) Greg’s enlarged Ziroli B-25 earned him the title Mr. Top Gun in 2005.
If you’re still with me, then you’ve made it through the early weeding out process, and we can get down to the next step. Making a decision on just how much to enlarge the plans requires you to consider a lot of things all at once. Expense and legality are the two considerations that are most important to me. When you enlarge a plan, most if not all of the hardware pieces, such as landing gear, cowls, canopies and other bumps and appendages, are not available.
(Above) When you enlarge a scale airplane, you have to get the details right. Smaller planes can get by with a minimum of eye-candy, but the bigger you build them, the more important surface details become.
You either have to make them yourself or pay to have them made and believe me, low-volume mold-making can be quite expensive. If the plane you’re building happens to have retractable landing gear, these also will need to be custom made. Of course, increasing size does increase cost, but the hardware factor may compound the cost more than you might have thought.
IS IT LEGAL?
When I talk about legality, I’m talking about weight. Under AMA rules, the limit for competition or sport flying is 55 pounds; there are no dimensional limitations. Personally, if I’m going to go through all the time, trouble and expense of enlarging a plan and building a model, you can bet it will be legal for competition. If the plan you’re looking at is for a model that weighs 40 pounds, you’d better leave it alone unless you want it to be in the AMA Experimental class. If you have considered all that I’ve said, then I believe you are ready to “blow one up.” The rest isn’t too difficult as long as you’ve had some success in scratch-building.
SIZING THINGS UP
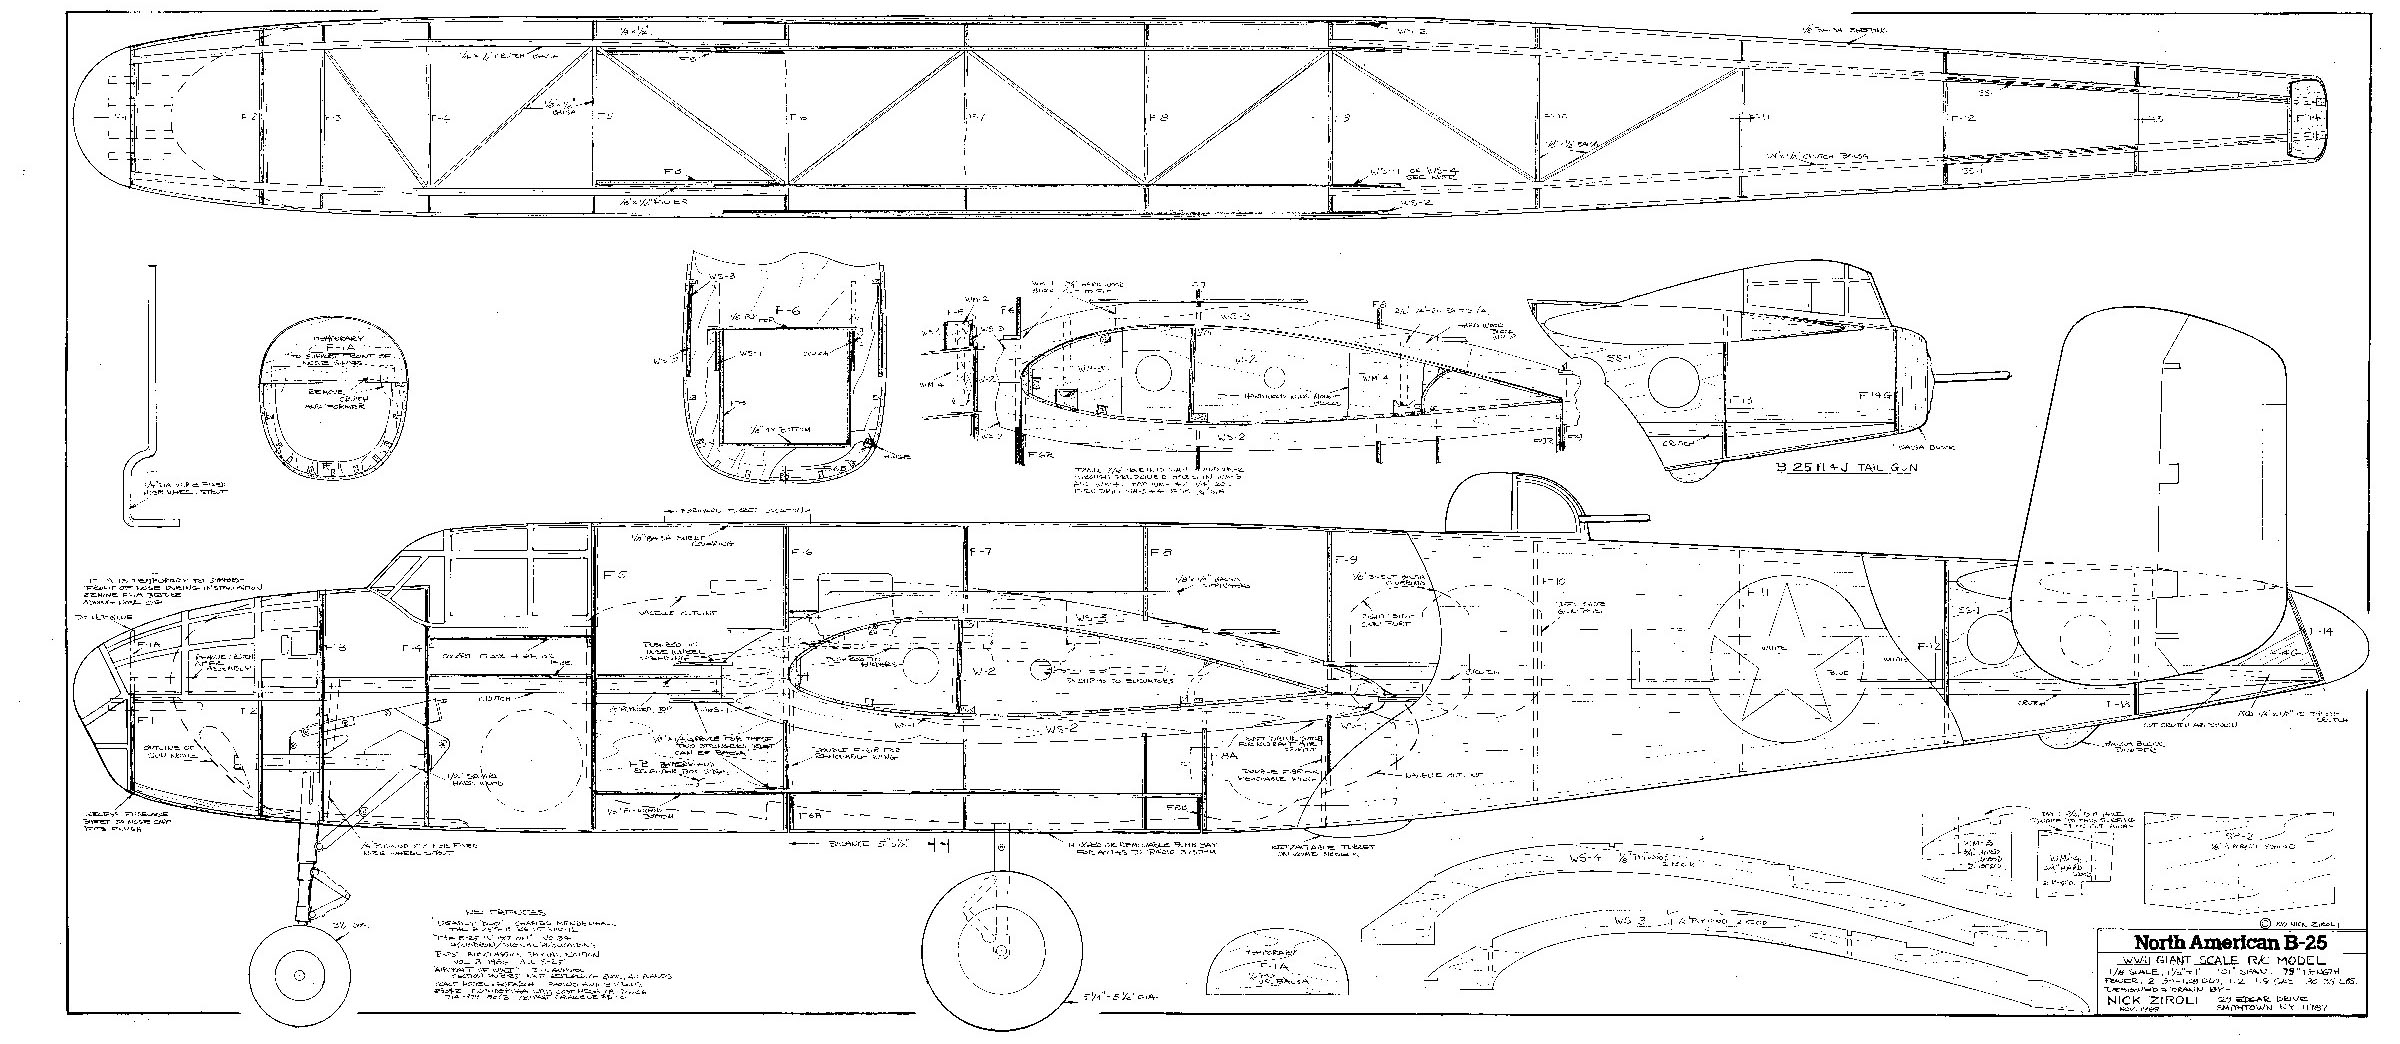
Getting the paper plan enlarged will take some mathematical figuring on your part. When you go to the print shop, they will want to know by what percentage you want the plans enlarged. You can’t just walk in and say, “I want to enlarge the span from 101 inches to 118 inches.” You’ll have to say you want to enlarge the plan 17.5 percent. The wingspan is the easiest dimension to use when figuring out the percentage. Everything else grows proportionally, including the lines in the drawings. Since the lines are so much bigger, you’ll have to decide to which side of the line you’ll cut your parts. Also, the plan itself will have to be physically cut down in width. Since most plans are printed on 36-inch-wide paper, you’ll have to cut and scrunch the drawing together so that when enlarged, it will still fit on 36-inch-wide paper. Once you have your big plans in hand, you’ll need to study them carefully and make some wood-size decisions. The wood or lumber dimensions that were originally called for by the designer have grown along with everything else.
(Above) It’s true, Bigger does fly Better!
Usually, you won’t find these new sizes and shapes down at the ole’ hobby hut. When figuring out new wood sizes, I usually revert to the original sizes for non-load-bearing stringers, formers, and ribs (most profile pieces). Then, on load-bearing items like spars, landing gear-mount blocks and engine mounts, I bump them up 1/8 inch on both sides. There’s no need to use anything over 1/8 inch thick for planking to cover a model weighing less than 55 pounds; 1/8-inch balsa has plenty of strength, especially when 1-ounce fiberglass cloth is applied over it. The only other structural areas to be concerned with are the wing mounts. The mount blocks for the wing bolts in both the wing and fuselage should be beefed up. When I use plug-in aluminum wing tubes, I increase them by 1/4 inch in outside diameter.
CUSTOM HARDWARE
(Above) Remember, when you change the size of a set of plans, you’re on your own when it comes to cowls, canopies and other hardware items like retracts. Plan accordingly.
The hardware pieces and parts are going to be the toughest hill to climb in this project. Whether you attempt to build them yourself or have them custom made, good planning will keep stress to a minimum. If you’re buying them, get your order in early; you can’t expect custom anything to be on your doorstep in a couple of weeks. The only place I go for retractable landing gear is Robart.* They can make custom gear to your specifications and will even help you with the engineering if you run into a kink. For “scale looks,” strength, and ease of operation, they are, without a doubt, the very best! When it comes to mold-making and vacuumforming, I go to Nick Ziroli Jr. His company, Nick Ziroli Plans*, makes canopies and cowls for their plans, and on occasion, Nick makes custom parts. You do need to make the plug, usually from hardwood or aluminum. If you need parts that require more strength, like large cowls, then fiberglass is the only way to go. Lenny Stanko of Take Flight Model & Mold*, is called “Mister Smooooth” in the glass business, and I get my glass from him. He can be hard to catch, however, so keep trying if you don’t get an answer. Radio gear will also need more attention. To give you an idea, my B-25, uses 19 servos of various sizes and power output, all connected with over 125 feet of wire. Also included are six Y-harnesses and three switch units. I power this mess with two 2500mAh Ni-Cd packs. Servo leads are quite long in the wings, so I strongly recommend the use of larger diameter wire for aileron and flap servos. I also recommend using a servo on each control surface. This seems to spread out control pressure and keep the rod lengths as short as possible.
Another question I’m often asked is whether or not I use “chokes” on the longer leads to suppress noise. A couple of years ago, I converted to JR* radios. At the time, Team JR manager, Mike Stokes, told me that the “chokes” that came on factory servo extensions and “Y” harnesses were a precautionary measure. They have since found them to be unnecessary. So to answer the question: no, I don’t use them.
POWER AND WEIGHT
Power requirements for your larger bird are almost a given. Unless it’s going to turn more than two propellers, gasoline engines are the only offerings that produce enough power to get your 40- to 50-pound plane off the ground. Since I love simplicity and reliability, I use Zenoah* 2-stroke, gas engines. They use simple but ultra-reliable ignition systems, are well-balanced and produce minimal vibration for their size and displacement. Normal building techniques will work just fine, and you shouldn’t need any special adhesives; the regular stuff will do. Weight and balance should never be a problem as size goes up. Even though the plane has grown in size, it’s still built from the same materials, and the parts count usually doesn’t go up; physical weight doesn’t seem to grow proportionally. Since the wing area increases, more weight is needed to keep the model from becoming a “floater.” I learned this the hard way by trying to keep my 140-inch span Ziroli twin-engine Beechcraft C-17 under 35 pounds. I did accomplish this goal, but I ended up with a plane with so much wing area and such a low stall speed that it was virtually uncontrollable in a crosswind. To make a long story short, as the size goes up, the weight should, too!
FLYING BIG
The standard size Ziroli B-25 flew and handled great and is truly a vice-less twin. But in choppy air, it seemed to get bounced around quite a bit and looked too fast. For me, the only way to solve these shortcomings was to increase its size. With a 118-inch span, the plane looks slower, and the increased weight softens and mellows out the ride. With the enlargement, crosswind handling during takeoffs and landings improved; the CG range became wider; the reaction time to control inputs slowed and made the plane seem to be flying “heavy.” And, of course, the “wow” factor was greatly increased. I ‘m a firm believer in building models as large as possible because everything is so much easier to see and control. If your budget, transportation and scratch-building techniques are up to snuff, and you truly have the desire for a one-of-a-kind model, then bigger is the way to go—especially for competition.
See you at briefing!
Model Airplane News - The #1 resource for RC plane and helicopter enthusiasts featuring news, videos, product releases and tech tips.
Continue reading...