Ohio AV8TOR
Just Do It
My Pide and Joy!
As this plane has been out for some time now I really did not plan to start another thread on one. When I was searching build threads I noticed not many were with DA-60’s so I though with the popularity of this motor now if this could help others why not. As there is already a great step by step build thread by the great designer Scott Stoops so I will forgo the step-by-step instructions and focus on some of my setups.
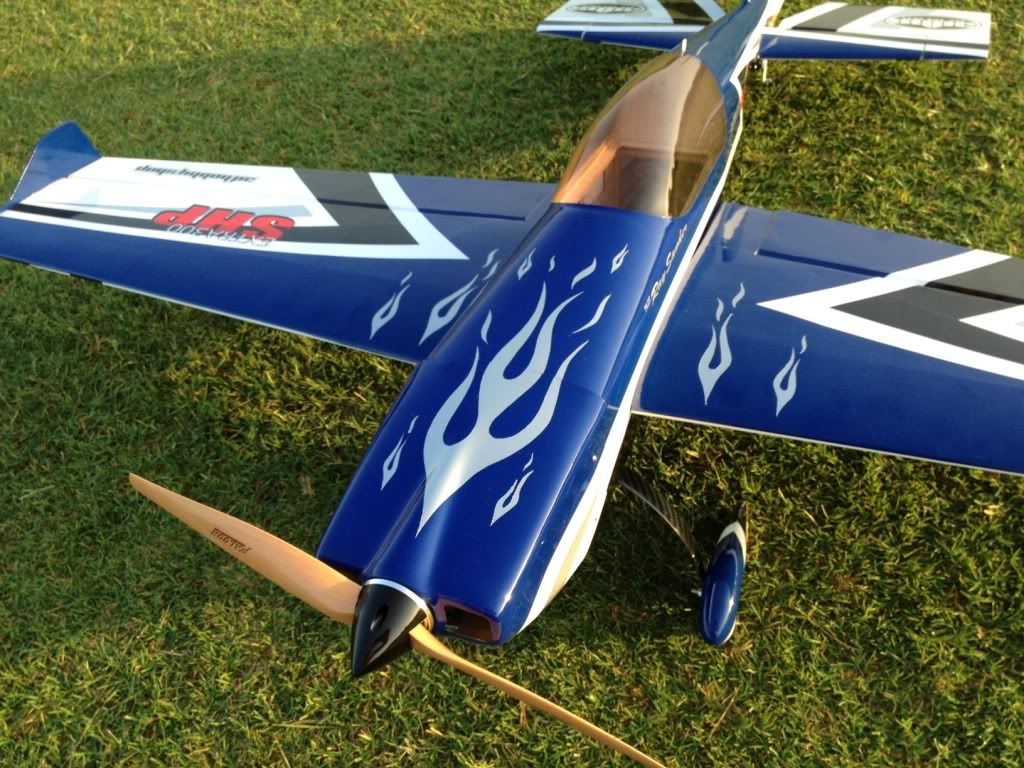
I have not had a 3DHS plane do me wrong and when I decided to go with a 50cc size plan it was down to the Slick and the Extra. I have a 71” and 42” Slick now but ever since Joe Smith flew the 87” Extra at the King 50 the lines of the Extra was calling me (plus it was in stock first).
For power I picked up a used DA-60 from DA and as I always liked the looks of the Pitts style muffler and with the DA-60 not lacking in power I felt this was how I wanted to go.
I have always been a huge Hitec fan but for the price and the jitter stories that I have been reading I decided to go with Savox on this. There has been so much good feedback with Savox I had to give them a try. So far I am very happy. The speed and strength really through the super large control surfaces with authority. Lot's off good feed back here on GiantScaleNews on the Savox too. I have them all swinging the SWB 2" arms except the throttle. I am using SC-1256TG on the control surfaces and a SC-1257TG for the throttle.
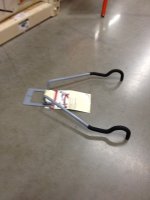
I liked the touch I saw on someones plane here on painting the control arms.


I really like painting my motor box area. My flying buddy Capt Roll did this on his Yak and I really liked it. It is a multicolor texture paint from Rust-oleum

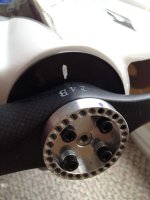
The DA-60, wow I have always wanted a DA. At first I was planning on using the plywood discs but I am so happy I choose the Blazing Star mount on this, what a quality product. It looks so good on the DA as well as the color contrast with the painted motor box. As you can see the mount provides plenty of access for you. The carb was just free of the firewall but still needed to cut a hole so the choke would open. I choose a 1-1/2" hole done with a drill and a hole-saw. It needed a Dremel slot for the throttle and another for the choke plus a drilled hole for the fuel line.


Cutting out the cowl for the motor was pretty easy but I did run into an unexpected issue. I made a template from a manila folder that I screwed to the bottom cowl mounting tabs. That made it easy to transfer over to the cowl with proper alignment. After some quality time with my Dremel I was so happy with the results, that is until I tried to install it. There is an internal ply ring on the inside of the cowl and when trying to slide it on it comes down and hits the top of the motor box before the exhausts made it to the perfectly cut out slot. To get it to work I shortened the exhaust tube by 1/8" and moved back the slot and provided two round lead in slots. Still looks good so I am happy.
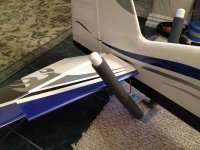
I really like the provided canister tunnel so I am going to take advantage of it for cooling air exhaust. Note the fuel vent going through this removable floor.


I know to some this is a no-no to some but I wanted a means to adjust my needles without taking off the cowl. I found a small screw driver that only needed an 0.080" hole for clearance. I did not like the idea of the straws attached to the cowl so I made this block from laminating 1/4" lite ply. It rests 3/16" above the needles and allows the screw driver to position itself right over the needle. The top of it is 1/8" from touching the ID of the cowl. I ran a 20º cone burr on the top of the block to help align the insertion of the screw driver. The 0.080" holes are positioned right over some carbon fiber flames so after drilling the holes a little black sharpie help hide them.


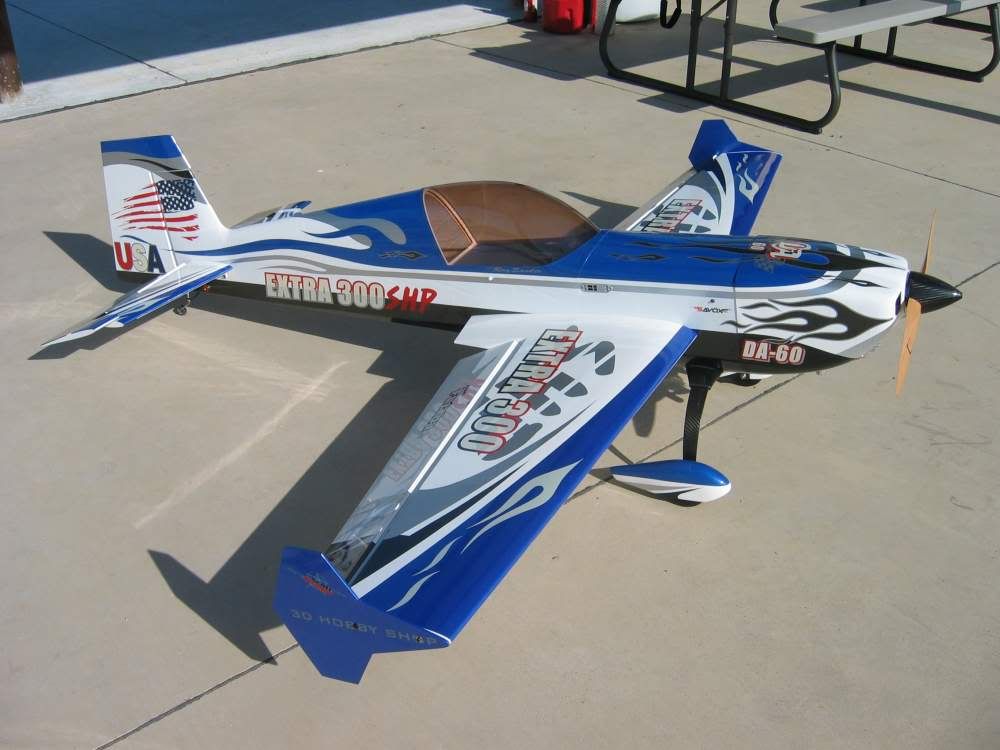
Graphics is always cool. Got this from ADC as I love the fag. Now if I was really thinking I would have went with the graphics just like Joe's 87" SHP so I would have all of those great pictures of him flying for my desktop.


All graphics on
As this plane has been out for some time now I really did not plan to start another thread on one. When I was searching build threads I noticed not many were with DA-60’s so I though with the popularity of this motor now if this could help others why not. As there is already a great step by step build thread by the great designer Scott Stoops so I will forgo the step-by-step instructions and focus on some of my setups.
I have not had a 3DHS plane do me wrong and when I decided to go with a 50cc size plan it was down to the Slick and the Extra. I have a 71” and 42” Slick now but ever since Joe Smith flew the 87” Extra at the King 50 the lines of the Extra was calling me (plus it was in stock first).
For power I picked up a used DA-60 from DA and as I always liked the looks of the Pitts style muffler and with the DA-60 not lacking in power I felt this was how I wanted to go.
I have always been a huge Hitec fan but for the price and the jitter stories that I have been reading I decided to go with Savox on this. There has been so much good feedback with Savox I had to give them a try. So far I am very happy. The speed and strength really through the super large control surfaces with authority. Lot's off good feed back here on GiantScaleNews on the Savox too. I have them all swinging the SWB 2" arms except the throttle. I am using SC-1256TG on the control surfaces and a SC-1257TG for the throttle.
I liked the touch I saw on someones plane here on painting the control arms.
I really like painting my motor box area. My flying buddy Capt Roll did this on his Yak and I really liked it. It is a multicolor texture paint from Rust-oleum
The DA-60, wow I have always wanted a DA. At first I was planning on using the plywood discs but I am so happy I choose the Blazing Star mount on this, what a quality product. It looks so good on the DA as well as the color contrast with the painted motor box. As you can see the mount provides plenty of access for you. The carb was just free of the firewall but still needed to cut a hole so the choke would open. I choose a 1-1/2" hole done with a drill and a hole-saw. It needed a Dremel slot for the throttle and another for the choke plus a drilled hole for the fuel line.
Cutting out the cowl for the motor was pretty easy but I did run into an unexpected issue. I made a template from a manila folder that I screwed to the bottom cowl mounting tabs. That made it easy to transfer over to the cowl with proper alignment. After some quality time with my Dremel I was so happy with the results, that is until I tried to install it. There is an internal ply ring on the inside of the cowl and when trying to slide it on it comes down and hits the top of the motor box before the exhausts made it to the perfectly cut out slot. To get it to work I shortened the exhaust tube by 1/8" and moved back the slot and provided two round lead in slots. Still looks good so I am happy.
I really like the provided canister tunnel so I am going to take advantage of it for cooling air exhaust. Note the fuel vent going through this removable floor.
I know to some this is a no-no to some but I wanted a means to adjust my needles without taking off the cowl. I found a small screw driver that only needed an 0.080" hole for clearance. I did not like the idea of the straws attached to the cowl so I made this block from laminating 1/4" lite ply. It rests 3/16" above the needles and allows the screw driver to position itself right over the needle. The top of it is 1/8" from touching the ID of the cowl. I ran a 20º cone burr on the top of the block to help align the insertion of the screw driver. The 0.080" holes are positioned right over some carbon fiber flames so after drilling the holes a little black sharpie help hide them.
Graphics is always cool. Got this from ADC as I love the fag. Now if I was really thinking I would have went with the graphics just like Joe's 87" SHP so I would have all of those great pictures of him flying for my desktop.
All graphics on