dskuro95
100cc
This is my first build log so cut me a little slack. For reference (on all collets, and the little silver clevces, and on the nuts for the horn bolts.) (You do not have to do the ones that are lock nuts!)
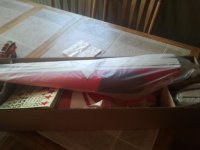
It looked like everything was packaged well and no damage to the box either!!!
Lets begin.
I took the plane out and downloaded the manual. First thing I did was put the tires on their axles, and attach the wheel pants to them and the landing gear. For the collar on the axles I added a little bit of thin CA so I can assure they will not come off.


Rather then following the manual I decided to wait until later to attach the landing gear because I did want the plane rolling on me. Next I cut the holes out for the wing tube, wire hole, and the wing pin hole.

Next, I cut out the elevator hole. Be sure you are in the correct area before you cut!!! Be sure to get the whole entire area as well. It does not have to be cut perfectly because when you pput the elevator and stab in it will cover it up. Also the part sticking out you can gentyl run a razor blade across and cut it off. Don't push too hard because it will go through the elevator!

The next step is a little tricky. What you have to do is take the elevators upside down, put the end that sits next to the stab in first all the way through, then turn it to pull it through. After that just flip it around and it is in.

Next you will put the stabilizer in. Make sure you eye up the straightness of it.

Afterward you will use thin CA to glue the elevators to the stabilizer. Before and while it is glueing, move the elevators a couple times to make sure you can get the full 45 degrees. After this you will need to take a yard stick or measuring tape and measure from the front far corner of the elevtor to the far back corner of the aileron on both sides. Make sure they are both the same before gluing the stabilizer in. For me they were 23 inches each side. WHen gluing with the thin CA make sure you allow the glue to seep in, and then do it underneath as well. NOTE: Take the aileron off the wings for most accurate measurement.

While they are gluing take your wings and put the horns into the ailerons, then install servos. Refer to manual for which way they should be put in.


When the tail is done, put your horn in the elevator. Also glue your rudder and vertical stabilizer in. (I forgot to take pictures of this part, and I forgot about the tail wheel. It is pretty easy to do though. Also cut the hole in the rudder for the pull pull horn.

Now that you have completed most the airframe you can go ahead and put the landing gear on.
Next we will cut the holes for the elevator servo. Make sure that you cut out the hole in front of the elevator and not under it. (I have made this mistake twice!)
Now we will mount the motor. Before you actually mount it go around all of the glued piece in the motor box with a little thin CA to assure they are glued! The motor is very easy to mount if you have a recommended motor with the correct x-mount. All you have to do is unbolt the motor screws from the airframe and attach the motor. Go snug but do not over tighten because you may squeeze the wood.
Also you can either put your ESC where mine is pictured or you can mount it on the side of the motor box where my wires are. After mounting feed wires towards your RX and ziptie anything hanging in the cowl.
Cowl:
Mounting the cowl takes time to get used too. You will need to take 4 piece of thin paper and tape it to the side of the fuselage. Make the end of the paper closest to the motor to stop where the little ply blocks are sitting for the cowl screws. Then put your cowl on with the paper on the outside of the cowl. Now drill a tiny hole at the end of the paper. Now just put your cowl screws in and you are good to go!

Now all you have to do is the little things. They are really easy to do. Just take the bolts and nuts and mount the control arms to the horns and servos. (This is will take a long time to explain so if you need help just PM me)
For your pull pull refer to the manual for help. It takes time to get used too. It was a first time experience for me as well.
Hope you all enjoyed my build log.
If you have questions or need help just PM me.
It looked like everything was packaged well and no damage to the box either!!!
Lets begin.
I took the plane out and downloaded the manual. First thing I did was put the tires on their axles, and attach the wheel pants to them and the landing gear. For the collar on the axles I added a little bit of thin CA so I can assure they will not come off.
Rather then following the manual I decided to wait until later to attach the landing gear because I did want the plane rolling on me. Next I cut the holes out for the wing tube, wire hole, and the wing pin hole.
Next, I cut out the elevator hole. Be sure you are in the correct area before you cut!!! Be sure to get the whole entire area as well. It does not have to be cut perfectly because when you pput the elevator and stab in it will cover it up. Also the part sticking out you can gentyl run a razor blade across and cut it off. Don't push too hard because it will go through the elevator!
The next step is a little tricky. What you have to do is take the elevators upside down, put the end that sits next to the stab in first all the way through, then turn it to pull it through. After that just flip it around and it is in.
Next you will put the stabilizer in. Make sure you eye up the straightness of it.
Afterward you will use thin CA to glue the elevators to the stabilizer. Before and while it is glueing, move the elevators a couple times to make sure you can get the full 45 degrees. After this you will need to take a yard stick or measuring tape and measure from the front far corner of the elevtor to the far back corner of the aileron on both sides. Make sure they are both the same before gluing the stabilizer in. For me they were 23 inches each side. WHen gluing with the thin CA make sure you allow the glue to seep in, and then do it underneath as well. NOTE: Take the aileron off the wings for most accurate measurement.
While they are gluing take your wings and put the horns into the ailerons, then install servos. Refer to manual for which way they should be put in.
When the tail is done, put your horn in the elevator. Also glue your rudder and vertical stabilizer in. (I forgot to take pictures of this part, and I forgot about the tail wheel. It is pretty easy to do though. Also cut the hole in the rudder for the pull pull horn.
Now that you have completed most the airframe you can go ahead and put the landing gear on.
Next we will cut the holes for the elevator servo. Make sure that you cut out the hole in front of the elevator and not under it. (I have made this mistake twice!)
Now we will mount the motor. Before you actually mount it go around all of the glued piece in the motor box with a little thin CA to assure they are glued! The motor is very easy to mount if you have a recommended motor with the correct x-mount. All you have to do is unbolt the motor screws from the airframe and attach the motor. Go snug but do not over tighten because you may squeeze the wood.
Also you can either put your ESC where mine is pictured or you can mount it on the side of the motor box where my wires are. After mounting feed wires towards your RX and ziptie anything hanging in the cowl.
Cowl:
Mounting the cowl takes time to get used too. You will need to take 4 piece of thin paper and tape it to the side of the fuselage. Make the end of the paper closest to the motor to stop where the little ply blocks are sitting for the cowl screws. Then put your cowl on with the paper on the outside of the cowl. Now drill a tiny hole at the end of the paper. Now just put your cowl screws in and you are good to go!
Now all you have to do is the little things. They are really easy to do. Just take the bolts and nuts and mount the control arms to the horns and servos. (This is will take a long time to explain so if you need help just PM me)
For your pull pull refer to the manual for help. It takes time to get used too. It was a first time experience for me as well.
Hope you all enjoyed my build log.
If you have questions or need help just PM me.